(No.MA220)1-11
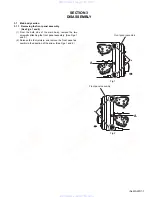
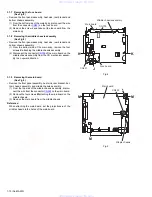
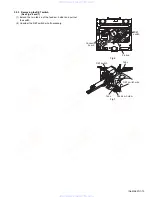
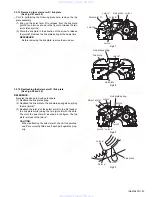
3.1.10 Removing the mechanism board
(See Fig.10)
• Remove the front panel assembly, heat sink, rear bracket, bot-
tom chassis assembly and middle chassis assembly.
(1) From the inside of the top chassis assembly, disconnect
the card wire from the connector
CN601
on the mechanism
board.
(2) Remove the five screws
N
attaching the mechanism board.
(3) Lift the mechanism board to remove the joint
f
and remove
the joint
g
in the direction of the arrow.
Fig.10
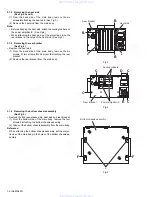
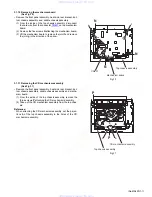
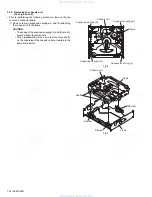
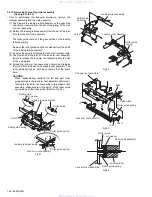
3.1.11 Removing the CD mechanism assembly
(See Fig.11)
• Remove the front panel assembly, heat sink, rear bracket, bot-
tom chassis assembly, middle chassis assembly and mecha-
nism board.
(1) From the inside of the top chassis assembly, remove the
three screws
P
attaching the CD mechanism assembly.
(2) Take out the CD mechanism assembly from the top chas-
sis.
Reference:
When attaching the CD mechanism assembly, set the projec-
tions
h
of the top chassis assembly in the holes of the CD
mechanism assembly.
Fig.11
Mechanism board
CN601
N
N
N
g
f
Top chassis assembly
CD mechanism assembly
P
P
h
h
Top chassis assembly
www. xiaoyu163. com
QQ 376315150
9
9
2
8
9
4
2
9
8
TEL 13942296513
9
9
2
8
9
4
2
9
8
0
5
1
5
1
3
6
7
3
Q
Q
TEL 13942296513 QQ 376315150 892498299
TEL 13942296513 QQ 376315150 892498299

