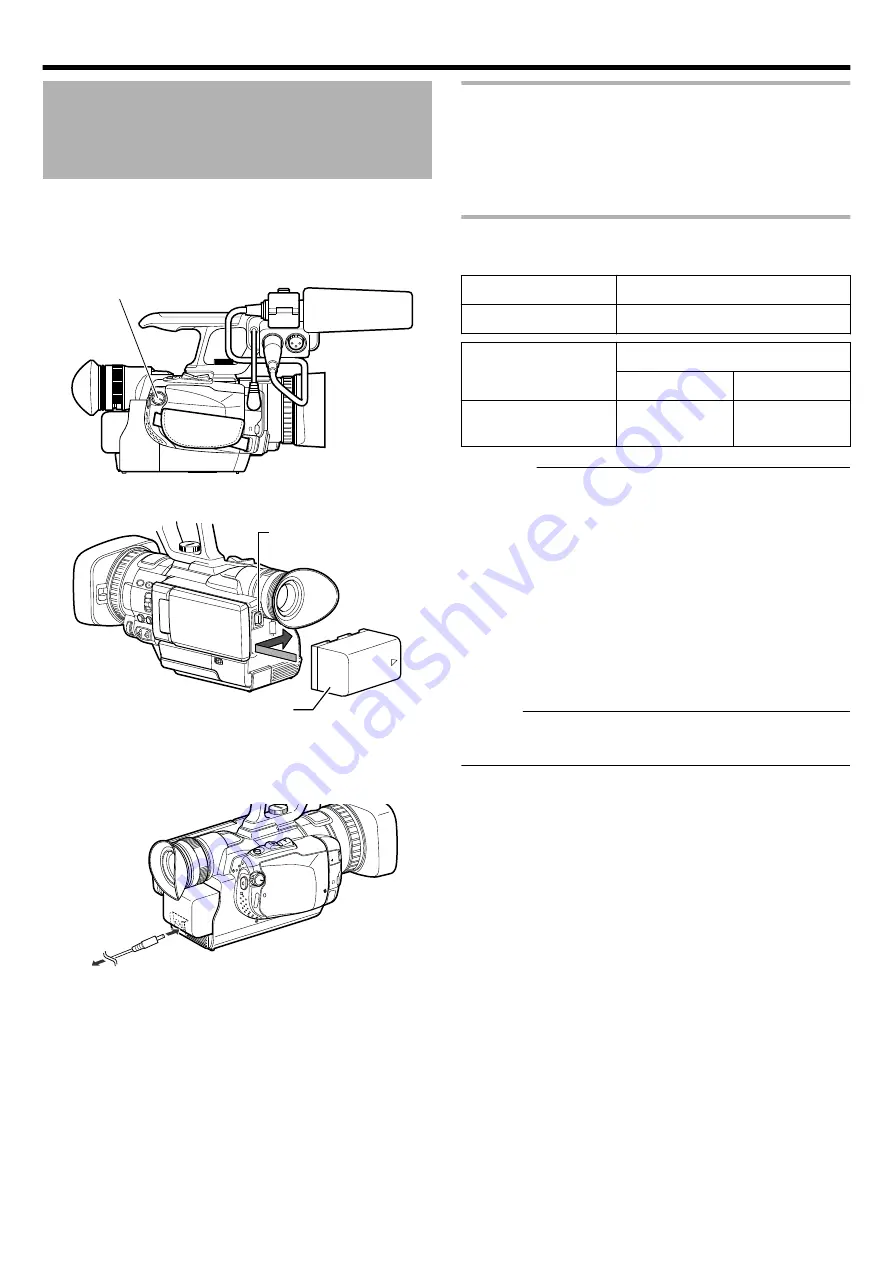
Charging the Battery Pack
Charge the battery pack immediately after purchase and when the
remaining battery power is low.
0
The battery pack is not charged at the time of purchase.
1
Set the [STANDBY/ON OFF] switch to [OFF].
.
[STANDBY/ON OFF] switch
2
Attach the supplied battery.
.
Battery Pack
Battery Lock Release
Button
0
Align the top of the battery with the mark on this unit, and
slide in until the battery clicks into place.
3
Connect the AC adapter to the [DC] terminal
.
AUDIO I
MIC
N
OPEN
[DC] Terminal
AC Adapter
To AC Outlet
(110 V to 240 V)
4
Plug in the power.
0
When charging is in progress, [ACCESS] access indicating
lamp blinks.
It goes out when charging is finished.
0
After charging is complete, disconnect the AC adapter.
Removing the Battery
1
Set the [STANDBY/ON OFF] switch to [OFF].
2
Press the battery lock release button and slide
the battery to the left.
Charging time and continuous recording time
(approximate)
Battery Pack
Charging Time
SSL-JVC50 (Provided)
Approx. 4 hrs
Battery Pack
Continuous Recording Time
4K2K mode
1920 mode
SSL-JVC50 (Provided)
Approx. 1 hrs 45
mins
Approx. 2 hrs 45
mins
Caution :
0
Recording time is the value when “MONITOR BRIGHTNESS” is
set to “3” during the use of LCD monitor.
0
Recording time may differ depending on the age of the battery,
charging condition, and operating environment.
0
Under the high-temperature environment, the power of this unit
may be turned off to protect the battery.
The use of an AC adapter is recommended when this unit is used
in such places.
0
Recording time is shortened in cold environments.
0
Recording time is shortened when the zoom lens and LCD
screen are frequently used.
0
Recording time is shortened when the HDMI cable is connected.
Memo :
0
To purchase a spare battery or battery charger, please visit a
nearby JVC dealer.
Preparations
24


