background image

8

INTRODUCTION

Battery Pack to be Used

The GY-HD100 can use any of the following batteries.
• BN-V428, BN-V438

Videocassette to be Used

• Use JVC’s videocassette tapes marked with the 

A

 sym-

bol.

• Mini DV videocassette

: M-DV63HD

M-DV63PROHD

* Do not use M-DV80.

• Videocassettes cannot be used upside down.
• Avoid storing a videocassette with its tape not being com-

pletely wound, as this may damage the tape. Rewind it to
the beginning before placing a cassette into storage.

• Store videocassettes in a place with little humidity and

good ventilation where mould does not form.

• After a videocassette tape has been used repeatedly, it

becomes unable to maintain full performance due to an
increase in noise caused by dropouts, etc. Do not continue
to use a dirty or damaged tape, as this will reduce the
rotary head life.

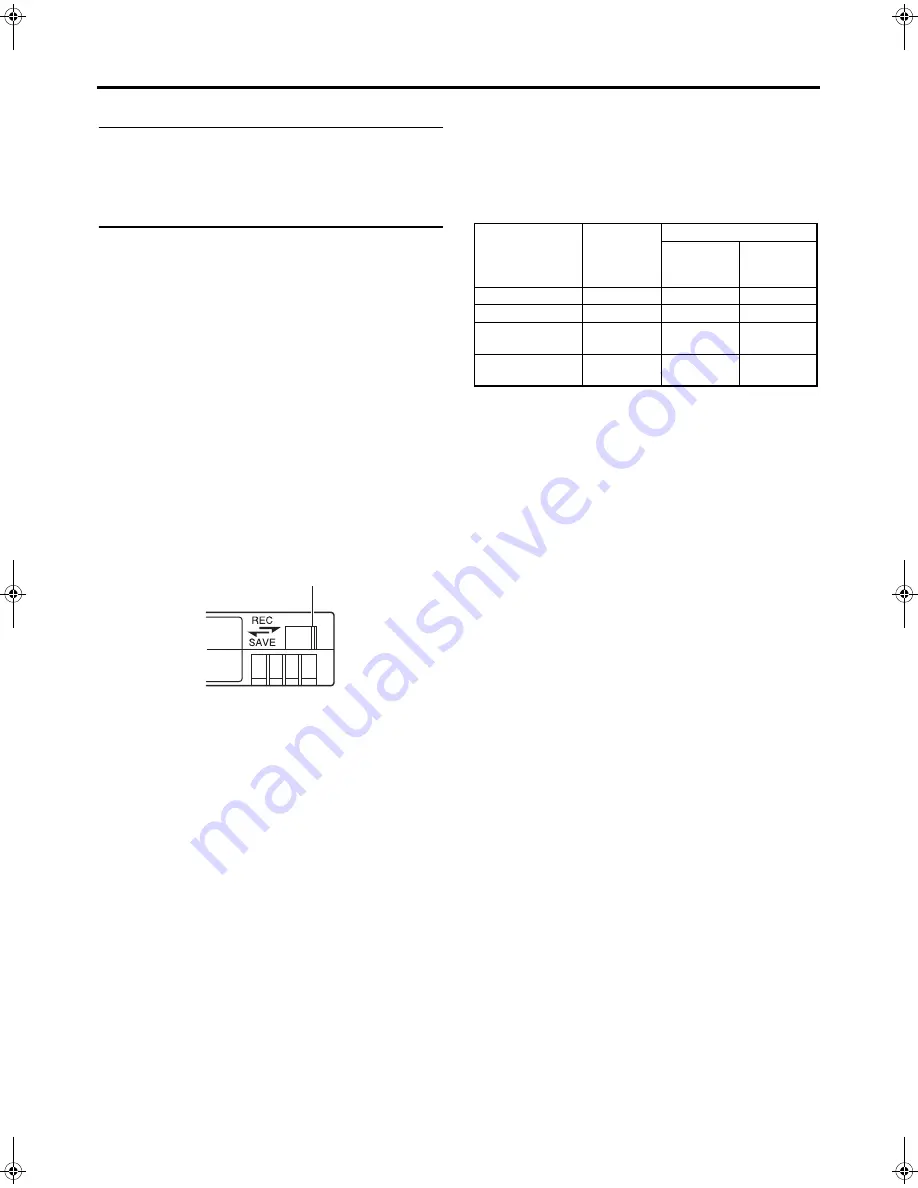
• Videocassette tapes with the 

A

 symbol are provided

with a switch on the back to prevent accidental erasure.

• Slide the switch to SAVE to protect the required recording

in the tape from being overwritten.

• To record on the tape, slide the switch to REC.

„

For recording and storing videotapes in
the best condition

Observe the following instructions for the best recording and
storage of videotapes.
• Take care of the conditions of handling videotapes. It is rec-

ommended that you record and store videotapes in the
environment below.

• Do not leave the videotapes neglected for a long period. If

videotapes are left wound for a long period of time, it may
result in distortion of the tape. Also it may cause tape-to-
tape adhesion (known as blocking). It is recommended that
videotapes be unspooled and rewound once a year for
refreshing.

• When tapes are not in use, store them in cases and on

end. Storage cases protect videotapes from humidity, dust
and ultraviolet light. Keep tapes in cases and do not store
them lying flat. When housed in a horizontal position, pres-
sure from other tapes can cause distortions and deforma-
tions of the tape edges.

Switch

Recording

Storage

Short period 

(Up to 10 

years)

Long period 

(Over 10 

years)

Temperature

17°C to 25°C 15°C to 23°C 15°C to 19°C

Humidity

30% to 70%

40% to 55%

25% to 35%

Hourly temperature 

change

Less than 

10°C

H

H

Hourly humidity 

change

Less than 

10%

H

H

e_hd100.book  Page 8  Thursday, July 14, 2005  5:28 PM

Содержание GY- HD101

Страница 1: ...MERA RECORDER INSTRUCTIONS GY HD100 GY HD101 Thank you for purchasing this JVC product Before operating this unit please read the instructions carefully to ensure the best possible performance For Customer Use Enter below the Serial No which is located on the body Retain this information for future reference Model No Serial No The illustration shows the GY HD100 GY HD101 HD CAMERA RECORDER with th...

Страница 2: ......

Страница 3: ...t fit into your outlet consult an electrician for replacement of the obsolete outlet 10 Protect the power cord from being walked on or pinched particularly at plug convenience receptacles and the point where they exit from the apparatus 11 Only use attachments accessories specified by the manufacturer 12 Use only with the cart stand tripod bracket or table specified by the manufacturer or sold wit...

Страница 4: ...to which the receiver is connected z Consult the dealer or an experienced radio TV technician for help CAUTION CHANGES OR MODIFICATIONS NOT APPROVED BY JVC COULD VOID USER S AUTHORITY TO OPERATE THE EQUIPMENT THIS DEVICE COMPLIES WITH PART 15 OF THE FCC RULES OPERATION IS SUBJECT TO THE FOLLOWING TWO CON DITIONS 1 THIS DEVICE MAY NOT CAUSE HARMFUL INTERFERENCE AND 2 THIS DEVICE MUST ACCEPT ANY INT...

Страница 5: ...rt Cable Length DC OUT Exclusive Cable 2 m AC IN Exclusive Cable 2 m WARNING TO REDUCE THE RISK OF FIRE OR ELECTRIC SHOCK DO NOT EXPOSE THIS APPLIANCE TO RAIN OR MOISTURE This unit should be used with 7V DC only CAUTION To prevent electric shocks and fire hazards do NOT use any other power source NOTE The rating plate serial number plate is on the bottom of the unit CAUTION To prevent electric sho...

Страница 6: ... recorded on other units and those recorded on this unit may appear dis turbed Digital noise may appear during playback due to tracking errors This unit records and plays back in the SP mode Recording or playback in the LP mode is not possible In DV format Due to manufacturing dispersion of tapes we recom mend not to record pictures within the first 2 to 3 minutes from the beginning of the tape Be...

Страница 7: ...arge 3 5 color LCD display In addition to displaying the camera image and the play back image the LCD monitor shows the status screens menu screens for settings and alarm indications Built in monitor speaker for audio checking The input audio can be monitored in recording or EE mode The playback sound can be monitored in the playback mode The speaker also outputs an alarm tone in case an abnormal ...

Страница 8: ...Detaching the Battery Pack from the GY HD100 Remaining Battery Power Display Battery Recharge Times Operating Time with Battery Pack Precautions for the Battery Pack Recharging PREPARATIONS FOR OPERATION Turning the Power ON 34 Turning the Power ON Turning the Power OFF Loading Unloading the Cassette 35 Setting and Displaying the Date and Time 36 Setting the Date and Time Style Setting the Date an...

Страница 9: ... 1 2 Menu Screen 65 CAMERA PROCESS 2 2 Menu Screen 66 ADVANCED PROCESS Menu Screen 67 COLOR MATRIX ADJUST Menu Screen 68 SKIN COLOR ADJUST Menu Screen 68 SWITCH MODE Menu Screen 69 AUDIO MIC Menu Screen 70 LCD VF 1 3 Menu Screen 71 LCD VF 2 3 Menu Screen 72 LCD VF 3 3 Menu Screen 73 TC UB CLOCK Menu Screen 74 HEADER REC Menu Screen 75 TIME DATE Menu Screen 76 OTHERS 1 2 Menu Screen 77 OTHERS 2 2 M...

Страница 10: ...ideocassette before transporting the unit Do not insert an object other than a videocassette in the cassette insertion slot Be sure to close the cassette cover when the unit is not to be used for a long period Do not set the POWER switch to OFF or remove the power cable during recording or playback Otherwise the tape may be damaged The sensitivity level of the provided microphone is set lower than...

Страница 11: ...lace The maintenance contents vary depending on the operat ing environment and method Therefore the above data should be considered as a reference Time management The accumulated running time of the unit can be confirmed with the hour meter display which shows the accumulated drum and fan motor running time X See How to Display the Hour Meter on page 89 Precautions for Use of Head Cleaning Tape Pl...

Страница 12: ... overwritten To record on the tape slide the switch to REC For recording and storing videotapes in the best condition Observe the following instructions for the best recording and storage of videotapes Take care of the conditions of handling videotapes It is rec ommended that you record and store videotapes in the environment below Do not leave the videotapes neglected for a long period If videota...

Страница 13: ...s are greatly deferent first remove the video cassette place the unit in a tightly sealed vinyl bag and then move it to a new environment To ensure no condensation occurs allow the temperature of the unit in the bag to reach that of the new environment before using it Characteristic CCD Phenomena Smear and Blooming Due to the physical structure of a CCD it is possible to induce vertical streaking ...

Страница 14: ...may occur To avoid the phenomena described above perform adjustment again 0FILTER thread Protect the lens with a clear filter or UV filter by screwing the filter onto the thread inside the lens hood from the front Other filters can be used for various effects aZOOM servo connector Connect an optional zoom servo unit here b ZOOM ZOOM mode knob cBACK FOCUS ring fixing screw For back focus adjustment...

Страница 15: ...s set to ON The default value is 70 80 The luminance level can be changed with the ZEBRA setting in the LCD VF 1 3 menu screen X See page 71 While this switch is pressed to the SKIN AREA side the color tone areas specified with the SKIN COLOR ADJUST item on the ADVANCED PROCESS menu are indicated in the viewfinder The switch returns to the OFF position when released X See How to Use Skin Detail on...

Страница 16: ...monitor volume control 3 on page 14 MEMO The volume of the alarm sound is set with the ALARM VR LEVEL item on the OTHERS 1 2 menu screen When using a stereotype jack and stereo sound should be output the following setting should be performed Set the MONITOR SELECT switch e on page 18 to BOTH Set the AUDIO MONITOR item on the AUDIO MIC menu screen to STEREO 3Shoulder belt hooks Allows you to attach...

Страница 17: ... from the IEEE1394 connector 4 on page 16 HDV DV signal input is possible with the GY HD100U GY HD101E When the power is turned on the mode becomes the Camera mode AUTO A limiter works to suppress the audio level when excessive audio is input When the input level is low the audio level does not increase The AUTO LED in the CH 1 CH 2 AUDIO LEVEL area g on page 15 lights MANUAL Allows you to adjust ...

Страница 18: ...d the shutter speed switches between on off When this dial is turned 1 click up or down in the normal screen mode the shutter speed indicator is shown for about 3 seconds on the LCD monitor or in the viewfinder The shutter speed is changed when this dial is turned while the shutter speed indicator is shown X See page 69 When this dial turned upward or downward while the menu screen is displayed th...

Страница 19: ...s set for the 1394 REC TRIGGER item on the OTHERS 2 2 menu screen this button becomes the start stop recording button for an external device X See page 78 X See Backup Recording on page 58 g CH 1 CH 2 AUDIO LEVEL CH 1 CH 2 Audio level con trols and AUTO LED Allow you to adjust the audio level for the CH 1 and CH 2 audio channels To use these controls set the CH 1 CH 2 AUDIO SELECT switch 2 on page...

Страница 20: ...rtion or removal of the videocassette CAUTION To prevent foreign objects from entering the internal parts of the VTR unit do not leave the unit with the cover open for extended periods of time 7Viewfinder connector 6 pin Connect the cable from the viewfinder here 8 CH 2 INPUT CH 2 audio input connector selector switch Selects the CH 2 audio input connector MEMO The audio from the INPUT1 connector ...

Страница 21: ...tton on the right panel and the lens VTR trigger button are not locked 0SD memory card cover When you open this cover you can insert and remove the SD memory card X See Inserting an SD Memory Card on page 30 When an SD memory card is loaded You can save call up and reset the menu settings on this camcorder You can initialize format an SD memory card X See FILE MANAGE Menu Screen on page 79 a EJECT...

Страница 22: ... you release FAS mode all of the settings return to their previous modes CAUTION When the power is turned on while the camera is in the FAS mode it takes about 10 seconds before the automatic adjustment of FAS is completed All of the previous setting contents are recalled when the FAS mode is cancelled i STOP Stop button Press to enter the stop mode j REW Rewind button Press this button to rewind ...

Страница 23: ...onnector Status Screens Press the STATUS button while normal screen is displayed to show one of the status screens The contents of the status display are divided into those for the Camera mode and those for the VTR mode Each time the STATUS button is pressed in the Camera mode one of 5 status screens is displayed STATUS 0 1 2 3 4 One type of screen is displayed in the VTR mode MEMO When the STATUS...

Страница 24: ...TTER 1 6 1 6 25 1 7 5 1 12 1 12 5 1 15 1 24 1 25 1 30 1 48 1 50 1 60 1 100 1 120 1 250 1 500 1 1000 1 2000 1 4000 1 10000 Variable shutter speed value was changed 1 V SHUTTER 1 24 01 to 1 1998 0 Shutter was turned OFF SHUTTER OFF 1 4 White balance value was changed Example WHITE BAL A 3200K Numeric value Any of 2300 2500 2800 3000 3200 3400 3700 4300 5200 5600 6500 8000 FILTER value was changed FI...

Страница 25: ...CD BRIGHT button the date and time indications and the VTR mode indication 2 are turned off and the LCD BRIGHT indicator is displayed Example BRIGHT 5 O Numeric value Any of 5 4 3 2 1 0 1 2 3 4 5 4 Indication of Black operation B Displayed when the black stretch or black compress settings are other than NORMAL 5 Indication of skin tone detail color operation SD Indicated when skin tone detail is O...

Страница 26: ...ge 72 Whether the time code or user s bits should be shown is selected with the TC DISPLAY switch inside the LCD door 3 Remaining tape indication Remaining tape indication displayed in 1 minute steps This indicator blinks when remaining tape time is equivalent to less than 3 minutes Whether or not to display this item is set with the TAPE REMAIN item on the LCD VF 2 3 menu screen X See page 72 Whe...

Страница 27: ... recorded on the tape is indicated by O 20 dB 12 dB X See AUDIO REF LEVEL on page 70 8 Iris indicator display M Iris set higher than normal b Iris set to normal N Iris set lower than normal 9 Iris F value indication Indicates the F number of the connected lens OPEN F2 F2 8 F4 F5 6 F8 F11 F16 CLOSE It is not displayed when the lens is removed For some lenses no display appears The indication can be...

Страница 28: ...ed The display disappears when the setting is saved using STORE FILE FULL AUTO ON OFF GAIN 0dB 3dB 6dB 9dB 12dB 15dB 18dB ALC SHUTTER When STEP is selected OFF 1 6 1 6 25 1 7 5 1 12 1 12 5 1 15 1 24 1 25 1 30 1 48 1 50 1 60 1 100 1 120 1 250 1 500 1 1000 1 2000 1 4000 1 10000 When VARIABLE is selected 1 24 01 1 1998 0 Displayed when FAS or ALC mode is selected EEI The range for the shutter speed d...

Страница 29: ...hile before the indication of the remaining tape time appears 4 Event display Displays messages related to VTR operations X See page 85 86 5 Audio sampling frequency in dication The audio sampling frequency used for the recording is displayed during playback 32 K 48 K 44 1 K 6 Audio level meter indication Displays the audio level meters during playback Whether or not to display this item is set wi...

Страница 30: ... an alarm is generated while the STATUS 2 3 screen is shown the STATUS 0 screen returns to display the alarm X See page 85 When an abnormality occurs in the VTR a warning mes sage with an error code is displayed X See page 85 86 Safety Zone Indication Camera mode only The indication of the following safety zone and center mark indications can be turned ON OFF with the SAFETY ZONE item and CENTER M...

Страница 31: ...and the viewfinder by holding down the DISPLAY button the display mode is cancelled by the LCD monitor open close and normal inverted oper ations If the LCD monitor is closed inside the camcorder with the screen in the normal display orientation holding down the DISPLAY button does not work AUDIOSELECT LCDBRIGHT CAM VTR AUTO TC UB REC FREE REGEN MANU CH 2 CH 1 DISPLAY GENE TC DISPLAY button Normal...

Страница 32: ...U FUJINON Wide Converter WCV 82SC FOCUS MANUAL UNIT 1 ZOOM SERVO UNIT HZ ZS13B 1 2 ZOOM LENS S14 7 3B12U FUJINON S17 6 6BRM FUJINON S20 6 4B12U FUJINON YH16 7K12U CANON YH19 6 7K12U CANON MICROPHONE 1 3 ZOOM LENS Th16 5 5BRMU FUJINON GY HD100 STANDARD PACKAGE Mount Converter 1 2 1 3 AMC 12 CARRYING CASE GY HD100 BATTERY BN V428 DC cable 2m AC ADAPTER AC TRIPOD TP P300 DOLLY TP P205 COMPONENT CABLE...

Страница 33: ...older anticlockwise to loosen it and open the microphone holder 2 Place the microphone in the microphone holder Place the microphone toward the front to prevent it from interfering with the cassette cover 3 Turn the knob on the microphone holder clockwise to secure the microphone 4 Connect the microphone cable to the INPUT1 or INPUT2 input connector on the GY HD100 5 Attach the microphone cable to...

Страница 34: ... the arrow The SD memory card comes out slightly 2 Pull the SD memory card straight out About SD Memory Cards When you use an SD memory card that was either just pur chased or formatted on a device other than this camcorder format it on this camcorder X See page 81 Recommended SD memory cards Panasonic 32 MB or more You can write protect the card so that saved files are not mistakenly erased Set t...

Страница 35: ...ging the Built in Battery The built in rechargeable backup battery retains the date and time and the time code data The built in battery is constantly being charge whenever the GY HD100 is connected to a power supply but it gradually discharges while the GY HD100 is disconnected from a power supply The battery will be fully discharged when the GY HD100 is not used for about three months in which c...

Страница 36: ...Detaching the Battery Pack from the GY HD100 Ensure that the POWER switch on the GY HD100 is set to OFF 1 While sliding the battery pack lock release lever slide the battery pack upward to remove it CAUTION Do not detach the battery pack while recording is taking place MEMO Do not connect or disconnect the DC cable while operat ing with a battery pack The following symptoms may occur if the DC cab...

Страница 37: ... When the battery pack is not in use it must be stored in a cool dry place Do not leave the battery pack in a place where it might be subject to a high temperature under direct sunlight in a car etc this could cause leakage of the fluid or shorten service life When the terminal section of the battery pack gets dirty the operating time will be shortened If the operating time becomes greatly reduced...

Страница 38: ...displayed in the VTR operation mode indication area of the LCD monitor or in the viewfinder HDV DV input is possible through the IEEE1394 connector GY HD100U GY HD101E only Turning the Power OFF 1 Place the GY HD100 in the record standby or STOP mode 2 Set the POWER switch to OFF 3 Remove the battery pack or the power supply to the DC IN connector When the camera is not going to be used for a long...

Страница 39: ...he EJECT switch to the side and wait until the videocassette cover opens completely The LED next to the EJECT switch flashes A few seconds pass before the videocassette tape is ejected 3 The LED turns off and the videocassette cover opens Take out the videocassette tape 4 Carefully push the center of the videocassette cover in the direction of the arrow as far as it will go to close it CAUTION Whe...

Страница 40: ...E DATE menu screen appears Set the DISPLAY item on the TIME DATE menu screen to ON 5 Make settings on the TIME DATE menu screen This includes display style etc 1Rotate the SHUTTER dial to align the cursor K with the item to be set and then press the SHUTTER dial The setting area of the selected item starts blinking 2Rotate the SHUTTER dial to change the setting and then press the SHUTTER dial The ...

Страница 41: ...nd Date on the Screen Whether or not the time and date should be displayed on the screen and how to display them are set on the TIME DATE menu screen 1 Display the TIME DATE menu screen 1Select the TC UB CLOCK item on the TOP MENU screen 2Select the TIME DATE item on the TC UB CLOCK menu screen 2 Set the TIME DATE menu screen Display of date and time in the various operation modes 1 TIME DATE menu...

Страница 42: ...ata from the IEEE1394 connector on the STATUS screen To return to display of the original time code or user s bit press the STOP button Display of the normal time code or user s bit is also restored by performing VTR opera tion MEMO To record DV input time cord and user s bit from the IEEE1394 connector set the TC DUPLI DV item on the TC UB CLOCK menu screen to ON X See page 74 To maintain the con...

Страница 43: ... 30 Use the DROP NON DROP item to select the framing mode for the time code generator MEMO Drop frame Non drop frame mode In the NTSC system the actual number of frames per 1 sec ond is approximately 29 97 frames but per time code 30 frames are processed To compensate for this difference the mode called drop mode drops frame 00 and 01 for every minute not divisible by 10 The non drop frame mode is...

Страница 44: ... button to return to the normal screen or Rotate the SHUTTER dial to align the cursor K with the PAGE BACK item and then press the SHUTTER dial to return to the TOP MENU screen Presetting user s bit data The user s bit data are preset with the UB PRESET item on the TC UB CLOCK menu screen The method for setting is the same as the method for setting the time code described above The user s bit can ...

Страница 45: ...he LCD monitor Viewfinder Adjustment Direction of the Viewfinder Adjust the position and angle of the viewfinder Diopter Adjustment Rotate the eyepiece focusing ring until the viewfinder screen image is clearly visible Adjustment of the Viewfinder Screen PEAKING Adjusts the contour of the LCD monitor and the viewfinder screen VF BRIGHT Adjusts the brightness of the viewfinder screen Adjustments ar...

Страница 46: ... Manual 3 Open the iris by turning the iris ring If the illumination is too strong reduce it or move to a darker place 4 Turn the zoom lever until the lens is at the maximum tele photo position 5 Bring the subject into focus 6 Set the lens to maximum wide angle 7 Loosen the back focus ring retaining knob 8 View the same subject and adjust the back focus ring for the best possible focus 9 Repeat st...

Страница 47: ...alance button AUTO WHITE A B OPERATION is displayed in the viewfinder while the auto white balance adjustment circuit operates When correct white balance is obtained the approximate color temperature is displayed together with AUTO WHITE A B OK for about 5 seconds Error messages If the adjustment ends abnormally an error message as described below blinks for about 5 seconds NG OBJECT Improper obje...

Страница 48: ...he SHUTTER dial change the setting and push the SHUTTER dial The setting stops flashing and is temporarily set Move the cursor K to the EXECUTE item and EXE CUTE flashes 5 Push the SHUTTER dial REBOOT SYSTEM CHANGE is displayed on the screen and after a few seconds the system is rebooted Setting the REC Item Set the REC item using the same steps as for the FRAME RATE item MEMO If you change the FR...

Страница 49: ...To record using the 16 9 screen set ASPECT to 16 9 MEMO When you set the REC item on the VIDEO FORMAT menu to HDV format the ASPECT item is fixed at 16 9 and 16 9 is displayed In the SAFETY ZONE item on the LCD VF 1 3 menu screen you can display the safety zone for a standard screen as well as a 16 9 screen in the viewfinder or LCD monitor X See page 71 When the ASPECT item is set to 4 3 the scree...

Страница 50: ...1 CH 2 AUDIO SELECT switch to select whether the audio level adjustment should be set to AUTO mode or MANUAL mode Adjusting the audio input level control The audio input level can be adjusted manually when the GY HD100 is in the record record standby or stop mode 1 Set the CH 1 CH 2 AUDIO SELECT switch of the channel whose audio level that you want to adjust manually to MANUAL 2 Rotate the audio i...

Страница 51: ...r earphone Select the audio channel to be monitored using the MONI TOR SELECT switch The MONITOR volume control adjusts the monitoring vol ume The loudspeaker or earphone outputs an alarm tone in the case of an abnormal condition occurring in the unit An alarm tone is also output when the tape end is reached or when the battery is running down Do not increase the audio monitoring volume exces sive...

Страница 52: ...not be guaranteed if a recording is ended by turning the POWER switch or DC power supply OFF or by removing the bat tery pack Trial shooting is always recommended before recording important events to confirm the recording is satisfactory The microphone may pick up the sound of the lens iris if the iris is changed abruptly or the iris is manually moved abruptly during recording About the Focus Assi...

Страница 53: ...n HDV format can be played back The recorded contents can be checked on the LCD moni tor in the viewfinder or on a monitor connected to the video signal output connectors The video image from the VTR section is shown on the LCD monitor in the viewfinder or on the monitor connected to the video signal output connectors 1 In the record standby mode press the RET button on the camera lens section The...

Страница 54: ...all time codes to zero 0 CANCEL Clears the set time code The frame mode is set depending on the setting in the DROP NON DROP item on the TC UB CLOCK menu screen The time code value at the point when the Record Standby mode is engaged may differ some frames from the value set for this item UB DATA Sets the user s bits of the HEADER REC section EXECUTE Confirms the set user s bits ZERO PRESET Resets...

Страница 55: ...e tape After HEADER REC recording is performed for the specified duration only the Record Standby mode is engaged automatically During HEADER REC recording HEADER REC is shown blinking on the LCD monitor and in the viewfinder 3 After HEADER REC recording is completed and the Record Standby mode is engaged normal recording starts when you press the REC VTR trigger button When the TC GENE switch is ...

Страница 56: ...laying back a tape that was recorded on another unit digital noise may appear during playback Following loading of the tape the built in head cleaner will emit a sound while operating This does not indicate a malfunction The data recorded for the date and time or time code on the tape can be shown on the screen To enable or dis able the display is selected on the menu screen Fast Forward Rewind Pr...

Страница 57: ...When the GY HD100 is used for playback of a tape that was recorded on another unit with audio recorded on the CH 3 and CH 4 channels the PB AUDIO CH DV item on the AUDIO menu screen must be set After recording on the CH 3 and CH 4 channels is not possi ble AUDIO menu screen MONITOR SELECT switch VTR indicator SHUTTER dial STATUS button CAM VTR button MIX Outputs mixed audio STEREO Outputs stereo a...

Страница 58: ...s force to the video signal out put terminal when connecting or disconnecting the cable This will cause poor contact or failure Displaying Alarms CHANGE 1394 SWITCH Displayed when the setting for the input output video format from the IEEE1394 connector and the setting for the IEEE1394 switch are different Set the IEEE1394 switch so it matches the video format IEEE 1394 HDV DV LINE OUTPUT DC INPUT...

Страница 59: ... or play back only a particular format Normally use the AUTO setting OUTPUT TERMINAL item Set either component or composite output Normally use the AUTO setting 5 Set the audio output X See page 53 Set the AUDIO MIC menu screen X See page 70 AUDIO MONITOR item Set stereo audio or mixed audio PB AUDIO CH DV item Set the audio channel to be output Set the MONITOR SELECT switch 6 Insert the videocass...

Страница 60: ...r more informa tion 9 When dubbing is finished stop recording on the recording device press the STOP button on the camcorder and stop the playback MEMO Switch the IEEE1394 switch when the camcorder is OFF When you dub still images they are low resolution images Noise may also enter the audio Operations may differ depending on the features and specifications of the connected device and operations o...

Страница 61: ...ack unit For details see the instructions to the unit used for play back The playback picture from the playback unit appears on the GY HD100 s LCD monitor and viewfinder screen 9 Press the REC VTR trigger button on the GY HD100 to start recording To temporarily pause the recording press the REC or VTR trigger button To restart the recording press the REC or VTR trigger button again 10 When dubbing...

Страница 62: ...f recording on the backup unit takes place in accordance with the operation of the REC VTR trigger button on the master unit Depending on the GY HD100 or the backup unit the image audio and or time code may deviate from what they should be at the points where the recording is started or stopped MEMO When the backup recording is started the TRIGGER TO DV or TRIGGER TO HDV indication is shown on the...

Страница 63: ... accordance with the function or purpose The items on the menu screens differ with the Camera mode and the VTR mode The contents of set items are stored in the GY HD100 s memory and are retained even when the power is turned off The FILE MANAGE menu screen can be used to store the menu setting contents on the GY HD100 or SD memory card TOP MENU screen VTR TOP MENU screen CAM ...

Страница 64: ...ple items repeat the procedures in steps 5 and 6 above 7 Return to the TOP MENU Rotate the SHUTTER dial to align the cursor K with the PAGE BACK item and then press the SHUTTER dial To change settings on other menu screens repeat the pro cedures in steps 4 to 7 above To save the set contents in FILE select the FILE MANAGE menu screen and perform the operations for saving to file X See FILE MANAGE ...

Страница 65: ...anges to the AUDIO menu screen The cursor K does not move to this item when the camcorder is recording LCD VF Displays a menu screen for selecting whether to display characters on the LCD monitor or in the viewfinder and for adjustments of the picture quality of LCD monitor Camera mode It consists of three screens VTR mode It consists of two screens TU UB CLOCK Displays a menu screen for setting t...

Страница 66: ...ched On the E model the video format is fixed at HDV HD24 when the FRAME RATE item is set to 24 HDV HD24 is displayed ASPECT Sets the screen size for the recording video signal Can only be displayed and set in camera mode 4 3 Outputs the video with an aspect ratio of 4 3 16 9 Outputs the video with an aspect ratio of 16 9 The resolution in the vertical direction drops compared to 4 3 video MEMO Wh...

Страница 67: ...NENT Outputs a component signal regardless of the status of the cables connected to the video signal output connectors Output signals when AUTO is set CAUTION If you output video recorded in HDV format using a composite signal the colors may change SET UP Selects whether to add a setup signal to the video signal output from the video signal output connector You can also select a setup signal for I...

Страница 68: ...th a low color temperature such as halogen lamps 5600K Sets the basic color temperature to 5600K Use for light sources with a high color temperature such as sunlight MEMO This item does not function when the FAW item on the SWITCH MODE menu screen is set to PRESET SMOOTH TRANS Smoothens the transition when the GAIN switch b on page 15 or WHT BAL switch c on page 15 is switched over and achieves gr...

Страница 69: ...ll patterns V FREQUENCY 1 Use this when shooting subjects with finely detailed patterns Changes the vertical contour compensation frequency for the contours details Compensates for distortion when outputting progressive video to an interlaced monitor HIGH Enhances high frequency bands LOW Enhances low frequency bands SKIN DETECT Sets ON OFF for the skin detail function OFF Turns off the skin detai...

Страница 70: ...uminance level MANUAL You can change the luminance level in the LEVEL item LEVEL Sets the start point for knee compression knee point Increase the number Raises the knee point level Decrease the number Lowers the knee point level Settings 80 85 90 95 100 MEMO When the KNEE item is set to AUTO is displayed and this cannot be selected MOTION SMOOTH Makes the video smoother when the tape is played ba...

Страница 71: ...ings MIN 5 4 NORMAL 0 4 MAX 5 COLOR GAIN Adjusts the video signal color level OFF Sets the video to black and white Increase the number Makes the colors more dense Decrease the number Makes the colors less dense Settings OFF MIN 10 9 NORMAL 0 9 MAX 10 WHITE PAINT R Adjusts the R red component when in AWB Auto White Balance mode Increase the number Strengthens the red Decrease the number Weakens th...

Страница 72: ...ss of magenta color Settings MIN 5 4 NORMAL 0 4 MAX 5 B GAIN For manually adjusting the shading of the B axis of the color matrix blue and yellow Increase the number Enhances blue and yellow Decrease the number Reduces blue and yellow Settings MIN 5 4 NORMAL 0 4 MAX 5 B ROTATION For manually adjusting the color phase of the B axis of the color matrix blue and yellow Increase the number Increases r...

Страница 73: ...g conditions LENS RET Sets the lens RET button functions This does not function if there is not RET button on the lens you are using RET Functions as a normal RET button FOCUS ASSIST Functions as the FOCUS ASSIST button PAGE BACK When the cursor is in this position press the SHUTTER dial to return to the TOP MENU screen REC Item Setting for STEP Setting for VARIABLE DV 60I HDV SD60P HDV HD30P 1 7 ...

Страница 74: ...ector 50dB Sets the reference audio input level at 50 dB 60dB Sets the reference audio input level at 60 dB AUDIO MONITOR Selects whether stereo or mixed audio is output from the PHONES jack when the MONITOR SELECT switch is set to BOTH STEREO Stereo audio CH 1 audio is output to L and CH 2 audio is output to R Outputs only the CH 1 audio from the monitor speaker MIX Mixed audio CH 1 and CH 2 mixe...

Страница 75: ...ot displayed F NO F number is displayed F NO IND F number and iris level mark is displayed FILTER Selects whether or not the FILTER position of the unit is displayed in the status display on the LCD monitor or in the viewfinder STATUS 1 screen OFF FILTER position is not displayed ON FILTER position is displayed SAFETY ZONE 1 Selects whether or not the safety zone is shown on the LCD monitor or in ...

Страница 76: ...ed OFF Not displayed TC UB Selects whether or not the time code or user s bits data should be shown in the status display on the LCD monitor or in the viewfinder Camera mode STATUS 1 screen VTR mode STATUS screen OFF Not displayed ON Displayed Whether the time code or user s bits data is shown is selected with the TC DISPLAY switch AUDIO Selects whether the audio level meters should be shown in th...

Страница 77: ... contrast of the LCD Settings MIN 5 4 NORMAL 0 4 MAX 5 VF CONTRAST Adjusts the contrast of the viewfinder Settings MIN 5 4 NORMAL 0 4 MAX 5 PAGE BACK Camera mode When the cursor is in this position press the SHUTTER dial to return to the LCD VF 2 3 menu screen VTR mode When the cursor is in this position press the SHUTTER dial to return to the LCD VF 1 2 menu screen ...

Страница 78: ...aming mode is drop frame or non drop frame DROP Internal timecode generator works in drop frame mode Set this when the recorded time is im portant NON DROP Internal timecode generator works in non drop frame mode Set this when the number of frames is important UB REC 2 To select whether or not user s bit data should be recorded To select whether the user s bits should be displayed during playback ...

Страница 79: ...setting in the DROP NON DROP item on the TC UB CLOCK menu screen The time code value at the point when the Record Standby mode is engaged may differ some frames from the val ue set for this item UB DATA Sets the user s bits of the HEADER REC section EXECUTE Confirms the set user s bits ZERO PRESET Resets all user s bits data to 0 CANCEL Clears the set user s bits MEMO The user s bits for the norma...

Страница 80: ...tem cannot be selected DATE STYLE Selects the style for the date display YY MM DD Displayed in the format of year month date MM DD YY Displayed in the format of month date year DD MM YY Displayed in the format of date month year Variation Range U model MM DD YY E model DD MM YY When the DISPLAY item is set to OFF is indicated and this item cannot be selected TIME STYLE Selects the style for the ti...

Страница 81: ... sound is output through the monitoring loudspeaker and the PHONES jack OFF Sound is not output LOW Alarm sound is soft MIDDLE Alarm sound is normal HIGH Alarm sound is loud FRONT TALLY Selects the lighting method of the FRONT TALLY lamp during recording BLINK The lamp blinks from when the REC VTR trigger is pressed and until recording starts The lamp lights steadily during recording ON The lamp l...

Страница 82: ...device that is on Pause when the tape on the camcorder has less than 3 minutes remaining during shooting MEMO If you use the backup recording function on the BR HD50 set this item to OFF The cursor K does not move to this item when the camcorder is recording MENU ALL RESET Selects whether to reset the menu screen settings to initial settings The camera mode and VTR mode menu settings are reset The...

Страница 83: ... page 80 If there is an error Press the STATUS button Return to the normal screen Press the SHUTTER dial Return to the FILE MAN AGE menu screen To exit the FILE MANAGE screen Move the cursor K to PAGE BACK and press the SHUT TER dial or press the STATUS button Displaying the FILE MANAGE menu screen Select the FILE MANAGE item on the TOP MENU screen Loading a menu settings file Select the LOAD FILE...

Страница 84: ...e SHUTTER dial EXECUTE if the file already exists OVERWRITE flashes 6 With EXECUTE selected turn the SHUTTER dial to save the menu settings to the selected file Error displays NO CARD No SD memory card is inserted Insert an SD memory card NO FORMAT The SD memory card is not initialized formatted Initialize format the SD memory card NO ACCESS There is a problem with the SD memory card Replace the S...

Страница 85: ...s the camcorder turns off automatically and then turns on When this happens the SUB NAME initial value SCENE is displayed MEMO Even if CAM1 and CAM2 are reset the current settings are not reset To reset the currently set values select CURRENT Initializing formatting an SD memory card Before initializing formatting a card 1Insert and remove the SD memory card with the power to the camcorder OFF 2Di...

Страница 86: ...detection area for the skin detail function The color within the detection area is recognized as the color that the skin detail function will use If the color within the detection area is not recognized as the color that the skin detail function will use ERROR is displayed on the screen 5 If you want to change the range of colors recognized with the skin color detection function follow the steps b...

Страница 87: ...rates the SD indicator is displayed on the STATUS 0 and STATUS 1 screen in the viewfinder or LCD monitor Confirming the color tone area adjusted with the Skin Detail function When you push the ZEBRA switch on the front panel to SKIN AREA the skin detail function turns ON and the color area adjusted with the skin detail function is displayed in color in the LCD monitor or viewfinder MEMO When COLOR...

Страница 88: ...ch to OFF 2 Assign BARS to one of the USER1 2 or 3 buttons X See SWITCH MODE Menu Screen on page 69 3 Press the USER button to which BARS was assigned Color bars are output MEMO You can select whether to output an audio test signal dur ing color bar output using the TEST TONE item on the AUDIO MIC menu screen X See page 70 Color bars are not output when FULL AUTO mode is ON or in VTR mode FULL AUT...

Страница 89: ...l The U model cannot play back tapes recorded in DV 50I or DV 25P format or input into the IEEE1394 connector in VTR mode INVALID TAPE A computer data tape or a DVC PRO cassette was used Use a MiniDV videocassette LP TAPE INVALID Tried to play back a tape recorded in LP mode This camcorder cannot record or play back in LP mode NO DV SIGNAL DV signal was not input Set the IEEE1394 switch to DV and ...

Страница 90: ...rity with eject operation 5605 5609 DEFECTIVE TAPE Tape is cut Operation stops Press the EJECT button to take out the cassette 5702 TAPE END DET ERROR Tape end sensor error Operation stops All opera tions are rejected Switch the power OFF and then switch it back ON However the tape may be damaged depending on the circum stances Please consult the person in charge of professional video equip ment a...

Страница 91: ...n the TALLY lamp and alarm sounds appear as shown in the following table Blinking Pattern Remaining Battery Tape Slow blinking once per sec Remaining battery power is low Remaining tape time is equivalent to less than 3 minutes Fast blinking four times per sec Tape has run out Irregularity has occurred in the VTR Alarm Indications on LCD Monitor Viewfinder Screen TALLY lamp Alarm Sound Condition V...

Страница 92: ...e camcorder in VTR mode Is the VTR indicator lit Is the IEEE1394 switch set correctly Noise interferes with playback video Video head may be clogged with dirt Clean head with the special head clean ing tape X See Precautions for Use of Head Cleaning Tape on page 7 Sound is not output during playback Is the AUDIO SELECT item on the AUDIO menu screen set to CH3 4 To output the sound of the recording...

Страница 93: ...e recycling of electrical and electronic equipment for proper treatment recovery and recycling in accordance with your national legislation By disposing of this product correctly you will help to con serve natural resources and will help prevent potential nega tive effects on the environment and human health which could otherwise be caused by inappropriate waste handling of this product For more i...

Страница 94: ...01E only Variable scan 60 19 1 998 0 Hz HDV HD30p HDV 60p 50 20 1 973 6 Hz HDV HD25p HDV SD50p DV 50i 48 11 1 998 0 Hz HDV 24p DV 24p GY HD100U only Dynamic range 300 or more Video Recording format 720 24p 720 25p 720 30p 576 50p 480 60p GY HD100U HD100E HD101E 480 24p 480 60i GY HD100U 576 25p 576 50i GY HD100E HD101E Video Format HDV Video signal record ing format HDV720p format 8 bit 19 7 Mbps ...

Страница 95: ...wer cord 2 Approx 2 m E model only Core Filter 2 Clamp Filter 2 Audio cable 1 SD memory card 1 Instruction Manual 1 Warranty Card 1 USA and Canada only Power USA and Canada AC 120 V 60 Hz European countries AC 220 V to 240 V 50 Hz 60 Hz Other countries AC 110 V to 240 V 50 Hz 60 Hz Power consumption 23 W Output power DC 7 2 V 1 2 A charge DC 7 2 V 2 3 A VTR Operating tempera ture 0 C to 40 C 32 F ...

Страница 96: ...A RECORDER Printed in Thailand LWT0278 001A H is a registered trademark owned by Victor Company of Japan Limited is a registered trademark in Japan the U S A the U K and many other countries 2005 Victor Company of Japan Limited ...

Отзывы: