background image

17

TROUBLESHOOTING

Before consulting your JVC dealer, please check the following to see if you can correct the problem
yourself.

Vertical white lines appear when shooting a 
very bright object.

• This sometimes occurs when the contrast

between the back-ground and the object is
great. It is not a defect of the camcorder.

Bright, crystal-shaped spots appear in the 
LCD monitor and the viewfinder.

• Sunlight is directly entering the lens. This is not

a defect of the camcorder.

Colored bright spots appear all over the 
LCD monitor or the viewfinder.

• The LCD monitor and the viewfinder are made

with high-precision technology. However, black
spots or bright spots of light (red, green or
blue) may appear constantly on the LCD
monitor or in the viewfinder. These spots are
not recorded on the tape. This is not due to any
defect of the unit. (Effective dots: more than
99.99 %.)

Animation or Time-Lapse is not available.

• Before recording in the Animation mode at the

very beginning of a tape, set the camcorder to
the Recording mode for about 5 seconds, so
that the tape runs smoothly. Using the Fade-in
function at this point is a good way to begin an
animated programme (

pg. 15, REC TIME/

INT. TIME in SYSTEM MENU).

The tape is running, but there is no play-
back picture.

• The TV has not been set to its VIDEO mode or

channel.

• If A/V connection is used, the TV’s VIDEO/TV

Switch has not been set to VIDEO.

Playback picture is blurred or interrupted.

• The video heads are dirty or worn out. Consult

your nearest JVC dealer for head cleaning or
replacement.

The tape stops during fast-forwarding or 
rewinding.

• The Counter Memory Function has been

activated (

pg. 16, “COUNTER MEMORY”).

The date and time displays disappear.

• If you remove the power source from the

camcorder while the power is on, all settings
and selections are erased. Make sure to turn
the camcorder’s power off before
disconnecting the power source.

The tape will not eject.

• The battery pack is running low.
• If the LCD monitor is not open over 60

degrees, the EJECT button 

)

 does not

function.

TROUBLESHOOTING

The camcorder is a microcomputer-controlled device.
External noise and interference (from a TV, a radio, etc.) might prevent it from functioning properly. In
such cases, first disconnect its power supply unit (battery pack, AC Adapter, etc.); and then re-
connect it and proceed as usual from the beginning.

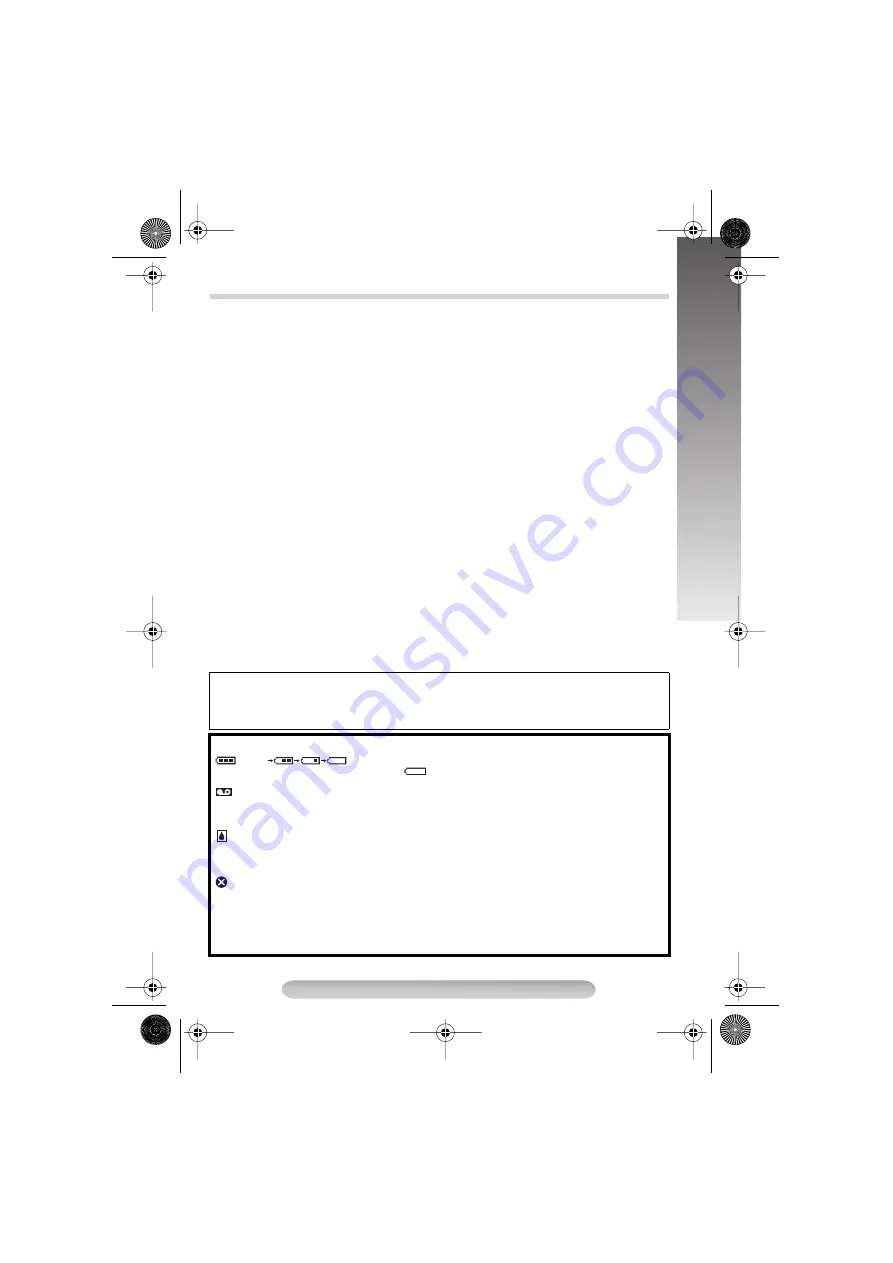
WARNING INDICATIONS: 

 (high) 

 (exhausted) : Displays the battery remaining power level. As the battery

power comes close to nil, the battery indicator 

 blinks (battery power warning). When the battery power is

exhausted, power turns off automatically.


: Blinks when no cassette is loaded, or when the erase protection tab is not in the position that allows

recording.

TAPE END

: Appears when the tape ends during recording, playback or fast-forwarding.

LENS CAP

: Appears for 5 seconds after power is turned on if the lens cap is attached.


CONDENSATION OPERATION PAUSED   PLEASE WAIT

: These 2 warnings appear alternately every 3

seconds if condensation occurs. In this case, all functions except tape eject and power on/off are disabled.
Remove the tape, turn the unit off (without removing the power supply), wait a few minutes for the warnings to
clear, and turn it on again.


HEAD CLEANING REQUIRED   USE CLEANING CASSETTE

: These 2 warnings appear alternately

every 3 seconds if dirt is detected on the heads during recording. In this case, use an optional cleaning
cassette. If the warning remains after cleaning, consult your nearest JVC dealer.

E01—E06 UNIT IN SAFEGUARD MODE   REMOVE AND REATTACH BATTERY

: The error indications (E01

— E06) show what type of malfunction has occured. If an error indication and warning appear, turn the unit off,
remove the power supply (battery, etc.) and wait a few minutes for them to clear. When it does, you can
resume using the camcorder. If the indication remains, consult your nearest JVC dealer.

GR-SXM303AS-EN.fm  Page 17  Tuesday, May 23, 2006  11:19 AM

Содержание GR-SXM303AS

Страница 1: ...c Demonstration set DEMO MODE to OFF pg 15 Dear Customer Thank you for purchasing the JVC Compact VHS camcorder Before use please read SAFETY PRECAUTIONS pg 3 to ensure safe use of this product LYT1604 001A COMPACT VHS CAMCORDER GR SXM303AS CONTENTS GETTING STARTED 4 8 RECORDING PLAYBACK 9 BASIC FEATURES 9 11 MENU SETTINGS 11 16 REFERENCES 18 23 GR SXM303AS EN fm Page 1 Tuesday May 23 2006 11 19 A...

Страница 2: ...les Battery Packs BN V12U BN V20U BN V400U Compact S VHS Cassettes SE C45 30 Compact VHS Cassettes EC 60 45 30 Active Carrying Bag CB V7U PROVIDED ACCESSORIES Battery Pack BN V10U Shoulder Strap AC Adapter AP V14A A V Audio Video Cable Lens Cap Power Cord Core filter for S Video cable How To Attach The Core filter NOTE In order to maintain optimum performance of the camcorder provided cables may b...

Страница 3: ...s bottom This camcorder is designed to be used with PAL type color television signals It cannot be used for playback with a television of a different standard However live recording and LCD monitor viewfinder playback are possible anywhere Use the JVC BN V10U V12U V20U V400U battery packs and to recharge them or to supply power to the camcorder from an AC outlet use the provided multi voltage AC A...

Страница 4: ...e During shooting Keep the lens cap attached to the camcorder Cassette holder Erase protection tab LCD monitor Speaker Viewfinder During Recording During Playback LCD Monitor Viewfinder Indications _ V 0 2 3 4 5 6 7 8 9 pg 17 for Warning Indications Video Light 5 Microphone Turn the gear to take up slack Connector Cover Refer to this diagram while reading the instructions 1 GR SXM303AS EN fm Page ...

Страница 5: ... Tape Remaining Time pg 14 Recording Mode Indicator pg 13 Video Light Indicator pg 12 Backlight Compensation Indicator pg 10 Recording Format Indicator S S ET pg 15 Tape Length Indicator pg 14 Zoom Indicator Bar pg 10 a Zoom Level Indicator b Approximate Zoom Ratio Recording Indicator pg 9 Digital Effect Indicator pg 12 Programme AE Indicator pg 12 Fade Wipe Standby Indicator pg 13 Picture Stabili...

Страница 6: ...ge from 110V to 240V ATTENTION Before detaching the power source make sure that the camcorder s power is turned off Failure to do so can cause the camcorder to malfunction REFRESH Be sure to fully discharge a battery pack before recharging or storing it for a long period of time otherwise the battery performance will be reduced 1 Perform steps 1 through 3 of Charging the Battery Pack 2 Press REFRE...

Страница 7: ...ear a radio Recording time is reduced significantly when Zoom or Record Standby mode is engaged repeatedly or the LCD monitor is used repeatedly Before extended use it is recommended that you prepare enough battery packs to cover 3 times the planned shooting time 1 Set the Power Switch to while pressing down the Lock Button 2 Press the MENU Wheel 1 in The TOP MENU Screen appears 3 Rotate the MENU ...

Страница 8: ... to extend its legs fully to stabilise the camcorder To prevent damage to the unit caused by falling over do not use a small tripod 1 Open the LCD monitor fully and keep it aligned vertically with the camera do not tilt it Press EJECT for more than 2 seconds until the cassette holder opens Do not force open 2 When inserting a cassette make sure the label is facing outward 3 Press the Close button ...

Страница 9: ...1 or during playback During playback holding 1 or down continues the search as long as you hold the button For VIDEO RECORDING VIDEO PLAYBACK The camcorder shuts off automatically after about 5 minutes in the Record Standby or Stop mode To turn on again set the Power Switch to OFF then to or PLAY When the Power Switch is set to or PLAY and the LCD monitor is opened at an angle of 60 degrees or mor...

Страница 10: ...is in Record Standby mode 2 Press and release quickly Tape is rewound for approx 1 second and played back automatically then pauses in Record Standby mode for the next shot Distortion may occur at the start of playback This is normal To re record certain segments 1 Make sure the camcorder is in Record Standby mode 2 Press and hold either RETAKE or 1 to reach the start point for new recording 3 Pre...

Страница 11: ... through 4 for additional editing then stop the VCR and camcorder when finished This Menu Screen cannot be accessed while recording 1 Set the Power Switch to while pressing down the Lock Button 2 Press the MENU Wheel 1 in The TOP MENU Screen appears Rotate the MENU Wheel 1 to select the desired menu or function and press it To go from TOP MENU to CAMERA MENU rotate the MENU Wheel 1 to select 3 TO ...

Страница 12: ... used Helps to counter the effects of glare on the subject FOG Makes the picture look misty white as when an external fog filter is attached to the lens Softens the image and gives it a fantasy look This mode cannot be used when the V ECHO mode Digital Effects is activated TWILIGHT Dusk twilight scenery fireworks etc look more natural and dramatic In this mode the Auto Focus pg 10 and S LX pg 13 m...

Страница 13: ...leaving a black screen Allows you to set the recording mode LP Long Play is more economical providing twice the recording time If the recording mode is switched the playback picture will be blurred at the switching point CAMERA MENU The Picture Stabiliser compensates for unstable images caused by camera shake particularly at high magnification ON The Picture Stabiliser is activated appears OFF The...

Страница 14: ...depending on the tape used T30 30 minutes T45 45 minutes T50 50 minutes T60 60 minutes Tape remaining time is correct only if the correct tape length has been selected FULL Makes all of the indications appear on the LCD monitor viewfinder during playback or recording SIMPLE Makes the following indications disappear from the LCD monitor viewfinder during recording or playback 4 tape remaining time ...

Страница 15: ...EM MENU before performing the INT TIME Time Lapse function Select the desired interval time and press the Recording Start Stop Button Fade or wipe in out cannot be performed This function is cancelled when the power is turned off or when the cassette is ejected To use this function it is recommended that SCROLL in TITLE SETUP pg 14 be set to OFF ON With an S VHS cassette S appears and the camcorde...

Страница 16: ...l 1 to select COUNTER RESET and press it Then rotate the MENU Wheel 1 to YES and press it The counter resets to 0 00 00 5 To return to normal screen rotate the MENU Wheel 1 to 3EXIT and press it 6 After recording or playback press 7 then 1 with Power Switch is set to PLAY The tape automatically stops at or close to 0 00 00 7 Press 3 8 to start playback The counter memory functions in both Fast For...

Страница 17: ...ff before disconnecting the power source The tape will not eject The battery pack is running low If the LCD monitor is not open over 60 degrees the EJECT button does not function TROUBLESHOOTING The camcorder is a microcomputer controlled device External noise and interference from a TV a radio etc might prevent it from functioning properly In such cases first disconnect its power supply unit batt...

Страница 18: ...e battery every 6 months when storing it over a long period of time remove from charger or powered unit when not in use It is normal for the battery pack to be warm after charging or after use Temperature Range Specifications Charging 10 C to 35 C Operation 0 C to 40 C Storage 10 C to 30 C Recharging time is based on room temperature of 20 C The lower the temperature the longer recharging takes Ca...

Страница 19: ...t against hard objects subject it to shock or excessive vibration during transportation keep the lens directed at extremely bright objects for long periods direct the eyepiece of the viewfinder at the sun carry it by holding the viewfinder or the LCD monitor Be sure to hold the main unit with both hands or use the grip swing it excessively when using the shoulder strap LCD Monitor 1 To prevent dam...

Страница 20: ...e viewfinder using a blower brush Avoid using strong cleaning agents such as benzine or alcohol Cleaning should be done only after the battery pack has been removed or other power units have been disconnected Mould may form if the lens is left dirty When using a cleaner or chemically treated cloth refer to the cautions that came with it About moisture condensation You may have observed that pourin...

Страница 21: ...e viewfinder fully tilted downward Pickup 1 6 format CCD Lens F1 8 f 2 2 mm to 55 mm 25 1 power zoom lens with auto iris and macro control Filter diameter ø 30 5mm Viewfinder Electronic viewfinder with 0 24 black white LCD White balance adjustment Auto Manual adjustment LCD monitor 2 50 diagonally measured LCD panel TFT active matrix system Speaker Monaural Connectors Video 1 V p p 75 Ω unbalanced...

Страница 22: ...Effect pg 12 Mosaic Effect pg 12 ND Effect Mode pg 12 Nega Posi Mode pg 12 Picture Stabiliser pg 13 Playback pg 9 Programme AE with Special Effects pg 12 Provided Accessories pg 2 Quick Review pg 10 Recording Start Stop pg 9 Recording Format S VHS S VHS ET pg 15 Recording Mode pg 13 Record Standby pg 9 Red Filter Effect pg 12 Retake pg 10 Rewind The Tape pg 9 Self Recording pg 9 Sepia Mode pg 12 S...

Страница 23: ...23 GR SXM303AS EN fm Page 23 Tuesday May 23 2006 11 19 AM ...

Страница 24: ...Printed in Malaysia 0506YDR NF VP AS 2006 Victor Company of Japan Limited GR SXM303AS EN fm Page 24 Monday August 21 2006 9 09 AM ...

Отзывы: