EN
49
D.S.C. PLAYBACK
Connection
NOTES:
●
Before transferring still images from your personal computer to the camcorder’s built-in memory, perform the
camcorder’s Picture Mode Setting (
Z
pg. 20). The still images will be transferred from the personal
computer in the selected Picture Mode.
●
When transferring still images from your personal computer to the camcorder, make sure the number of
images to be transferred is smaller than the camcorder's remaining number of shots available.
●
Use the AC Power Adapter/Charger as the power supply instead of the battery pack.
●
The still images stored in the camcorder’s memory are not automatically removed after being transferred to
the PC. If you wish to remove those still images from the camcorder's memory, delete them (
Z
pg. 54, 55).
●
Windows
®
are trademarks of Microsoft Corporation, registered in the U.S.A. and other countries.
PC MODE
Connection to a Windows
®
PC
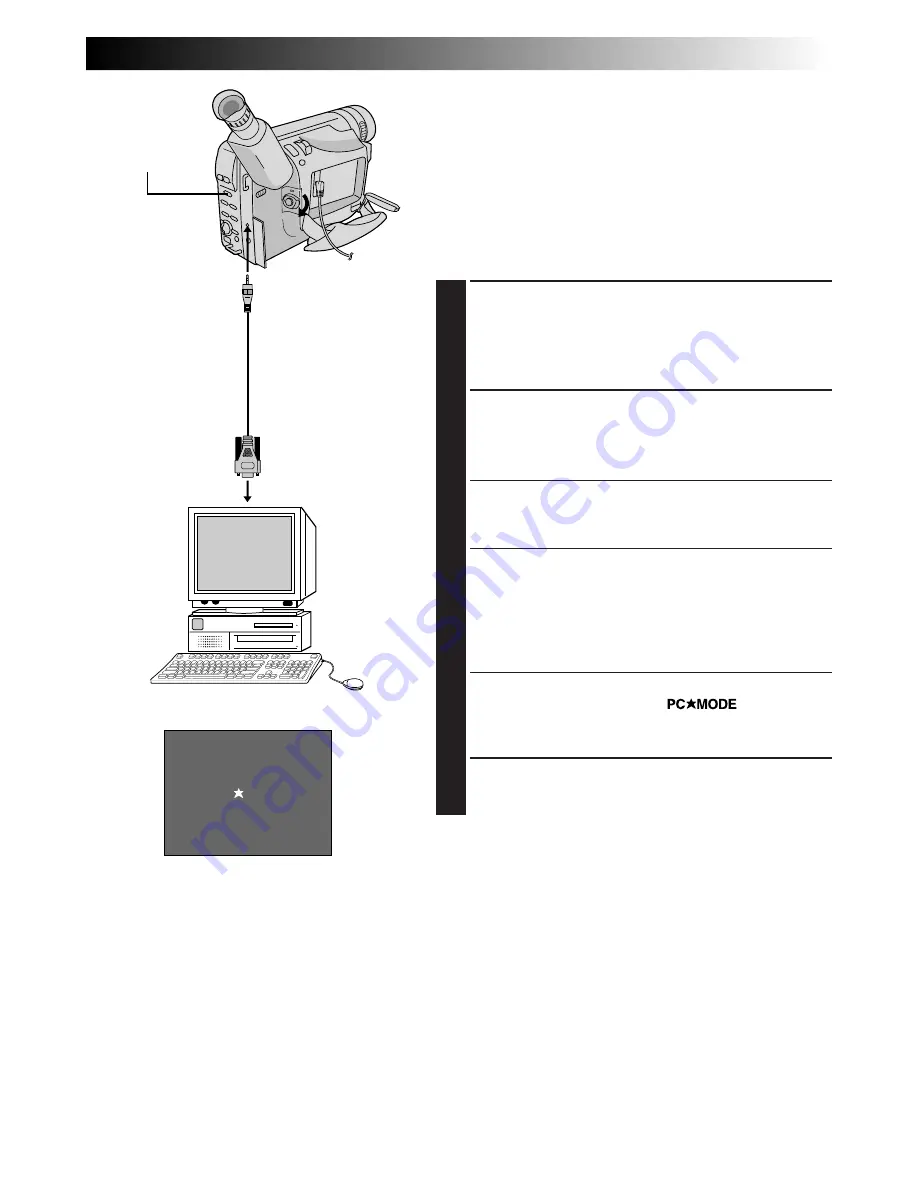
Image data stored in the camcorder’s built-in memory can
be transferred to a Windows
®
PC and saved using the
provided image transfer software, Picture Navigator. The
image data transferred to a Windows
®
PC can also be
further processed using Mr. Photo Gold, and the still image
processed on the PC can be inserted onto a tape
(
Z
pg. 63).
To assure safety, make sure all units are turned off before
making any connection.
1
CONNECT TO PERSONAL
COMPUTER
Connect the camcorder’s DIGITAL connector to the
COM Port (RS-232C) on a Windows
®
PC, using the
provided PC connection cable.
2
SELECT OPERATION SYSTEM AND
MODE
Set the System Select Switch to “D.S.C.”, then set the
Power Switch to “PLAY”.
•A still image stored in memory appears.
•When transferring still images to a computer, be
sure that a still image is displayed on the screen.
3
RUN IMAGE TRANSFER SOFTWARE
Launch the provided software on your Windows
®
PC.
Transfer the still images stored in the camcorder’s
memory to the Windows
®
PC. Refer to the software’s
instruction manual on the provided CD-ROM for
details.
•During transfer of the still image, the camcorder’s
screen becomes blue and “
” is dis-
played. After transferring is finished, the screen
displays the same still image as in step 2.
4
END TRANSFERRING
Close the software, then switch off the camcorder.
For Windows
®
:
To COM Port
(RS-232C)
System
Select Switch
Display
PC connection cable
(provided)
To DIGITAL
connector


