6
Daily Operations / Connections
7
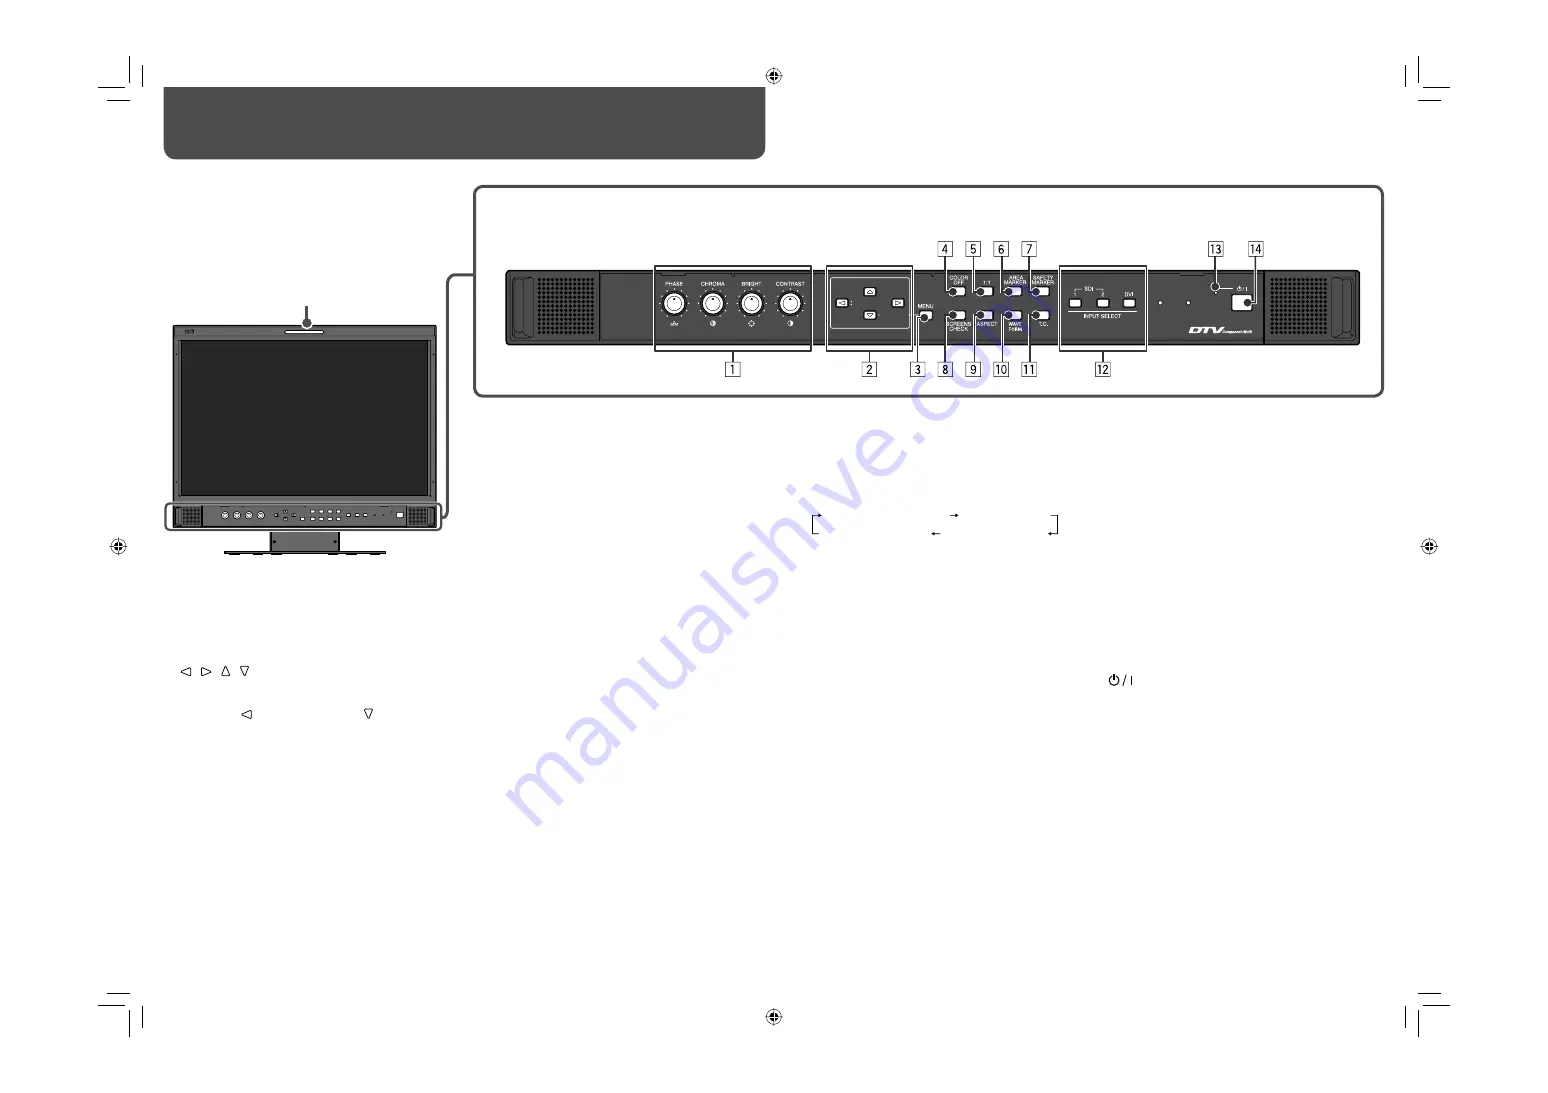
Front panel
Tally lamp
This lamp is controlled by the tally function of
the MAKE/TRIGGER terminal.
• You can select the color of the tally lamp from
“
GREEN” or “RED”
.
☞
“ TALLY SELECT” in “FUNCTION
SETTING” on page 14 and “External Control”
on page 16
• “NO EFFECT” is displayed when you press a button which is not available for the current input or signal format (the lamp lights even when the function does not
actually work).
• The items controlled by the MAKE system cannot be controlled by the buttons on the front panel (“REMOTE ON” is displayed and the lamps do not light).
4
COLOR OFF button/lamp
Displays only the luminance signal.
• This function does not work for RGB input signals.
5
1:1 button/lamp
Displays the picture in the original resolution of the
input signal.
• The aspect ratio of the picture may change
depending on the input signal.
6
AREA MARKER button/lamp
Displays/hides the area marker.
• Select the style of the area marker in “MARKER”
of the MAIN MENU (
☞
page 11).
• This function works only when displaying the
picture in 16:9 aspect ratio.
• This function does not work when “AREA
MARKER” or “R-AREA MARKER” is set to “OFF”
in “MARKER.”
7
SAFETY MARKER button/lamp
Displays/hides the safety marker.
• Adjust the area of the safety marker in
“MARKER” of the MAIN MENU (
☞
page 11).
• This function does not work when displaying the
picture in the 1:1 mode.
• This function does not work when “SAFETY
MARKER” or “R-SAFETY MARKER” is set to
“OFF” in “MARKER.”
1
Picture adjustment knob
PHASE:
Adjusts the picture hue.
CHROMA:
Adjusts the picture color density.
BRIGHT:
Adjusts the picture brightness.
CONTRAST:
Adjusts the picture contrast.
2
/ / / buttons
Selects or adjusts menu items when a menu screen
is displayed. (
☞
“Menu Operations” on page 7)
• Pressing button while holding button displays
the SET-UP MENU. (
☞
“Menu Operations” on
page 7)
3
MENU button
Activates/deactivates the display of the MAIN MENU.
(
☞
“Menu Operations” on page 7)
RGB (Normal screen)
Red screen
Green screen
Blue screen
8
SCREENS CHECK button/lamp
Displays only the selected element (R, G, or B) of
the video signal.
• Each time you press this button, the screen
changes in the following order.
9
ASPECT button/lamp
Changes the aspect ratio of the picture from 4:3
to 16:9 when the picture of 16:9 aspect ratio is
squeezed into 4:3 format signal.
• To return to 4:3, press the button again.
• This function does not work when displaying the
picture in the 1:1 mode.
p
WAVE FORM button/lamp
Displays/hides the indication of the wave form
monitor.
• Adjust the settings of the wave form monitor in
“WAVE FORM SETTING” of the MAIN MENU (
☞
page 13).
q
T.C. (time code) button/lamp
Activates/deactivates the display of the time data
(time code) contained in the SDI signal.
(
☞
“On the Information Display” on page 7)
w
INPUT SELECT buttons/lamps
Selects an input.
SDI 1:
E. AUDIO HD/SD SDI (IN 1) terminal
SDI 2:
E. AUDIO HD/SD SDI (IN 2) terminal
DVI:
DVI-D (HDCP) terminal
• The lamp for the selected input lights.
e
Power lamp
Unlit:
The monitor is completely off (the AC plug
is disconnected or the POWER switch on the rear
panel is turned off).
Lights in Green:
The monitor is on.
Lights in orange:
The monitor is off (on standby).
Flashes in orange:
The monitor is in the P. SAVE
(power save) mode (
☞
“NO SYNC ACTION” in
“SYNC FUNCTION” on page 13).
r
button
Turns on and off (on standby) the monitor.
• The POWER switch is equipped on the rear panel
of the monitor (
☞
6
on page 8).
DT-V17L3REB̲EN.indd 6
DT-V17L3REB̲EN.indd 6
08.9.18 5:27:28 PM
08.9.18 5:27:28 PM


