background image

No.51781

1-6

DLA-M2000LE

3

ENGLISH

DEUTSH

FRAN

Ç

AIS

ITALIANO

ESPA

Ñ

OL

POWER CONNECTION 

(United Kingdom only)

WARNING

Do not cut off the main plug from this equipment.
If the plug fitted is not suitable for the power points in your 
home or the cable is too short to reach a power point, then 
obtain an appropriate safety approved extension lead or 
adapter or consult your dealer.

If nonetheless the mains plug is cut off, remove the fuse and 
dispose of the plug immediately, to avoid a possible shock 
hazard by inadvertent connection to the main supply.

If a new main plug has to be fitted, then follow the instruction 
given below:

WARNING:

THIS APPARATUS MUST BE EARTHED.

IMPORTANT:

The wires in the mains lead on this product are coloured in 
accordance with the following cord:

Green-and-yellow:

Earth

Blue:

Neutral

Brown:

Live

As these colours may not correspond with the coloured 
making identifying the terminals in your plug, proceed as 
follows:

The wire which is coloured green-and-yellow must be 

connected to the terminal which is marked 

 with the letter 

E or the safety earth or coloured green or green-and-yellow.
 
The wire which is coloured blue must be connected to the 
terminal which is marked with the letter N or coloured black.

The wire which is coloured brown must be connected to the 
terminal which is marked with the letter L or coloured red.

When replacing the fuse, be sure to use only a correctly 
rated approved type, re-fit the fuse cover.

IF IN DOUBT —— CONSULT A COMPETENT

ELECTRICIAN.

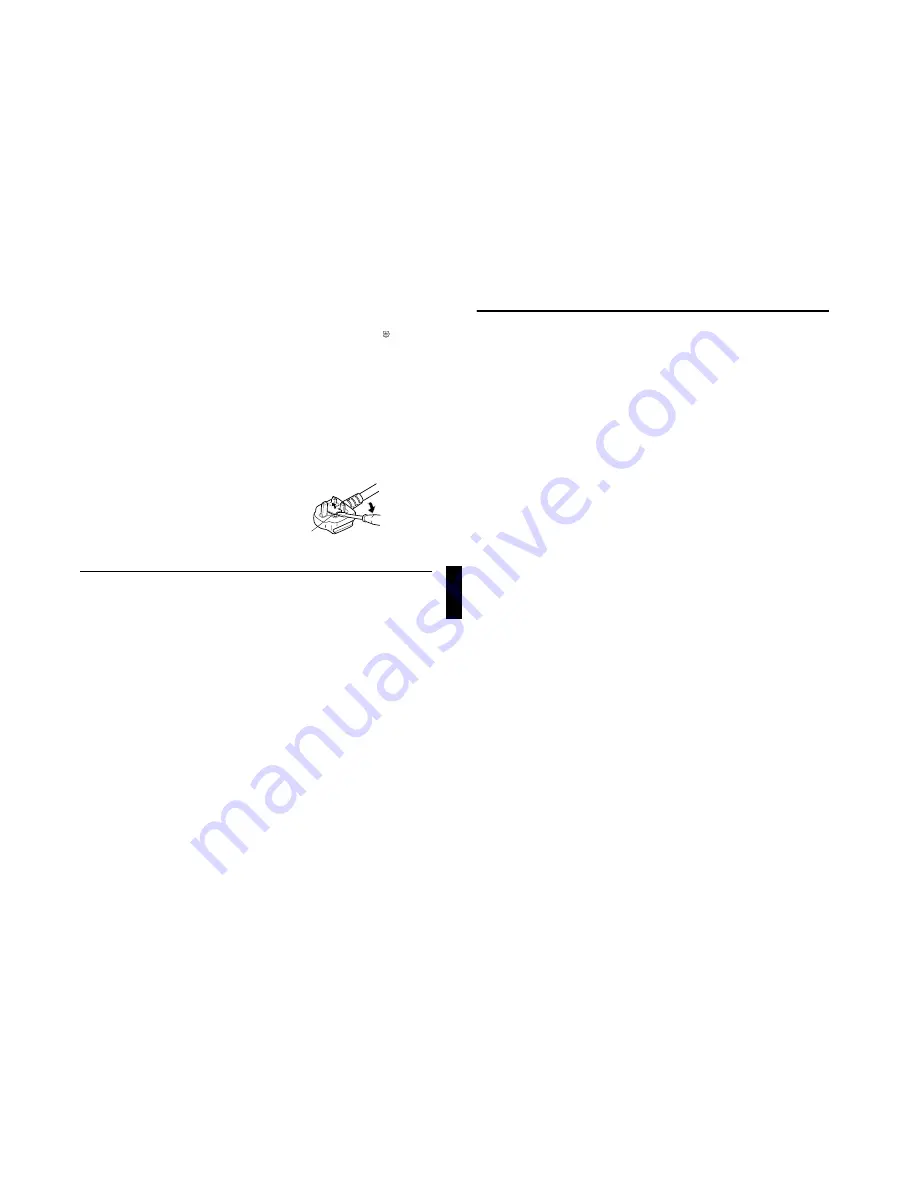
How To Replace The Fuse
Open the fuse compartment with the blade screwdriver, and 
replace the fuse.
(* An example is shown in the illustration below.)

Fuse

4

Contents

SAFETY PRECAUTIONS ................. 2
Contents ........................................... 4
Accessories ..................................... 5
Controls and Features .................... 6

Front Side / Top Surface / Right Side .....................6
Left-hand Side / Rear Side......................................7
Bottom Surface .......................................................8
Control Panel on the Projector ................................9
Connector Panel ...................................................11
Remote Control Unit..............................................12
Installing Batteries.................................................14
Precautions for using batteries..............................14

Installing the Projector.................. 15

Precautions for Installation....................................15
Adjusting the Inclination of the Projector...............16
Installing the Projector against the Screen............17
Projection Distance and Screen Size....................18
Setting the Amount of Lens Shifting......................19
Effective Range and Distance of the 
Remote Control Unit..............................................20
Setting the Position Selecting Screw for 
Ceiling Mounting ...................................................21

Connecting to Various Devices.... 22

Signals that Can Be Input to the Projector ............22
Connecting to Video Devices ................................24
Connecting to Hi-Vision Devices...........................25
Connecting to Other Devices ................................26
Connecting to Devices which Control the 
Projector................................................................27
Connecting to Computer Devices .........................28
Connecting to Computer Devices (Cont.) .............29
Connecting the Power Cord ..................................30
Removing the Lens Cap........................................30

Basic Operations ........................... 31

1. Turning on the Power........................................31
2. Select the Input source to be Projected ............32
3. Adjust the Screen Size (Zooming) ....................32
4. Adjust Focus .....................................................33
5. Adjusting Sound Volume...................................33
Turning off Image and Sound (HIDE)....................34
Removing the Trapezoidal Distortion of the 
Image ....................................................................34
Quick Alignment Function
(QUICK ALIGN.)....................................................35
Displaying a Still Picture (FREEZE) ......................36
Zooming a Part of the Image 
(DIGITAL ZOOM +/–) ............................................36

Menu Operations ........................... 37

Basic Menu Operation...........................................42
Basic Menu Operation (Cont.)...............................43
Changing the Color System 
(Video Menu Mode Only) ......................................44
Changing the Language Display ...........................45
Changing the Screen aspect ratio/HDTV format 
(Video Menu Mode Only) ......................................45
Adjusting Tracking / Phase ...................................46

Adjusting Picture Quality ...................................... 47
Adjusting Color temperature................................. 48
Adjusting the Video Screen/Menu Position .......... 49
Changing the Image Tone/Aspect Ratio 
(Video Menu Mode Only) ..................................... 50
Changing the Image Size - Resize Function 
(PC Menu Mode Only).......................................... 51
Changing the Clamp pulse position 
(PC Menu Mode Only).......................................... 51
Setting and Adjusting Other Functions 
(OPTIONS)........................................................... 52
Getting Information............................................... 54

Replacing the Fuse ........................ 55
Replacing the Light-Source Lamp 56
Cleaning and Replacing the 
Filter Cover ..................................... 60
Troubleshooting............................. 61
Warning Indication......................... 63
Warning Messages ........................ 64
Specifications................................. 66

Outside dimensions.............................................. 68
Pin assignment (Specifications for terminals) ...... 69

RS-232C external control .............. 70
Appendix......................................... 72

Содержание DLA-M2000LE

Страница 1: ...LA M2000LE Mar 2000 No 51781 ENGLISH PROJECTOR DLA M2000LU INSTRUCTIONS U T D W FOCUS ZOOM SHIFT VOLUME QUICK ALIGN SHUTER EN T E R HIDE OPERATE PRESET ESCAPE DIGITAL ZOOM KEYSTONE PC VIC SELECT MENU FREEZE VIDEO RM M2000 REMOTE CONTROL UNIT Lenses are optional ...

Страница 2: ...e of the grounded plug Power supply cords should be routed so that they are not likely to be walked on or pinched by items placed upon or against them Pay particular attention to cords at doors plugs receptacles and the point where they exit from the product For added protection of this product during a lightning storm or when it is left unattended and unused for long periods of time unplug it fro...

Страница 3: ... 36 Zooming a Part of the Image DIGITAL ZOOM 36 Menu Operations 37 Basic Menu Operation 42 Basic Menu Operation Cont 43 Changing the Color System Video Menu Mode Only 44 Changing the Language Display 45 Changing the Screen aspect ratio HDTV format Video Menu Mode Only 45 Adjusting Tracking Phase 46 Adjusting Picture Quality 47 Adjusting Color temperature 48 Adjusting the Video Screen Menu Position...

Страница 4: ...LISH PROJECTOR DLA M2000LE INSTRUCTIONS U T D W FOCUS ZOOM SHIFT VOLUME QUICK ALIGN SHUTER EN T E R HIDE OPERATE PRESET ESCAPE DIGITAL ZOOM KEYSTONE PC VIC SELECT MENU FREEZE VIDEO RM M2000 REMOTE CONTROL UNIT Lenses are optional ...

Страница 5: ...of this product during a lightning storm or when it is left unattended and unused for long periods of time unplug it from the wall outlet and disconnect the cable system This will prevent damage to the product due to lightning and power line surges Do not overload wall outlets extension cords or convenience receptacles on other equipment as this can result in a risk of fire or electric shock Never...

Страница 6: ...ol Unit 12 Installing Batteries 14 Precautions for using batteries 14 Installing the Projector 15 Precautions for Installation 15 Adjusting the Inclination of the Projector 16 Installing the Projector against the Screen 17 Projection Distance and Screen Size 18 Setting the Amount of Lens Shifting 19 Effective Range and Distance of the Remote Control Unit 20 Setting the Position Selecting Screw for...

Страница 7: ...our dealer Remote control unit RM M2000G AA R6 size dry cell battery 2 for checking operation Power cord approx 2 5 m Personal computer connection cable approx 2 m D sub 3 row 15 pin AV connection cable approx 2 m Remote cable approx 3 m 3 5 mm dia stereo mini plug Conversion adapter for Mac for Macintosh BNC RCA Conversion plug for United Kingdom for European continental countries Hex wrench ...

Страница 8: ...jector A lens hole blind cover black one is installed when the projector is shipped from the factory For details on the types of optional lenses available refer to page 18 CAUTION Please consult your authorized dealer or service center for information about attaching an optional lens 8 Lens cap This is the lens cap provided for the optional lens When you are not using the projector attach the lens...

Страница 9: ...he MAIN POWER switch while in the cool down mode Do not place the projector on its side or stand it upright while in the cool down mode this may block the vents 2 OPERATE indicator ON When the projector is in operation projecting OFF When the projector is not in operation not projecting 3 OPERATE button When the projector is in the stand by mode press this button one second or more and the project...

Страница 10: ...to be used to this terminal The input audio signal is reproduced by the speaker of the projector Note When the PC input terminal signal source PC1 or PC2 is switched with the PC button it is necessary to reconnect the audio cable to the active device since the projector has only a single PC AUDIO input terminal 5 REMOTE terminal stereo mini jack To use the remote control as a wired unit connect th...

Страница 11: ...nified up to four times on the screen Each time the or button is pressed the image is enlarged or the enlarged image is reduced by a certain degree Refer to page 36 Images which are enlarged with the digital zoom become less clear Depending on the video signal source UXGA etc this button does not work p ESCAPE button This button is used in the menu mode to return to the previous menu When the main...

Страница 12: ... normal use However the batteries supplied are for confirming operation and may not run that long When the remote control starts failing to work properly replace the batteries with new ones 15 Installing the Projector ENGLISH DEUTSH FRANÇAIS ITALIANO ESPAÑOL Installing the Projector Precautions for Installation CAUTIONS 1 Before instalation do not connect the projector s power cord 2 Do not instal...

Страница 13: ...ver Shorten Extend Adjustable foot at the rear Fixing foot at the rear 17 Installing the Projector ENGLISH DEUTSH FRANÇAIS ITALIANO ESPAÑOL Installing the Projector against the Screen The projector should be placed so that the center line of the lens is at a right angle to the screen as shown in the following figures Side view Top view Trapezoidal distortion correctable maximum angle The projector...

Страница 14: ...thorized dealer or service center to install the lens Lens model Function GL M2910G Powered focus for rear projection short focal length subject ratio 1 1 0 influence GL M2915SG Powered focus short focal length subject ratio 1 5 1 powered image adjustment 2 zoom includes manual vertical shift function 30 55 influence GL M2920ZG Powered zoom powered focus lens subject ratio 2 1 3 1 50 influence GL ...

Страница 15: ...o bottom and right to left the position selecting screw for ceiling mounting must be turned to switch to ceiling mounting This will correct variance in color images shading which otherwise would occur in ceiling mounting To revert to normal desktop setting turn the position selecting screw for ceiling mounting back to the initial position factory shipped When using the projector in an upside down ...

Страница 16: ...t be used Even signals out of the range could be projected However it may not sharp enough On the other hand even some of the signals within the range may require adjustment depending on the video board used When a signal other than listed in the table on page 23 is input the image could be partially erased or an unneeded fold over image could appear Even signals in the frequency range that can be...

Страница 17: ...odisc player VCR Video cassette recorder S video cable separately available BNC RCA conversion plug accessory To AV IN 25 Connecting to Various Devices ENGLISH DEUTSH FRANÇAIS ITALIANO ESPAÑOL Connecting to Hi Vision Devices Before connection be sure to turn off both the projector and Hi Vision devices Read thoroughly the manual that comes with each Hi Vision device Use separately available BNC ca...

Страница 18: ...roughly the manual that comes with each device to be connected By connecting a computer to the RS 232C terminal you can control the projector Obtain connection cables as required Use a reverse connection cable For details refer to RS 232C external control on page 70 For further details consult your dealer or an authorized service center The supplied remote control can be used as a wired remote con...

Страница 19: ... external display output need to be switched RGB output devices Desktop type To monitor connector Separate cable separately available To PC 2 To H Cs To V Laser video disc player etc To G To B To R To H Cs To V To PC 2 To PC 2 To PC 1 To PC OUT Cable supplied with the display or separately available D sub 3 row 15 pin When a display monitor is connected to the PC OUT terminal you can view the vide...

Страница 20: ...PRES ET ESCA PE ENTE R OPER ATE Power cord supplied 31 ENGLISH DEUTSH FRANÇAIS ITALIANO ESPAÑOL Basic Operations Projector s buttons Remote control unit The following describes the basic procedure for normal use of the projector 1 Turning on the Power 1 Turn on the MAIN POWER switch ON The main power turns on and the STAND BY indicator comes on 2 Press the OPERATE button for one second or more The...

Страница 21: ... M2915SG GL M2920ZG GL M2930SZG with zooming function Adjust the projected screen size with the following buttons on the remote control unit LAMP TEMP STAND BY HIDE PC VIDEO MENU KEYSTONE VOLUME PRESET ESCAPE ENTER OPERATE PC button VIDEO button U T D W FOCUS ZOOM SHIFT VOLUME QUICK ALIGN SHUTTER EN T E R PRESET ESCAPE DIGITAL ZOOM KEYSTONE PC VIC SELECT MENU VIDEO PC button VIDEO button ZOOM butt...

Страница 22: ...tton ESCAPE button HIDE button ESCAPE button U T D W FOCUS ZOOM SHIFT VOLUME QUICK ALIGN SHUTER EN T E R HIDE OPERATE PRESET ESCAPE DIGITAL ZOOM KEYSTONE PC VIC SELECT MENU FREEZE VIDEO RM M2000 REMOTE CONTROL UNIT KEYSTONE button PRESET button HIDE HIDE Remote control unit Projector Keystone 123 KEYSTONE KEYSTONE KEYSTONE KEYSTONE Projected image with trapezoidal distortion Remote control unit Pr...

Страница 23: ... MENU FREEZE VIDEO RM M2000 REMOTE CONTROL UNIT FREEZE button PRESET button ESCAPE button DIGITAL ZOOM button Cursor 5 2 3 ENTER button FREEZE FREEZE D ZOOM FREEZE Remote control unit Digital zoom 1 2 DIGITAL ZOOM Remote control unit EN T E R 37 ENGLISH DEUTSH FRANÇAIS ITALIANO ESPAÑOL Menu Operations You can adjust picture quality set functions get information on the input video signal etc using ...

Страница 24: ...ice related signals Image adj Refer to page 47 Brightness Brightness of the video image being projected can be adjusted 30 to 30 0 Contrast Contrast of the video image being projected can be adjusted 30 to 30 0 Sharpness Sharpness of the video image being projected can be adjusted 5 to 5 0 Color Color density of the video image being projected can be adjusted 30 to 30 0 Tint Tint of the video imag...

Страница 25: ...st of the picture image being projected can be adjusted 30 to 30 0 Sharpness Adjust the outline of letters etc 1 2 3 4 5 3 All reset Resets above items to the factory set values Yes No Setting Tracking The lateral size and display area of picture image can be adjusted 128 to 127 Refer to page 46 Phase Flickering or dim picture image can be adjusted 0 to 31 Refer to page 46 Position Video screen po...

Страница 26: ...ious menu To exit the menu mode directly press the MENU button The submenu disappears and the original video image is restored MENU MENU Remote control unit Projector EN T E R Remote control unit Projector EN T E R Remote control unit Projector EN T E R Remote control unit Projector EN T E R Remote control unit Projector 43 Menu Operations ENGLISH DEUTSH FRANÇAIS ITALIANO ESPAÑOL Basic Menu Operat...

Страница 27: ...E 45 Menu Operations ENGLISH DEUTSH FRANÇAIS ITALIANO ESPAÑOL Changing the Language Display The on screen language is set to English when shipped from the factory When you want to change to another language set it as follows 1 Press the MENU button The main menu appears on the screen 2 Select Language with the cursor button 5 or and press 3 3 3 3 or the ENTER button The Language submenu appears on...

Страница 28: ...sition Resize Clamp 123 12 ENTER ST FP BP 1 1 Panel Aspect Adjustment item Button Adjustment content Tracking 2 or 3 The picture image shrinks laterally right to left or extends laterally left to right 128 127 Phase 2 or 3 Set to a position where text appears clear PC menu mode only 0 31 47 Menu Operations ENGLISH DEUTSH FRANÇAIS ITALIANO ESPAÑOL Adjusting Picture Quality In the Image adj submenu ...

Страница 29: ...in 2 or 3 Adjusts the red level 0 to 255 G Gain 2 or 3 Adjusts the green level 0 to 255 B Gain 2 or 3 Adjusts the blue level 0 to 255 49 Menu Operations ENGLISH DEUTSH FRANÇAIS ITALIANO ESPAÑOL Adjusting the Video Screen Menu Position The position of the video screen and the menu on the video screen can be adjusted You can finely adjust the video screen position The menu will move widely on the vi...

Страница 30: ...r than that of the projector s D ILA element 1365 pixels 1024 pixels Panel The picture image projected is virtually enlarged to the full size 1365 pixels 1024 pixels The horizontal and vertical enlargement ratio will differ depending on the original image and the image will be deformed Aspect While maintaining the original aspect ratio the video image projected is virtually enlarged until either t...

Страница 31: ...for more details about adjusting the keystone CAUTION Correctly set the PC2 BNC according to the device connected to the PC2 terminals However when the PC signal is input RGB input is used irrespective of which setting YPBPR is made Adjustment item Button Adjustment content Menu display 2 or 3 Sets whether to clear the menu display automatically or not 15sec Clears the display automatically in abo...

Страница 32: ...Color temp Options Language Information Input Switcher Source Lamp time VIDEO CH 0 NTSC 123 h Menu Input Switcher Resolution Frequency H Frequency V Lamp time PC 1 CH 0 1280 1024 79 9 75 123 kHz Hz h Image adj Setting Color temp Options Language Information 55 ENGLISH DEUTSH FRANÇAIS ITALIANO ESPAÑOL Replacing the Fuse A fuse is used to protect the power source of the projector If the fuse is blow...

Страница 33: ...rcury lamp Be careful when disposing of the light source lamp If anything is unclear please consult your dealer ESCAPE Lamp replacement ESCAPE Warning Lamp replacement 900 hours 1000 hours 1010 hours Accumulated used hours of the light source lamp The LAMP indicator lights up on the projector On the screen Lamp replacement appears in red To cancel this message press the ESCAPE button Arrange for a...

Страница 34: ...ro 0 After resetting a new count will start for the new light source lamp Projector s button 1 Turn on the MAIN POWER switch to go into stand by mode In stand by mode the STAND BY indicator on the projector lights up 2 Press the following buttons on the projector sequentially 1 Momentary press the PC button 2 Momentary press the ENTER button 3 Momentary press the ESCAPE button 4 Press and hold the...

Страница 35: ...ck the fuse If it is blown replace it 55 Is the lamp replacement opening cover closed correctly Turn off the MAIN POWER switch close the lamp replacement opening cover correctly and turn on the MAIN POWER switch again 7 31 56 Is the filter closed correctly Turn off the MAIN POWER switch fit the filter correctly and turn on the MAIN POWER switch again 7 31 60 Has the lamp life expired Has the lamp ...

Страница 36: ...tch the polarities of batteries correctly to and to 14 Are batteries exhausted Replace with new batteries 14 Is there a shielding object between the remote control unit and the remote sensor Remove any shielding objects 20 Is the distance too long Use the remote control unit at a nearer point 20 Is either side of remote cable disconnected Firmly insert the remote cable when using the remote contro...

Страница 37: ...can be frozen 13 36 PC 1 No image signal is inputted PC 1 Frequency of image signal is out of range PC 1 No image signal is shown for this type FREEZE FREEZE 65 Warning Messages ENGLISH DEUTSH FRANÇAIS ITALIANO ESPAÑOL Memo The message display language corresponds to the menu display language setting This is set to English English when the projector is bought The display language can be selected f...

Страница 38: ...gnates the delimiter for ID Command and Parameter 20h Normal Termination Status 0 30h CR Designates the terminal of the data 0Dh Baud rate 9600bps 19200bps Data length 8 bits Parity None Stop bit 1 bit Flow control None Header ID SP Command SP Parameter CR Header ID SP Normal Termination Status SP Parameter CR 71 RS 232C external control ENGLISH DEUTSH FRANÇAIS ITALIANO ESPAÑOL 2 3 Parameters used...

Страница 39: ...rojection screen size Diagonal length Approximate projection distance unit ft m For 4 3 aspect ratio screens For 16 9 aspect ration screens Wide end Tele end Wide end Tele end 40 approx 101 6 cm 8 53 2 60 42 approx 106 7 cm 8 23 2 51 9 96 2 73 50 approx 127 0 cm 9 74 2 97 10 60 3 23 60 approx 152 4 cm 11 65 3 55 8 50 2 59 12 66 3 86 70 approx 177 8 cm 9 09 2 77 13 55 4 13 9 84 3 00 14 73 4 49 80 a...

Страница 40: ...40 DLA M2000LU DLA M2000LE VP0103 DP1051 Printed in Japan LCT0941 001A LCT0940 001A 0201 K CR VP 2001 VICTOR COMPANY OF JAPAN LIMITED DLA M2000LU U PROJECTOR DLA M2000LE U PROJECTOR VICTOR COMPANY OF JAPAN LIMITED ...

Отзывы: