background image

I

IMPORTANT SAFEGUARDS

1. Read all of these instructions.
2. Save these instructions for later use.
3. All warnings on the product and in the operating instructions should be adhered to.
4. Unplug this appliance system from the wall outlet before cleaning. Do not use liquid cleaners or aerosol

cleaners. Use a damp cloth for cleaning.

5. Do not use attachments not recommended by the appliance manufacturer as they may cause hazards.
6. Do not use this appliance near water - for example, near a bathtub, washbowl, kitchen sink, or laundry tub,

in a wet basement, or near a swimming pool, etc.

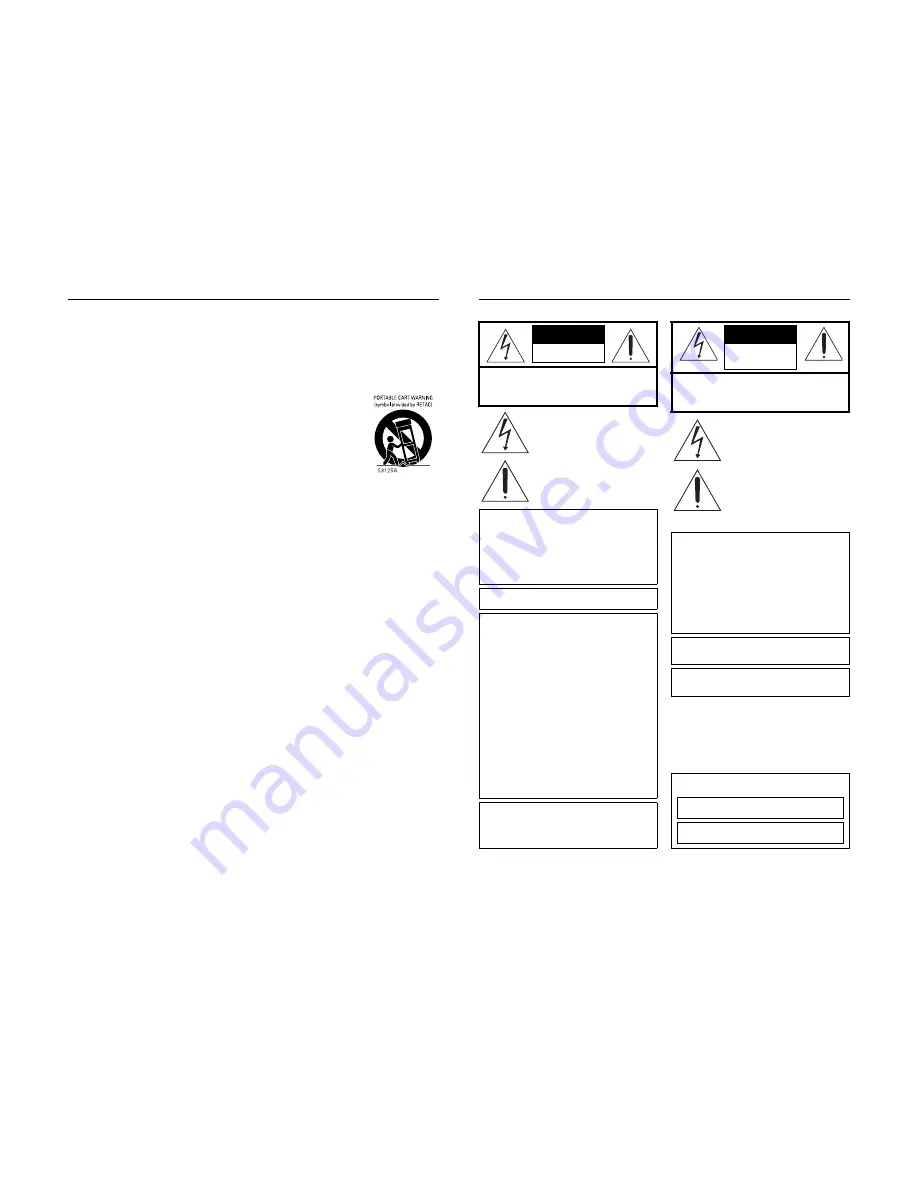
7. Do not place this appliance on an unstable cart, stand, or table. The appliance may

fall, causing serious injury to a child or adult, and serious damage to the appliance.
Use only with a cart or stand recommended by the manufacturer, or sold with the
appliance.
Wall or shelf mounting should follow the manufacturer’s instructions, and should
use a mounting kit approved by the manufacturer.
An appliance and cart combination should be moved with care. Quick stops,
excessive force, and uneven surfaces may cause the appliance and cart combina-
tion to overturn.

8. Slots and openings in the cabinet and the back or bottom are provided for ventila-

tion, and to insure reliable operation of the appliance and to protect it from over-
heating, these openings must not be blocked or covered. The openings should
never be blocked by placing the appliance on a bed, sofa, rug, or other similar surface. This appliance
should never be placed near or over a radiator or heat register. This appliance should not be placed in a
built-in installation such as a bookcase unless proper ventilation is provided.

9. This appliance should be operated only from the type of power source indicated on the marking label. If

you are not sure of the type of power supplied to your home, consult your dealer or local power company.
For appliance designed to operate from battery power, refer to the operating instructions.

10. This appliance system is equipped with a 3-wire grounding type plug (a plug having a third (grounding

pin). This plug will only fit into a grounding-type power outlet. This is a safety feature. If you are unable to
insert the plug into the outlet, contact your electrician to replace your obsolete outlet. Do not defeat the
safety purpose of the grounding plug.

11. For added protection for this product during a lightning storm, or when it is left unattended and unused for

long periods of time, unplug it from the wall outlet and disconnect the antenna or cable system. This will
prevent damage to the product due to lightning and power-line surges.

12. Do not allow anything to rest on the power cord. Do not locate this appliance where the cord will be

abused by persons walking on it.

13. Follow all warnings and instructions marked on the appliance.
14. Do not overload wall outlets and extension cords as this can result in fire or electric shock.
15. Never push objects of any kind into this appliance through cabinet slots as they may touch dangerous volt-

age points or short out parts that could result in a fire or electric shock. Never spill liquid of any kind on the
appliance.

16. Do not attempt to service this appliance yourself as opening or removing covers may expose you to dan-

gerous voltage or other hazards. Refer all servicing to qualified service personnel.

17. Unplug this appliance from the wall outlet and refer servicing to qualified service personnel under the fol-

lowing conditions:
a.When the power cord or plug is damaged or frayed.
b.If liquid has been spilled into the appliance.
c.If the appliance has been exposed to rain or water.
d.If the appliance does not operate normally by following the operating instructions. Adjust only those con-

trols that are covered by the operating instructions as improper adjustment of other controlsmay result
in damage and will often require extensive work by a qualified technician to restore the appliance to
normal operation.

e.If the appliance has been dropped or the cabinet has been damaged.
f. When the appliance exhibits a distinct change in performance - this indicates a need for service.

18. When replacement parts are required, be sure the service technician has used replacement parts speci-

fied by the manufacturer that have the same characteristics as the original part. Unauthorized substitu-
tions may result in fire, electric shock, or other hazards.

19. Upon completion of any service or repairs to this appliance, ask the service technician to perform routine

safety checks to determine that the appliance is in safe operating condition.

II

SAFETY PRECAUTIONS (For USA & Canada)

CAUTION

RISK OF ELECTRIC 

SHOCK DO NOT OPEN

CAUTION: TO REDUCE THE RISK OF ELECTRIC SHOCK, 

DO NOT REMOVE COVER (OR BACK).

NO USER-SERVICEABLE PARTS INSIDE.

REFER SERVICING TO QUALIFIED SERVICE PERSONNEL

The lightning flash with arrowhead symbol,

within an equilateral triangle, is intended to

alert the user to the presence of uninsulated

“dangerous voltage” within the product’s enclo-

sure that may be of sufficient magnitude to

constitute a risk of electric shock to persons.

The exclamation point within an equilateral tri-

angle is intended to alert the user to the pres-

ence of important operating and maintenance

(servicing) instructions in the literature accom-

panying the appliance.

WARNING:

TO REDUCE THE RISK OF FIRE OR ELEC-

TRIC SHOCK, DO NOT EXPOSE THIS

APPLIANCE TO RAIN OR MOISTURE.

This unit should be used with 120 V AC only.
CAUTION:

To prevent electric shocks and fire hazards, DO

NOT use any other power source.

NOTE:

The rating plate (serial number plate) is on the rear of the unit.

INFORMATION

This equipment has been tested and found to comply with the

limits for a Class B digital device, pursuant to Part 15 of the

FCC Rules. These limits are designed to provide reasonable

protection against harmful interference in a residential installa-

tion. This equipment generates, uses, and can radiate radio

frequency energy and, if not installed and used in accordance

with the instructions, may cause harmful interference to radio

communications. However, there is no guarantee that interfer-

ence will not occur in a particular installation.

If this equipment does cause harmful interference to radio or

television reception, which can be determined by turning the

equipment off and on, the user is encouraged to try to correct

the interference by one or more of the following measures:

z

Reorient or relocate the receiving antenna.

z

Increase the separation between the equipment and
receiver.

z

Connect the equipment into an outlet on a circuit different
from that to which the receiver is connected.

z

Consult the dealer or an experienced radio/TV technician
for help.

CAUTION

CHANGES OR MODIFICATIONS NOT APPROVED BY JVC

COULD VOID USER’S AUTHORITY TO OPERATE THE

EQUIPMENT.

THIS DEVICE COMPLIES WITH PART 15 OF THE FCC

RULES. OPERATION IS SUBJECT TO THE FOLLOWING TWO

CONDITIONS: (1) THIS DEVICE MAY NOT CAUSE HARMFUL

INTERFERENCE, AND (2) THIS DEVICE MUST ACCEPT ANY

INTERFERENCE RECEIVED, INCLUDING INTERFERENCE

THAT MAY CAUSE UNDESIRED OPERATION.

ATTENTION

RISQUE D’ELECTRO-

CUTION NE PAS 

OUVRIR

ATTENTION: POUR EVITER TOUT RISQUE D’ELECTROCUTION

NE PAS OUVRIR LE BOITER. 

AUCUNE PIECE INTERIEURE N’EST 

A REGLER PAR L’UTILISATEUR.

SE REFERER A UN AGENT QUALIFIE EN CAS DE PROBLEME.

Le symbole de l’éclair à l’intérieur d’un triangle

équilatéral est destiné à alerter l’utilisateur sur

la présence d’une “tension dangereuse” non

isolée dans le boîtier du produit. Cette tension

est suffisante pour provoquer l’électrocution

de personnes.

Le point d’exclamation à l’intérieur d’un trian-

gle équilatéral est destiné à alerter l’utilisateur

sur la présence d’opérations d’entretien impor-

tantes au sujet desquelles des renseigne-

ments se trouvent dans le manuel

d’instructions.

* Ces symboles ne sont utilisés qu’aux Etats-

Unis.

AVERTISSEMENT:

POUR EVITER LES RISQUES D’INCENDIE

OU D’ELECTROCUTION, NE PAS

EXPOSER L’APPAREIL A L’HUMIDITE OU A

LA PLUIE.

Ce magnétoscope ne doit être utilisé que sur du

courant alternatif en 120 V.
ATTENTION:
Afin d’éviter tout resque d’incendie ou d’électro-

cution, ne pas utiliser d’autres sources d’alimen-

tation électrique. 

REMARQUE:

La plaque d’identification (numéro de série) se trouve sur le

panneau arrière de l’appareil.

WARNING:

The battery used in the BR-HD50 must be replaced by a JVC

authorized service dealer only.

INFORMATION (FOR CANADA)

RENSEIGNEMENT (POUR CANADA) 

This Class B digital apparatus complies with Canadian

ICES-003.

Cet appareil numérique de la Class B est conforme à la

norme NMB-003 du Canada.

Содержание BR-HD50

Страница 1: ...ble performance For Customer Use Enter below the Serial No which is located on the rear of cabinet Retain this information for future reference Model No BR HD50U Serial No This instruction manual is made from 100 recycled paper is a registered trademark owned by Victor Company of Japan Limited is a registered trademark in Japan the U S A the U K and many other countries 2005 Victor Company of Japa...

Страница 2: ... service technician has used replacement parts speci fied by the manufacturer that have the same characteristics as the original part Unauthorized substitu tions may result in fire electric shock or other hazards 19 Upon completion of any service or repairs to this appliance ask the service technician to perform routine safety checks to determine that the appliance is in safe operating condition I...

Страница 3: ...e do so in accordance with applicable national legislation or other rules in your country for the treatment of old electrical and electronic equipment Attention This symbol is only valid in the European Union IV SAFETY PRECAUTIONS For Europe Warning Notice FOR YOUR SAFETY Australia 1 Insert this plug only into effectively earthed three pin power outlet 2 If any doubt exists regarding the earthing ...

Страница 4: ...t Or connect with a foot switch used for recording operations z Recording and playback of time codes z Backup recording function With the combined use of other DV machines long time continuous recording is possible z Multi cue up Up to 5 points of the tape position can be reg istered and cued up z Index blank search function It can search for positions where index signals are recorded and unrecord...

Страница 5: ...ght owner z JVC shall not guarantee the quality of record ing and playback should BR HD50 fail to function normally due to defects either of the unit itself or the video cassette tapes E 5 BR HD50 can record onto and playback standard DV and mini DV cassette tapes for SP mode only Use the following JVC cassettes with the B or A the logo Memo z DVCAM cassette can be recorded in the HDV or DV format...

Страница 6: ...del 60Hz NTSC E model 50Hz PAL HDV and DV format HDV 60 or 50 IEEE1394 switch E 7 HDV 720p and DV format 1 For HDV DV signals the unit records the same signals as the input signals 2 During analog audio input only CH1 CH2 are recorded Viewing video signal display Example 720 30p 720 effective scanlines 30 frame progressive scan 480 60i 480 effective scanlines 60 field interlace scan Recording time...

Страница 7: ...s 3 Refer to the following table as a guide for cleaning Note z Under low humidity conditions 10 RH to 30 RH perform head cleaning at intervals of half of the periods stated in the table z If an M DV80 tape is used immediately after cleaning the message HEAD CLEANING REQUIRED may not disappear It does only after the tape has run for some time z Use the cleaning tape at room temperature 10 C to 35 ...

Страница 8: ...rator value can be checked while the button is being held down If TC DUPLI DV Menu is set to AUTO the time code date and time of the IEEE1394 terminal can be checked In DV mode only 2 1 3 4 E 11 PLAY button LED Press this button to start playing back a tape During playback the green LED lights up When recording is paused press this but ton to resume recording PAUSE button LED During recording pres...

Страница 9: ...e video format is DV HDV indicator is off Note z Video and audio recording and playback using the IEEE1394 terminal are unavailable when the switch setting differs from the video format z When the IEEE1394 terminal is used to input output video or audio signals with a non linear editing system and the format is changed by switching this switch either reconnect the IEEE1394 cable or use the OPERATE...

Страница 10: ...his button to start blank search It searches the unrecorded part of the tape and goes into the still mode XPage 54 Blank search During the STOP or REC mode the audio recording level is decreased Pressing simul taneously with Q or S button When Q S KEY FUNC in the SYSTEM 1 2 Menu screen is set to VAR RECV XPage 44 Adjusting audio recording level When the setting screen is displayed this button is u...

Страница 11: ...4 It displays the Menu setting screen Date Time setting screen and warning informa tion If DISPLAY in the DISPLAY Menu screen is set to ON or AUTO information will be displayed on screen e g the operation mode date time and counter XPage 20 6 CH1 AUDIO IN terminal RCA Use this terminal to input analog audio signals To enable audio input via this terminal set the INPUT SELECT switch located on the ...

Страница 12: ...wer to the unit bDC power input terminal This terminal is for inputting DC 12 V Connect the DC power cord of the supplied AC adapter Memo z When power is supplied to this terminal the OPERATE indicator located on the front panel lights up The indicator turns red when BR HD50 is in the OPERATE OFF state z Whether to set BR HD50 to enter the OPER ATE ON mode or OPERATE OFF mode when power is supplie...

Страница 13: ...t displays the current settings and operating status No Item Description 1 The 1 display contents differs between DV format and HDV format DV format Sampling frequency audio output CH Memo If the counter display position is set to the upper left this item will be displayed on the lower right DV Displayed when recording or playing back a tape with video in DV format Sampling frequency While recordi...

Страница 14: ...will be displayed if the COUNTER switch is set to TC The time code shows an 8 digit number hour minute second and frame At playback the time codes recorded on the tape are displayed The prefix indicates the time code mode TCG Time code generator data TCR Time code reader data DTCG Time code data received from the IEEE1394 terminal In DV mode Depending on the framing mode the symbols for the second...

Страница 15: ...layed again BR HD50 could be defective Consult your JVC authorized service agent 3 D V 2 K CH 1 2 S P 2 0m i n H E A D C L E A N I NG R EQU I R E D NO HD V V D S I GN A L 0 6 1 0 0 5 S T A ND B Y O F F 1 1 2 0 0 0 T CR 0 2 0 0 0 0 0 0 A B E 25 z B display Messages for incorrect operation are displayed for about 3 seconds They are displayed when the DISPLAY mode is ON or AUTO Display Description IN...

Страница 16: ... Y C OUT terminal Outputs Y C separate video signals Connect to a monitor using an S video cable 4PIN In addition to the Y C separate video signals it also displays the on screen status display and the menu settings screen When a wide screen ID signal exists in the video signal the ID signal is output z COMPONENT OUT terminal Outputs analog component video signals Connect to an HD compatible monit...

Страница 17: ...elected from 4 chan nels using A OUTPUT DV in the AUDIO Menu screen z PHONES terminal Stereo ø3 5 Connect headphones z IEEE1394 terminal 6P This is also an input terminal Connect an IEEE1394 6PIN cable Digital audio signals are output with the video IEEE1394 AUDIO OUT AUDIO IN HDMI OUT Audio output e g VCR Camera Digital audio HDV DV Analog audio HD monitor Digital audio HDV DV Video input e g VCR...

Страница 18: ...attach the supplied ferrite core to the DC cord XPage 29 1 Remove one screw on the back panel of the unit and remove the DC cord clamp 2 Connect the DC cord of the AC adapter to the DC IN terminal of BR HD50 3 To prevent accidental disconnection of the DC cord insert the DC cord into the clamp orient the clamp as shown in the figure above and secure the clamp to the unit Use the screw removed in s...

Страница 19: ...50 SEL in the SYSTEM 2 2 Menu screen 2 Set using OUT FORMAT 60 OUT FORMAT 50 in the VIDEO Menu screen Inputvideo format HD signal format 1 Input signal Tape record ing format HDMI OUT terminal COMPONENT OUT terminal 2 LINE OUT terminal Y C OUT terminal HDV 60Hz 720 30p 720 30p 720 60p 480 60p 1080 60i 480 60i 480 60i 720 24p 720 24p 480 60p 480 60p 50Hz 720 25p 720 25p 720 50p 576 50p 1080 50i 576...

Страница 20: ...ate video 480i 576i Analog audio HDV 720p 480p 576p DV 480i 576i Digital video Digital audio D A con version D A con version D A con version D A con version Cross converter HDV format DV format Down converter Digital video Digital audio Digital video Digital audio Digital audio Analog audio Analog video Analog video Playback E 35 PREPARATION Turning on off the power Note After the OPERATE button i...

Страница 21: ...I T E I N D E X O P E R A T I O N L O C K O N 6 0 5 0 S E L 6 0 F A C T O R Y S E T T I N G C A N C E L D R U M H O U R M E T E R 0 0 0 0 0 0 P A G E B A C K SYSTEM 2 2 Menu screen E 37 PREPARATION Loading Ejecting cassette Use standard DV cassette tapes or mini DV cassette tapes 1 Check the cassette tape Setting the rear switch Push it to REC for recording To prevent its contents from being erase...

Страница 22: ...2 0 0 P A G E B A C K TC UB CLOCK 2 2 Menu screen CLOCK ADJUST Menu screen Date MM DD YY U model Date DD MM YY E model Time Hour minute Cursor E 39 Memo The seconds for the time cannot be set up After the minute is set up press the SET button in synchronization with the time signal 4 Returning to the TOP Menu from TC UB CLOCK after com pleting all settings Press the Q button Or Press the R or P bu...

Страница 23: ...alog signal input or when playing a tape recorded with DV analog signals the field frequency format is fixed for the region regardless of the 60 50 SEL menu setting U model 60Hz E model 50Hz Check settings Setting the Menu screen S Y S T E M 2 2 D C I N M O D E O P E O F F I N D E X WR I T E I N D E X O P E R A T I O N L O C K O N 6 0 5 0 S E L 6 0 F A C T O R Y S E T T I N G C A N C E L D R U M H...

Страница 24: ... COMPONENT UT terminal Cross converter video etting 60 NATIVE 480I 480P 1080I 720P etting 50 NATIVE 576I 576P 1080I 720P ONITOR SELECT o automatically match the EE image format utput from the HDMI terminal to the video for at of the connected display set this menu em to HDMI A Settings HDMI A OUT FRMT OWN CONV MODE he HDV signal is a wide screen video signal When HDV signals are input the output f...

Страница 25: ...the R button while holding down the Q or S button The audio recording level for both CH1 and CH2 increases Decreasing the recording level Press the P button while holding down the Q or S button The audio recording level for CH1 and CH2 decreases Settings Adjusting audio recording level Simultaneously adjusting both channels BOTH Adjustment buttons Audio level indicator E 45 Adjusting the CH1 chann...

Страница 26: ...of the source unit nears its end BR HD50 can start recording enabling long hour recording Connect the DV terminal of the source unit to the IEEE1394 terminal of BR HD50 with an IEEE1394 cable Set the INPUT SELECT switch on the front panel to HDV DV Set the REMOTE LOCAL switch on the front panel to REMOTE Set BACKUP REC DV in the SYSTEM 1 2 Menu screen Use the following settings according to the ta...

Страница 27: ... screen REMOTE 1 2 Menu screen REMOTE 2 2 Menu screen terminal Signal Min E 49 PLAYBACK Playback settings This unit plays back tapes recorded in HDV DV or DVCAM format SP mode only When playing back tapes recorded in HDV or DVCAM format the front panel HDV or DVCAM indicator is lit Selecting playback video format Set whether to automatically detect the video format for playback or to select a spec...

Страница 28: ...z Q S KEY FUNC Select whether to use the SEARCH S and SEARCH Q buttons for index search or to change the search speed Settings INDEX VAR RECV Selecting repeat playback function z REPEAT MODE This mode is for turning ON OFF the REPEAT PLAYBACK function and selecting the type of REPEAT PLAYBACK If REPEAT PLAYBACK is not performed set it to OFF Settings OFF INDEX V END TAPE END Audio settings Setting...

Страница 29: ...e you press this button the speed increases more Press the SEARCH Q button to decrease the search speed Every time you press this button the speed decreases more Cannot perform slow playback when playing back an HDV tape Slow playback and Search mode Setting Operation Search speed SEARCH S button Fast Slow SEARCH Q button DV recorded tape playback 20 9 U 10 E 5 2 1 0 5 0 33 0 2 0 1 STILL 0 1 0 2 0...

Страница 30: ...rch progressing displayed on the screen The number denotes the corre sponding index position SEARCH button SEARCH button BLANK SEARCH Monitor screen BLANK button E 55 PLAYBACK Repeat playback Three types of repeat playback are available for BR HD50 The repeat playback function can be set with REPEAT MODE in the SYSTEM 1 2 Menu screen REPEAT MODE in the SYSTEM 1 2 Menu screen OFF No repeat playback...

Страница 31: ... button again to change the time code Press the R button to increase the time code data Press the P button to decrease the time code data 3Press the SET button to register the changed time code If no time code is to be registered do not press the SET button Instead press the Q button to make the blinking time code dis play disappear Press the R or P button to bring the cursor to EXIT Press the SET...

Страница 32: ... N T I M E D A T E D A T E T M A V I N F O O N D A T E S T Y L E D D MM Y Y T I M E S T Y L E 2 4 H O U R P A G E B A C K DISPLAY Menu screen The display position can be selected COUNTER switch E 59 TIME CODE Presetting the time code Variable values can be set for the time code and the user s bit for efficient material management and editing Set TCG SELECT to PRESET The time code advance mode is R...

Страница 33: ... the time code data already recorded on the tape and continues recording time code from that value Regeneration Set the TC UB CLOCK 1 2 Menu as follows TCG SELECT REGEN NDF DF 60 No setting required The framing mode will match the tape U model only 1 Insert a tape with time codes recorded 2 Set BR HD50 to the RECORDING PAUSE mode at the posi tion where time codes are to be recorded again 3 Press t...

Страница 34: ... to ON REMOTE 2 2 Menu screen z REMOTE FF REW MODE Use this item to select the operation to be per formed if the FF or REW command is received during playback FF REW or Search If the search operation is not performed prop erly set it to SEARCH z CONTROLLER TYPE in the REMOTE 2 2 Menu screen Set this item to TYPE1 Set the INPUT SELECT switch located on the front panel to HDV DV Set the IEEE1394 swi...

Страница 35: ...S Y S T I X E T E S Y A L P S I D K C O L C B U C T O E D I V O I D U A E T O M E R M E T S Y S U N E M TOP Menu screen Cursor Cursor Menu Items Setting value Item E 65 To display the Menu screen at the next level bring the cursor to NEXT PAGE and press the SET or S button To return to the previous Menu screen do one of the following actions Press the S button Or Select PAGE BACK and press the SET...

Страница 36: ... 1 0 0 5 T I M E 0 0 0 0 P A G E B A C K Top menu Normal screen SYSTEM 1 2 menu REMOTE 1 2 menu AUDIO menu VIDEO menu TC UB clock 1 2 menu DISPLAY menu SYSTEM 2 2 menu REMOTE 2 2 menu TC UB clock 2 2 menu CLOCK ADJUST menu E 67 MENU SCREENS Description of the Menu screens In the following description of the Menus E indicates factory settings Numbers in parentheses by items and settings are the cod...

Страница 37: ...ERATE ON mode INDEX WRITE 0108 OFF 00 EON 01 For enabling disabling index signal recording OFF No index signal ON Select here to record index signals It records an index signal automatically at the position where recording starts OPERATION LOCK 0109 EOFF 00 ON 01 For enabling disabling OPERATION LOCK OFF Turns off OPERATION LOCK and the operation buttons of BR HD50 can be used ON Turns on OPERATIO...

Страница 38: ...ting the action to be performed when the REMOTE termi nal or IEEE1394 terminal received an FF REW command FF REW Sets BR HD50 to perform FF REW when an FF REW command is received Normal setting SEARCH Sets BR HD50 to perform searching when an FF REW command is received Use this setting if the search cue up function does not work properly REM STOP SEL 0206 EEE 00 PB 01 For setting the action to be ...

Страница 39: ...parately BOTH Simultaneously adjusts both channels INDEPEND Adjusts both channels separately PAGE BACK For returning to the TOP Menu screen E 73 VIDEO Menu Screen Item Setting Description SET UP 60 DV 0400 OFF 00 EON 01 For enabling disabling the application of setups to analog video signals composite Y C and SD component During recording and playback Only for U model OFF Does not apply setups ON ...

Страница 40: ... aspect ratio Also when OUT FORMAT 60 is set to 480i or OUT FORMAT 50 is set to 576i this applies to the down converted video output from the COMPONENT OUT terminal during HDV signal input or when playing back a tape recorded with HDV signals SQUEEZE The video is compressed horizontally to display wide screen video on a display with a 4 3 aspect ratio The video will appear elongated vertically LET...

Страница 41: ... the time code input to the IEEE1394 ter minal The framing mode of the time code is fixed to non drop framing Only for U model Use this setting for dubbing tapes recorded with BR DV600 GY DV500 or GY DV550 in the NON DROP FRAME mode Only for U model TC OFFSET 0504 EOFF 00 1F 01 2F 02 2F 03 1F 04 For setting up the timing when time code data from the REMOTE terminal of BR HD50 to the editing remote...

Страница 42: ...screen E 79 OTHERS Warning display When an error occurs BR HD50 automatically self diagnoses the cause and displays an error coded warning message on the monitor If BR HD50 is not in good order or if an operation error has occurred an alarm display will be shown on the monitor Alarm display Displayed regardless of the DISPLAY mode For alarm displays resulting from operation errors refer to page 24...

Страница 43: ...NING 7401 REEL MOTOR FAILURE Reel motor rotation error E 81 OTHERS Troubleshooting Symptom Action No power Is the AC adapter correctly connected Unable to record Is the slide of the cassette tape turned to REC Set it to REC if it is at the SAVE position The operation buttons of BR HD50 do not work Is OPERATION LOCK of the SYSTEM 2 2 Menu set to ON Set it to OFF if the operation buttons are to be u...

Страница 44: ...tting is correct XPage 40 E 83 OTHERS Checking the hour meter This unit displays the drum usage time as the hour meter in DRUM HOUR METER in the SYSTEM 2 2 Menu screen Use it as a guide for regular maintenance XPage 8 Use standard DV cassette tapes or mini DV cassette tapes Set BR HD50 to the STOP mode 1 Press the MENU button to display the TOP Menu screen 2 Press the R or P button to bring the cu...

Страница 45: ...g format MPEG1 Audio Layer II DV Audio signal recording format 16 bit locked audio 48 kHz PCM for 2 channels or 12 bit 32 kHz PCM for 4 channels Connectors Video HDV Video outputs Analog component Y 1 0 V p p 75 BNC PB PR 0 7 V p p 75 BNC DV Video inputs Analog composite 1 0 V p p 75 BNC Analog Y C Y 1 0 V p p 75 C 0 286 V NTSC 0 3 V PAL p p 75 4 pin Video outputs Analog composiye 1 0 V p p 75 BNC...

Страница 46: ...aratus 11 Only use attachments accessories specified by the manufacturer 12 Use only with the cart stand tripod bracket or the table specified by the manufacturer or sold with the apparatus When a cart is used use caution when moving the cart apparatus combina tion to avoid injury from tip over 13 Unplug this apparatus during lightning storms or when unused for long peri ods of time 14 Refer all s...

Отзывы: