background image

16

XV-NA70BK/XV-NA77SL/GNT0036-001A/English

A

dv

an

ce

op

er

at

io

ns

Advanced operations

NOTE

Playing from a specific position

Locating a desired scene from the DVD 
menu

DVD AUDIO/DVD VIDEO discs generally have their own menus 
which show the disc contents. These menus contain various 
items such as titles of movies, names of songs, or artist 
information, and display them on the TV screen. You can locate a 
desired scene using the DVD menu.

1

While a DVD AUDIO/DVD VIDEO disc is 
inserted, press TOP MENU or MENU.

The menu appears on the TV screen.

2

Press 

5

/

/

2

/

3

 to select a desired item, then 

press ENTER.

The unit starts playback of the selected item.

Hints

• Some DVD AUDIO/DVD VIDEO discs may also have a different 

menu which appears when MENU is pressed.

• See the instructions of each DVD AUDIO/DVD VIDEO disc for 

its particular menu.

• With some discs, you can select items by entering the 

corresponding number using the numeric buttons, which may 
cause the unit to automatically start playback.

NOTE

The MENU button does not work while stopped.

Locating a desired scene from the menu of 
a SVCD/Video CD with PBC

Some SVCD/Video CD discs support the PBC function. PBC is 
an abbreviation of “Playback Control.” Some SVCD/Video CD 
discs recorded with PBC have their own menus, such as a list of 
the songs of the disc. You can locate a specific scene by using 
the PBC menu.

1

In stop mode, press 

3

 or TOP MENU.

A disc menu appears on the TV screen.

2

Press the numeric buttons to select the 
desired item.

To select 5: press 5.
To select 23: press +10, +10, then 3.
To select 40: press +10, +10, +10, then 10.

The unit starts playback of the selected item.
To return to the menu, press RETURN.

Hint

If something like [NEXT] or [PREVIOUS] appears on the TV 
screen, pressing 

¢

 advances to the next page, and pressing 

4

 returns to the previous page.

Specifying a desired title/group

1

During playback, press TITLE/GROUP.

[--] is shown in the title display area of the display window.

2

Press the numeric buttons to specify a title or 
group to be played.

To select 5: press 5.
To select 23: press +10, +10, then 3.
To select 40: press +10, +10, +10, then 10.

The unit starts playback from the specified title or group.

NOTE

This function may not work with some DVD AUDIO/DVD VIDEO 
discs.

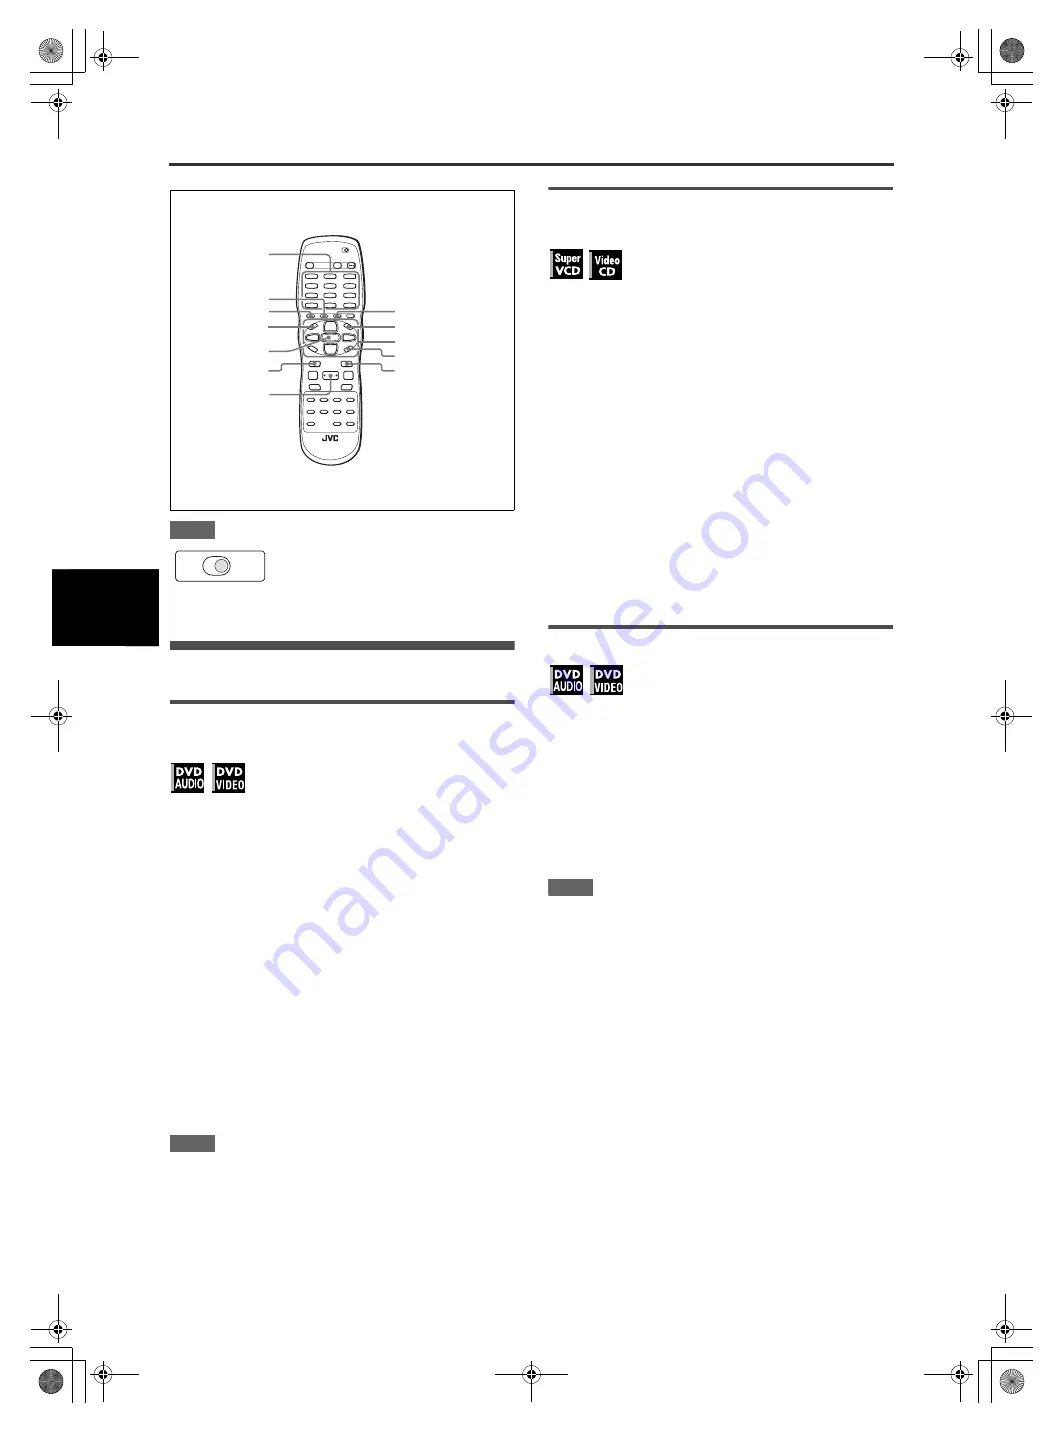
Make sure that the TV - DVD switch on the 
remote control unit is set to “DVD” when 
using the 

5

/

/

2

/

3

, numeric and TV/

VIDEO - CANCEL buttons for controlling 
the unit. 

3

ENTER

MENU

TOP MENU

TITLE/GROUP

RETURN

5

/

/

2

/

3

PAGE

ON SCREEN

¢

4

Numeric 
buttons

TV

DVD

XV-N70BK_N77SL(JUJ).book  Page 16  Wednesday, July 9, 2003  5:36 PM

Содержание AZ328/12

Страница 1: ...format disc playback 27 MP3 WMA disc playback 31 JPEG disc playback 33 Changing the initial settings 36 Additional information 44 For Customer Use Enter below the Model No and Serial No which are located on the rear bottom or side of the cabinet Retain this information for future reference Model No Serial No INSTRUCTIONS XV N70BK_N77SL JUJ book Page i Wednesday July 9 2003 5 36 PM ...

Страница 2: ... Afin d éviter tout risque d électrocution d incendie etc 1 Ne pas enlever les vis ni les panneaux et ne pas ouvrir le coffret de l appareil 2 Ne pas exposer l appareil à la pluie ni à l humidité Warnings Cautions and Others Mises en garde précautions et indications diverses IMPORTANT FOR LASER PRODUCTS IMPORTANT POUR LES PRODUITS LASER 1 CLASS 1 LASER PRODUCT 2 DANGER Visible laser radiation when...

Страница 3: ...r dealer Do not insert any metallic objects such as wires hairpins coins etc into the unit Do not block the vents Blocking the vents may damage the unit To clean the cabinet Use a soft cloth Follow the relevant instructions on the use of chemically coated cloths Do not use benzene thinner or other organic solvents and disinfectants These may cause deformation or discoloring Table of contents Suppl...

Страница 4: ...r playing back the disc be sure to retain it in the cartridge See also the instructions supplied with the disc The unit can play back audio signals recorded in MIX MODE CD CD G CD EXTRA and CD TEXT Region code of DVD VIDEO This unit can play back DVD VIDEO discs whose region code numbers include 1 Examples of playable DVD VIDEO discs NOTE The unit s region code is printed on the rear of the unit C...

Страница 5: ...g from the center outwards If a disc is difficult to clean wipe with a cloth moistened with water Never use record cleaners petrol alcohol or any anti static agents Notes on copyright Check the copyright laws in your country before recording from DVD AUDIO DVD VIDEO DVD RAM SVCD Video CD Audio CD MP3 WMA and JPEG discs Recording of copyrighted material may infringe copyright laws This product inco...

Страница 6: ...necting to a TV with an S video jack If your TV has an S VIDEO input you can get better picture quality by connecting it with the S VIDEO output of the unit using an S video cable instead of connecting the video input of the TV to the VIDEO jack of the unit NOTES Be sure to connect the red and white plugs of the audio cable to the FRONT RIGHT LEFT jacks on the rear of the unit as shown in the illu...

Страница 7: ...ndicator is lit in red regardless of the PICTURE SOURCE selection NOTES The Progressive scanning mode works only when you connect the unit s COMPONENT VIDEO OUT jacks to your TV There are some progressive TV and High Definition TV sets that are not fully compatible with the unit resulting in the unnatural picture when playing back a DVD VIDEO disc in the Progressive scanning mode In such a case us...

Страница 8: ...receiver equipped with the 5 1 channel inputs NOTES When using the 5 1 channel outputs of the unit set the ANALOG OUT in the AUDIO preference display to MULTI CHANNEL see page 38 If you select EXPERT in the SPK SETTING preference display you can control the audio output balance of the speakers see page 38 You can use the yellow plugs of the audio video cable for video connection RIGHT LEFT AUDIO I...

Страница 9: ...AUDIO DVD VIDEO SVCD Video CD or Audio CD played back on the unit record them through the analog jacks in this case set ANALOG OUT in the AUDIO preference display to 2 CH STEREO see page 38 Depending on the disc no signal may be output from the DIGITAL OUT Make an analog connection in this case Set DIGITAL AUDIO OUTPUT in the AUDIO preference display correctly according to the connected digital au...

Страница 10: ...cover and place the two supplied R6P SUM 3 AA 15F batteries in the remote control unit according to the polarity markings and inside the compartment Then replace the cover The batteries will last about six months with normal use If the functions of the remote control unit become erratic replace the batteries Precautions of the safe use of batteries Observe the following precautions for the safe us...

Страница 11: ...plifier or receiver Pressing the AMP VOL button raises the audio volume of a JVC s amplifier or receiver while pressing the button lowers the volume Manufacturer No Manufacturer No AIWA 36 MIVAR 29 BEIJING 22 NEC 20 CCE 02 NOBLEX 22 CHANGHONG 34 NOKIA 31 DAEWOO 17 37 PANASONIC 04 11 FERGUSON 27 PEONY 34 38 39 FINLUX 30 PHILCO 10 17 21 FUNAI 32 PHILIPS 02 GRADIENTE 15 20 RCA 05 GRUNDIG 19 SAMSUNG 1...

Страница 12: ...o select the desired language You can select the on screen language for the preference displays etc from among ENGLISH SPANISH and FRENCH 3 Press ENTER The second page is shown in which the pull down menu of the MONITOR TYPE is already open 4 Press 5 to select the desired monitor type For a normal conventional TV select 4 3 LB or 4 3 PS For a wide screen TV select 16 9 NORMAL or 16 9 AUTO See page...

Страница 13: ...VD AUDIO DVD VIDEO 1 Press 5 2 3 to select a desired item 2 Press ENTER The unit starts playback of the selected item For SVCD Video CD Press the numeric buttons to select a desired item The unit starts playback of the selected item NOTES Do not insert an unplayable disc See page 2 When inserting a disc on the disc tray be sure to position the disc inside the recess Otherwise the disc may be damag...

Страница 14: ...ll images which have a resolution four times greater than moving pictures To play a PBC compatible SVCD Video CD disc without activating the PBC function press the numeric buttons instead of 3 to start playback To activate the PBC function again 1 press TOP MENU or MENU or 2 press 7 to stop playback then press 3 7 3 8 0 MENU 3 8 7 TOP MENU ON SCREEN 8 5Mbps TITLE 33 TOTAL 1 25 58 CHAP 33 Transfer ...

Страница 15: ...he memory Press 7 while the disc is stopped To resume playback When the resume mode is ON While the disc you interrupted playback is still on the disc tray press 3 The unit resumes playback from the position where playback was interrupted The TV screen and the display window show RESUME PLAY To play back from the beginning Press 7 before pressing 3 to start playback When the resume mode is DISC RE...

Страница 16: ...some DVD VIDEO discs the sound quality and volume may alter or the sound may be out of tune To switch from rapid reverse playback to x1 5 Quick Playback first press 3 then press once To advance a still picture frame by frame While paused press 8 Each time you press 8 the still picture advances to the next frame Pressing 3 returns to normal playback To play back in slow motion You can select from 1...

Страница 17: ...while in stop mode Press the numeric buttons to specify the number To select 5 press 5 To select 23 press 10 10 then 3 To select 40 press 10 10 10 then 10 The unit starts playback from the beginning of the selection NOTES Depending on the disc type and the unit status what is specified differs Pressing the numeric buttons simply selects a track To select a group when a disc contains more than one ...

Страница 18: ... an abbreviation of Playback Control Some SVCD Video CD discs recorded with PBC have their own menus such as a list of the songs of the disc You can locate a specific scene by using the PBC menu 1 In stop mode press 3 or TOP MENU A disc menu appears on the TV screen 2 Press the numeric buttons to select the desired item To select 5 press 5 To select 23 press 10 10 then 3 To select 40 press 10 10 1...

Страница 19: ...git where you entered a wrong number and reenter the correct one 4 Press ENTER The unit starts playback from the specified time To dismiss the menu bar Press ON SCREEN Hint 10 and 10 buttons are not used with this function NOTES Some DVD VIDEO discs do not contain time information and the time search function cannot be used When a DVD AUDIO disc is stopped you can specify the elapsed time from the...

Страница 20: ...order To play back in a specific order Program play By programming tracks you can play up to 99 tracks in any order You may program the same track more than once 1 In stop mode press ON SCREEN twice The menu bar appears on the TV screen 2 Press 2 3 to move to Screen example for DVD AUDIO 3 Press ENTER The program table appears The PRGM indicator lights up in the display window 4 a for DVD AUDIO Pr...

Страница 21: ...e is shown press 7 To exit the program mode After clearing the program press ON SCREEN NOTES When the disc tray is opened or the unit is turned off the program is cleared If you are going to program a track in the bonus group of a DVD AUDIO the unit will prompt you to enter the key number for the bonus group To play back in random order Random play 1 In stop mode press ON SCREEN twice The menu bar...

Страница 22: ...indicator goes off in the display window Hint When the program playback mode is active with a DVD AUDIO SVCD Video CD or Audio CD the repeat mode changes in the same manner Note however that in the mode the unit repeats all the programmed tracks instead of all tracks on the disc NOTE The repeat playback may not work with some discs even if you select one of the repeat modes To repeat a desired par...

Страница 23: ...to OFF 1 During playback press AUDIO fs Rate The audio selection window appears on the TV screen 2 Press 5 or AUDIO fs Rate to select the desired audio Each time you press 5 or AUDIO fs Rate the audio changes For DVD AUDIO DVD VIDEO example For SVCD For Video CD 3 Press ENTER You can hear the selected audio The audio selection window is dismissed NOTES The audio selection window will automatically...

Страница 24: ...ions NORMAL for watching TV in a general room CINEMA for watching a movie software in a room with suppressed light USER 1 USER 2 you can adjust parameters that affect the picture character and store the settings as a user preset See the next step 3 To define a user setting press 5 to select a parameter to be edited from the following GAMMA Adjust this if the neutral color is bright or dark The bri...

Страница 25: ...ed with Dolby Digital When playing back a DVD VIDEO disc recorded with Dolby Digital that does not contain the rear signal you can change the 3D PHONIC setting but you will not be able to achieve a correct 3D effect The 3D PHONIC function does not affect the Dolby Digital bitstream signal from the DIGITAL OUT jack When the 3D PHONIC function is active the ANALOG OUT setting in the AUDIO setting di...

Страница 26: ...back mode Slow motion playback mode To dismiss the menu bar and status bar Press ON SCREEN Basic operation procedure 1 Press 2 3 to select the icon you want to work with The selected icon is pointed by 2 Press ENTER With many icons an appropriate pull down window appears however there are some exceptions NOTES A mark or text on the menu icon for the function or mode currently selected is shown in ...

Страница 27: ...ress ENTER to play back with the selected page Menu bar functions for DVD VIDEO Time mode selection During playback selects the time mode shown in the display window and in the status bar Press ENTER to select the time mode from the following TOTAL Current title elapsed time T REM Current title remaining time TIME Current chapter elapsed time REM Current chapter remaining time Repeat mode See also...

Страница 28: ...pen the pull down window 2 Press 5 to select a desired subtitle 3 Press ENTER to begin playback with the selected subtitle Menu bar functions for DVD RAM DVD RW written in the VR format Time mode selection Selects the time mode shown in the display window and in the status bar Press ENTER to select the time mode from the following TIME Current title play list elapsed time REM Current title play li...

Страница 29: ...k Press 3 SELECT If RESUME is set to ON and an interrupted position is memorized playback re starts from the interrupted position If no interrupted position is memorized or RESUME is set to OFF playback re starts from the beginning of the title 1 To select the next or previous title in stop mode Press or 4 The next or previous title will be selected In this case press 3 SELECT to start playback of...

Страница 30: ...isplay by pressing MENU playback continues Stop playback by pressing 7 the PLAY LIST display disappears NOTE If you press TOP MENU during playback by play list the ORIGINAL PROGRAM display appears on the TV screen and the unit enters original playback status playback starts from title 1 To stop in the middle of playback Press 7 Playback is interrupted If the resume mode is set to ON the unit memor...

Страница 31: ...peed shown on the TV screen depending on the recording condition To start playback of the desired play list Press one of the numeric buttons to specify number of the desired play list Repeat playback To repeat title or play list During playback press REPEAT Each time you press REPEAT one of the following repeat mode is selected For original playback PG Repeats the current title ALL Repeats all tit...

Страница 32: ...e desired audio 3 Press ENTER You can hear the selected audio The audio selection window is dismissed Turning on off the subtitle You can turn on or off the subtitle recorded on a VR format disc 1 During playback press SUBTITLE The subtitle selection window appears on the TV screen 2 Press 5 or SUBTITLE to select ON or OFF 3 Press ENTER The subtilte is turned on or off according to the selection y...

Страница 33: ...The unit does not support the ID3 tag and WMA tag The unit supports discs recorded with multiple sessions Some discs may not play due to disc characteristics or recording conditions Programmed and random playback functions do not work with MP3 WMA discs As for MP3 the unit only can play back tracks with the following file extensions MP3 Mp3 mp3 and mP3 As for WMA the unit only can play back tracks...

Страница 34: ...o press ENTER or 3 SELECT to start repeat playback To stop repeat playback Press 7 Note that the repeat mode remains active To quit repeat playback During playback press REPEAT until no repeat icon is shown on the display window While stopped press REPEAT until repeat mode indication on the MP3 WMA CONTROL display goes off NOTE You can change the repeat mode using ON SCREEN on the remote control u...

Страница 35: ...nts are read the JPEG CONTROL display automatically appears on the TV screen You can select a desired file for playback via this display 1 Make sure that the black cursor bar is in the left group column If it is in the right column press 2 to move it to the left column 2 Press 5 to move the bar to a desired group On the right column files in the selected group are shown 3 Press 4 to select a desir...

Страница 36: ...8 16 32 and 64 times 2 Press 5 2 3 to move the zoomed position Viewing pictures continuously slide show mode You can see files still pictures one after another automatically To start the slide show Press 3 SELECT The slide show starts from the beginning of the disc Each file still picture is displayed for approximately 3 seconds To stop slide show playback in the middle Press 7 or MENU The TV scre...

Страница 37: ...REPEAT GROUP All files in the current group are repeated No indication The repeat mode is off 2 Press 3 SELECT to start repeat playback To stop repeat playback Press 7 The repeat mode remains active To quit repeat playback Press 7 or MENU while the JPEG CONTROL display is shown and press REPEAT until the repeat mode indication goes off NOTE You can change the repeat mode using ON SCREEN on the rem...

Страница 38: ... any preference display When a preference display is shown on a wide TV screen the upper and lower parts of the preference display sometimes may be cut off If this happens adjust the picture size control of the TV The SPK SETTING display can be displayed only when ANALOG OUT in the AUDIO preference display is set to MULTI CHANNEL Make sure that the TV DVD switch on the remote control unit is set t...

Страница 39: ...Setting options 16 9 NORMAL 16 9 AUTO 4 3 LB 4 3 PS 16 9 NORMAL Wide television screen select when you connect the unit to a wide screen 16 9 TV whose aspect ratio is fixed to 16 9 the unit automatically adjusts the screen width of the output signal correctly when playing back a 4 3 source If you play a 4 3 DVD VIDEO source using the 16 9 NORMAL mode the picture character changes slightly due to t...

Страница 40: ...it s AUDIO OUT jacks to a stereo amplifier receiver or TV or when you duplicate audio of a DVD VIDEO disc recorded with surround audio to your MD cassette etc MULTI CHANNEL select when you enjoy multichannel surround audio by connecting the unit s 5 1 channel audio outputs to an amplifier equipped with 5 1 channel inputs NOTE With some DVD AUDIO discs the track is prohibited from down mixing to 2 ...

Страница 41: ...ters on the picture which show what is happening to the disc or the unit Example of on screen guide icons Setting options ON OFF ON when selected the on screen guide is activated AUTO STANDBY When the unit is stopped for more than 30 minutes or 60 minutes the unit enters standby mode automatically Setting options 60 30 OFF AV COMPULINK MODE You must set this item correctly to use the AV COMPU LINK...

Страница 42: ...quency range you can boost up the low frequency signal of the subwoofer or front speakers by setting the BASSS REDIRECT function To set the BASS REDIRECT function go to step 6 6 Press 5 to select BASS REDIRECT and press ENTER 7 Press 5 to select SUB WOOFER or FRONT L R and press ENTER SUB WOOFER The low frequency signal fed from the subwoofer output is boosted up FRONT L R The low frequency signal...

Страница 43: ...the distance from the center speaker and or the surround speakers to the listener is shorter than the distance from the front speakers to the listener select the longer distance value NOTE This setting can only compensate for differences in speaker distance when the front speakers left right are farther from the listener than the other speakers Setting the speaker level You can adjust the output l...

Страница 44: ...pull down menu NONE and levels 8 to 1 are available NONE does not restrict playback Level 1 is the strictest level Discs rated higher than the selected level are restricted 7 Press 5 to select a desired parental lock level then press ENTER moves to PASSWORD 8 Press the numeric buttons 0 to 9 to enter a 4 digit password 9 Press ENTER The parental lock feature is set moves to EXIT Pressing ENTER aga...

Страница 45: ...ssword The password entered in this step becomes the new password If you want to keep the same password as before enter the same password 7 Press ENTER moves to EXIT Pressing ENTER again returns to the OTHERS menu of the preference display NOTE If you enter the wrong password more than 3 times in step 3 above moves to EXIT automatically and 5 do not work To temporarily release the Parental Lock If...

Страница 46: ...play window see the illustration below Remote sensor 8 PROGRESSIVE indicator 5 DVD AUDIO indicator 2 Display window 1 Audio format indicators 2 Disc indicator 3 Group title track chapter indicators 4 Repeat mode indicator 5 Program random indicators 6 Total time remaining time indicators 7 kHz unit of sampling frequency indicator 8 3 play 8 pause indicators 9 Multi information window 0 1 2 3 4 5 9...

Страница 47: ... 27 31 33 36 TV STANDBY ON button 9 DVD STANDBY ON button 10 TV VIDEO CANCEL button 9 18 TITLE GROUP button 16 32 34 _ MENU button 16 28 33 34 ENTER button ON SCREEN button 12 17 18 19 20 24 NEXT button 14 15 27 28 29 31 33 34 8 button 12 31 SLOW button 14 27 29 ZOOM button 22 34 VFP PROGRESSIVE SCAN button 5 22 23 AUDIO fs Rate button 21 23 30 32 AMP VOL buttons 9 DIMMER button 11 2 1 3 5 4 6 8 7...

Страница 48: ...unit to a television and receiver via AV COMPU LINK set the unit s AV COMPU LINK setting to DVD1 IMPORTANT When you make video connection between the unit and another device such as a receiver and TV via the composite S video or component jacks as well as AV COMPU LINK connection see also the instruction manual of the other device Notes for connection If you connect the unit to a receiver via AV C...

Страница 49: ... SUBTITLE see page 37 Subtitle may not be displayed correctly during A B repeat playbacik Picture Picture is noisy The unit is connected to a VCR directly and the copyguard function is activated Connect the unit so that the picture signal flows directly to the TV With some discs the picture may be blurred when PICTURE SOURCE is set to FILM or AUTO Set PICTURE SOURCE to VIDEO NORMAL or VIDEO ACTIVE...

Страница 50: ...ion 500 lines or more Audio outputs ANALOG OUT pin jack 2 0 Vrms 10 kΩ DIGITAL OUT COAXIAL 0 5 Vp p 75 Ω termination DIGITAL OUT OPTICAL 21 dBm to 15 dBm peak Audio characteristics Frequency response CD sampling frequency 44 1 kHz 2 Hz to 20 kHz DVD sampling frequency 48 kHz 2 Hz to 22 kHz 4 Hz to 20 kHz for DTS and Dolby Digital bitstream signals DVD sampling frequency 96 kHz 2 Hz to 44 kHz DVD s...

Страница 51: ...int Kitts and Nevis KP Korea Democratic People s Republic of KR Korea Republic of KW Kuwait KY Cayman Islands KZ Kazakhstan LA Lao People s Democratic Republic LB Lebanon LC Saint Lucia LI Liechtenstein LK Sri Lanka LR Liberia LS Lesotho LT Lithuania LU Luxembourg LV Latvia LY Libyan Arab Jamahiriya MA Morocco MC Monaco MD Moldova Republic of MG Madagascar MH Marshall Islands ML Mali MM Myanmar MN...

Страница 52: ...A Interlingua MN Mongolian SH Serbo Croatian TW Twi CA Catalan IE Interlingue MO Moldavian SI Singhalese UK Ukrainian CO Corsican IK Inupiak MR Marathi SK Slovak UR Urdu CS Czech IN Indonesian MS Malay MAY SL Slovenian UZ Uzbek CY Welsh IS Icelandic MT Maltese SM Samoan VI Vietnamese DA Danish IW Hebrew MY Burmese SN Shona VO Volapuk DZ Bhutani JI Yiddish NA Nauru SO Somali WO Wolof EL Greek JW Ja...

Страница 53: ...fference between the loudest and softest sounds Group The largest division on DVD AUDIO Interlaced scanning In a conventional video system a picture is shown on the display monitor in between lines of two halves The Interlaced scanning system places lines of the second half of the picture in between lines of the first half of the picture JPEG A popular file format for still image compression and s...

Страница 54: ...ccurs in shipment due to act of God and cosmetic damage 5 Signal reception problems and failures due to line power surge 6 Video Pick up Tubes CCD Image Sensor Cartridge Stylus Needle are covered for 90 days from the date of purchase 7 Accessories 8 Batteries except that Rechargeable Batteries are covered for 90 days from the date of purchase There are no express warranties except as listed above ...

Страница 55: ...cer or visit our website at www JVC com Remember to retain your Bill of Sale for Warranty Service Do not service the television yourself Caution To prevent electrical shock do not open the cabinet There are no user serviceable parts inside Please refer to qualified service personnel for repairs Accessories To purchase accessories for your JVC product please call toll free 1 800 882 2345 or on the ...

Страница 56: ...XV NA70BK XV NA77SL GNT0036 001A English VICTOR COMPANY OF JAPAN LIMITED EN 2003 VICTOR COMPANY OF JAPAN LIMITED J VC 0703KTYBICJSC XV N70BK_N77SL JUJ book Page 54 Wednesday July 9 2003 5 36 PM ...

Отзывы: