background image

9

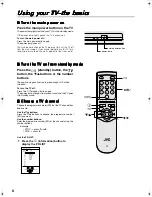
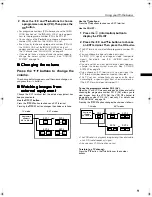
Using your TV–the basics

AV28CT1EK/EI / LCT1138-001A-U / English

2

Press the 

5

 and 

6

 buttons to choose 

a programme number (PR). Then press the 

a

 button

For programme numbers (PR) where you have the CHILD
LOCK function set, the 

n

 (CHILD LOCK) mark appears

next to the programme number (PR) in the PR LIST.

You cannot use the 

6

 buttons to choose a programme

number (PR)  which has the CHILD LOCK set.

Even if you try to choose a programme number (PR) with
the CHILD LOCK set, the 

n

 (CHILD LOCK) mark will 

appear, and you cannot watch the TV channel.  To watch
the TV channel, see “CHILD LOCK” on page 23. 

If you do not have a clear picture or no colour appears,
change the colour system manually. See “COLOUR
SYSTEM” on page 18.

Changing the volume

Changing the volume

Changing the volume

Changing the volume

Press the 

5

 buttons to change the

volume.

The volume indicator appears, and the volume changes, as 
you press the 

q

 buttons.

Watching images from 

Watching images from 

Watching images from 

Watching images from 

external equipment

external equipment

external equipment

external equipment

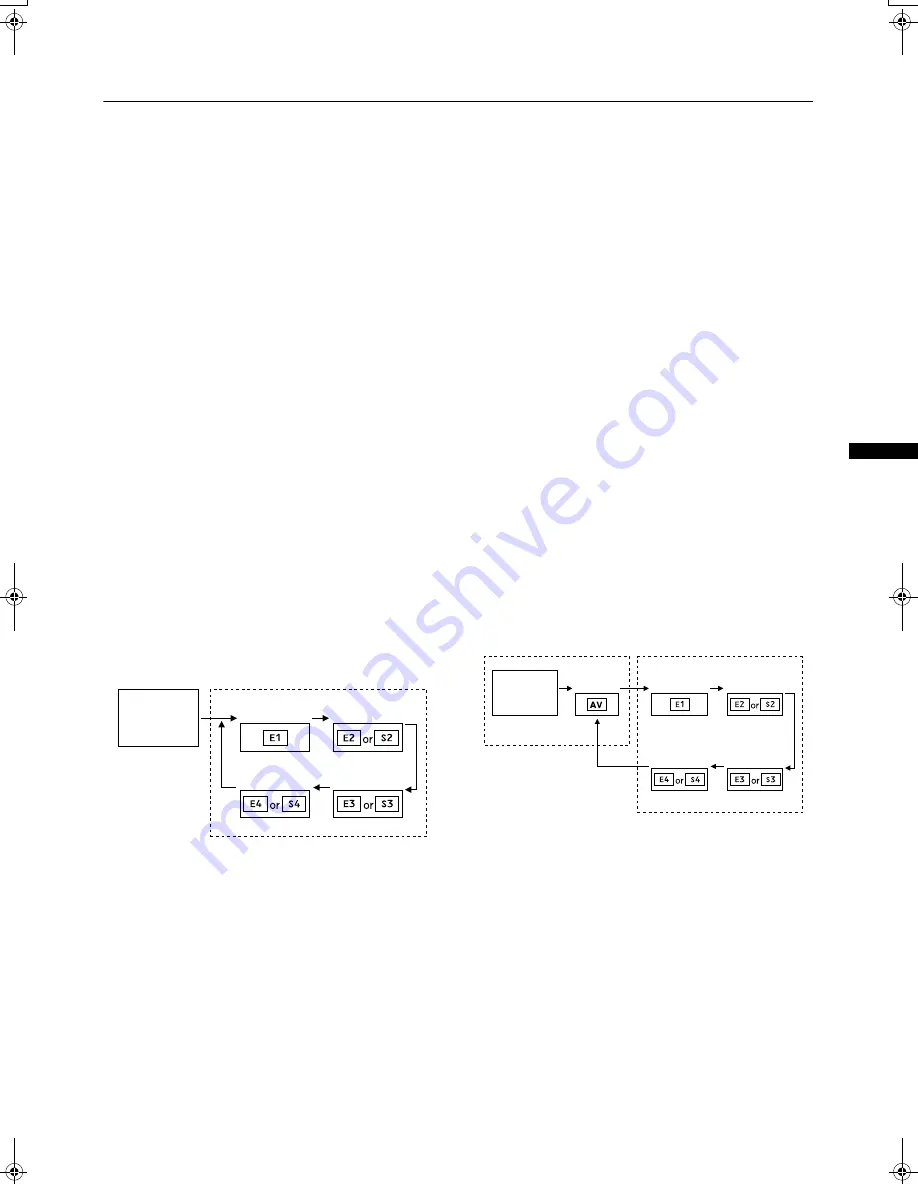
Choose the EXT terminal that the external equipment has
been connected to.

Use the 

o

 button:

Press the 

o

 button to choose an EXT terminal.

Pressing the 

o

 button changes the choice as follows:

Use the 

6

 buttons:

Press the 

6

 buttons to choose an EXT terminal

Use the PR LIST:

1

Press the 

h

 (information) button to 

display the PR LIST

2

Press the 

5

 and 

6

 buttons to choose 

an EXT terminal. Then press the 

a

 button

The EXT terminals are listed after programme number PR
99.

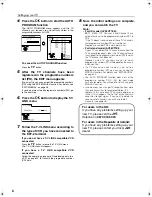
You can choose two types of video input signal: 
S-VIDEO (Y/C signal) and regular video (composite
signal). For details, see “

y

 (S-VIDEO input)” on

page 21.

If you do not have a clear picture or no colour appears,
change the colour system manually. See “COLOUR
SYSTEM” on page 18.

If you choose an EXT terminal with no input signal, the
EXT terminal number becomes fixed on the screen.

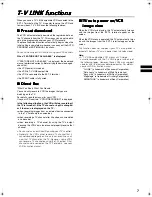
This TV set can automatically change over the input
according to a special signal from an external device.
(The EXT-4 terminal does not support it.)

To use the programme number PR 0 (AV):

When the TV and VCR are connected only by the aerial cable,
choosing the programme number PR 0 (AV) allows you to
view images from the VCR. Set the VCR RF channel to
programme number PR 0 (AV) manually. For details, see
“EDIT/MANUAL” on page 26.
Pressing the 

o

 button changes the choice as follows:

The VCR sends its playback image along the aerial cable
as an RF (radio frequency) signal.

Also see your VCR instruction manual.

To return to a TV channel:

Press the 

b

 button, the 

6

 buttons or the number 

buttons.

EXT-1

EXT-4

EXT-2

EXT-3

TV mode

EXT modes

Programme 

numbers 

PR 1 to PR 99

EXT-1

PR 0

EXT-4

EXT-2

EXT-3

TV mode

EXT modes

Programme 

numbers 

PR 1 to PR 99

JVC TV_MF1.fm  Page 9  Friday, December 21, 2001  2:49 PM

Содержание AV28CT1EI

Страница 1: ...s Safety precautions 2 Setting up your TV 4 T V LINK functions 7 Using your TV the basics 8 Remote control buttons and functions 11 Using the TV s menus 16 Picture setting 17 Picture features 18 Sound setting 20 EXT SETTING 21 FEATURES 23 INSTALL 25 DEMO 29 Other menus 30 Further preparation 31 TV buttons and parts 33 Troubleshooting 34 Specifications 35 LCT1138 001A U_cover fm Page 1 Friday Decem...

Страница 2: ...ot going to use this TV for a long period of time be sure to disconnect the mains plug from the mains outlet 8 Do not place any naked flame sources such as lighted candles on the apparatus Warning Warning Warning Warning DO NOT cut off the mains plug from this equipment If the plug fitted is not suitable for the power points in your home or the cable is too short to reach a power point then obtain...

Страница 3: ...sult in electrical shock Never leave this equipment operating unattended unless otherwise specifically stated that it is designed to do so or in standby mode Only use the designated power switch to turn off the power and ensure that all potential users are instructed how to do so Make special arrangements for infirm or handicapped persons Never watch TV while operating a motor vehicle It is illega...

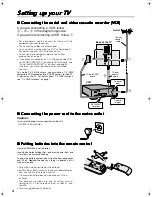
Страница 4: ... V LINK functions see T V LINK functions on page 7 Connecting the power cord to the mains outlet Connecting the power cord to the mains outlet Connecting the power cord to the mains outlet Connecting the power cord to the mains outlet Caution Use only the power source specified on the unit AC 220 240 V 50 Hz Putting batteries into the remote control Putting batteries into the remote control Puttin...

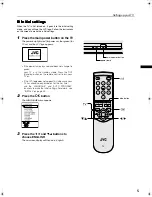
Страница 5: ...f the power lamp stays red and does not change to green your TV is in the standby mode Press the standby button on the remote control to turn your TV on If the JVC logo does not appear this is because your TV has already been turned on for the first time use the LANGUAGE and AUTO PROGRAM functions to make the initial settings For details see INSTALL on page 25 2 Press the a button The LANGUAGE men...

Страница 6: ...y set to the programme numbers PR1 to PR5 If the TV doesn t receive one of these TV channels that programme number PR will not be set Programme number PR6 is not normally set For Ireland model AV28CT1EI If your TV can detect the TV channel name from the TV channel broadcast signal the TV channel name is assigned to the programme number PR to which the TV channel has been set However which TV chann...

Страница 7: ...on the TV when recording images from an external device connected to the TV for example a camcorder when recording a TV channel after it has been unscrambled on a decoder when recording a TV channel by using the TV s output because the VCR s own tuner cannot properly receive that channel You cannot carry out Direct Rec using your TV s control Generally the VCR cannot record a TV channel that it ca...

Страница 8: ...ndby mode Turn the TV on from standby mode Turn the TV on from standby mode Press the standby button the b button the 6 buttons or the number buttons The power lamp goes from red to green and your TV will be turned on To turn the TV off Press the standby button again The power lamp changes from green to red and the TV goes into standby mode Choose a TV channel Choose a TV channel Choose a TV chann...

Страница 9: ... buttons to choose an EXT terminal Use the PR LIST 1 Press the h information button to display the PR LIST 2 Press the 5 and 6 buttons to choose an EXT terminal Then press the a button The EXT terminals are listed after programme number PR 99 You can choose two types of video input signal S VIDEO Y C signal and regular video composite signal For details see y S VIDEO input on page 21 If you do not...

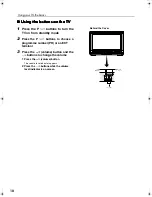
Страница 10: ...ess the P p buttons to turn the TV on from standby mode 2 Press the P p buttons to choose a programme number PR or an EXT terminal 3 Press the r volume button and the q buttons to change the volume 1 Press the r volume button The volume level indicator appears 2 Press the q buttons while the volume level indicator is on screen Behind the Cover ...

Страница 11: ...ose the ideal one from the following ZOOM modes AUTO WSS For any picture format except normal picture 4 3 aspect ratio the picture will be automatically displayed in the ideal screen size For normal picture 4 3 Aspect Ratio you can choose a ZOOM mode from the 4 3 AUTO ASPECT menu For details see 4 3 AUTO ASPECT on page 19 AUTO may not work properly with poor signal quality In this case choose the ...

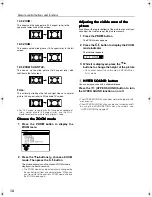
Страница 12: ... mode may be automatically changed by the control signal from an external device When you want to return to the previous ZOOM mode choose the ZOOM mode again Adjusting the visible area of the Adjusting the visible area of the Adjusting the visible area of the Adjusting the visible area of the picture picture picture picture If subtitles or the top or bottom of the picture are cut off you can adjus...

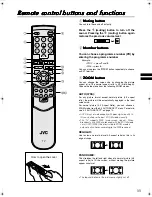
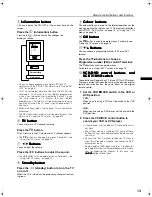
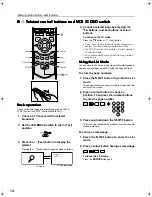
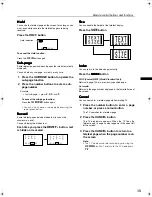
Страница 13: ... Colour buttons Colour buttons The colour buttons are used for the teletext operations or the menu operations For details see Teletext control buttons and VCR P DVD switch on page 14 or Using the TV s menus on page 16 0 OK button OK button OK button OK button The a button is used to operate menus For details see Using the TV s menus on page 16 6 Buttons Buttons Buttons Buttons You can choose a pro...

Страница 14: ...etext broadcasts contact your local dealer or the teletext station The ZOOM function will not work in the text mode or TV and text mode You cannot operate menus when viewing a teletext programme Using the List Mode Using the List Mode Using the List Mode Using the List Mode You can store the numbers of your favourite teletext pages in memory and call them up quickly using the colour buttons To sto...

Страница 15: ...a quiz You can display the hidden text Each time you press the Q button text is hidden or revealed Size Size Size Size You can double the height of the teletext display Press the R button Index Index Index Index You can return to the index page instantly Press the T T T T button FLOF Fastext WST World Standard Text Returns to page 100 or a previously specified page List mode Returns to the page nu...

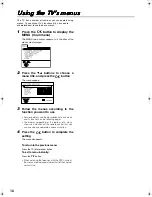
Страница 16: ...s the a button The menu appears 3 Follow the menus according to the function you want to use For more details see the descriptions of each menu and its functions on the following pages The display appearing at the bottom of a menu shows you a button on the remote control that you can use when you operate a chosen function 4 Press the a button to complete the setting The menu disappears To return t...

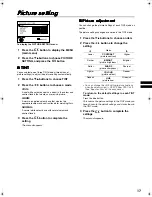
Страница 17: ...s the a button to complete the setting The menu disappears Picture adjustment Picture adjustment Picture adjustment Picture adjustment You can change the picture settings of each TINT mode as you like The picture settings changed are stored in the TINT mode 1 Press the 6 buttons to choose an item 2 Press the 5 buttons to change the setting You can change the HUE setting picture hue only when the c...

Страница 18: ... AUTO but still notice some noise change the mode to MAX However this may reduce the sharpness of the picture 3 Press the a a a a button to complete the setting The menu disappears COLOUR SYSTEM COLOUR SYSTEM COLOUR SYSTEM COLOUR SYSTEM The colour system is chosen automatically However if the picture is not clear or no colour appears choose the colour system manually 1 Press the 6 buttons to choos...

Страница 19: ...s REGULAR PANORAMIC or 14 9 ZOOM as the ZOOM mode for the normal picture 4 3 aspect ratio 1 Press the 6 buttons to choose 4 3 AUTO ASPECT Then press the a button The sub menu of the 4 3 AUTO ASPECT function appears 2 Press the 6 buttons to choose a ZOOM mode 3 Press the a button to complete the setting The menu disappears ...

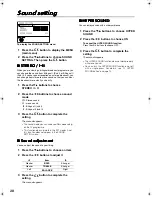
Страница 20: ...ound mode you can choose differs depending on the TV programme This function does not work in the EXT modes And this function does not appear in the SOUND SETTING menu Sound adjustment Sound adjustment Sound adjustment Sound adjustment You can adjust the sound to your liking 1 Press the 6 buttons to choose an item 2 Press the 5 buttons to adjust it 3 Press the a button to complete the setting The ...

Страница 21: ...Press the a button to complete the setting The menu disappears The EXT 1 terminal does not support S VIDEO signal Y C signal and you cannot set y S VIDEO input in the EXT 1 terminal Setting y S VIDEO input changes the head character from E to S When an EXT terminal receives a normal video signal E1 E2 E3 or E4 appears on the display This changes to S2 S3 or S4 when it receives an S VIDEO signal Ev...

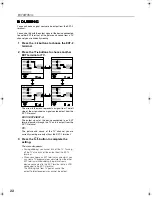
Страница 22: ...3 EXT 4 The output signal of the device connected to an EXT terminal passes through the TV and is output from the EXT 2 terminal TV The picture and sound of the TV channel you are currently viewing are output from the EXT 2 terminal 3 Press the a button to complete the setting The menu disappears During dubbing you cannot turn off the TV Turning off the TV also turns off the output from the EXT 2 ...

Страница 23: ...een and mute the sound if the signal is weak or absent or when there is no input from an external device 1 Press the 6 buttons to choose BLUE BACK 2 Press the5 buttons to choose ON To cancel the BLUE BACK function Press the 5 buttons to choose OFF 3 Press the a button to complete the setting The menu disappears CHILD LOCK CHILD LOCK CHILD LOCK CHILD LOCK When there is a TV channel you do not want ...

Страница 24: ... confirming the ID number press the b button to exit the menu Even if you reset the lock temporarily it does not mean that the CHILD LOCK function set for the TV channel is cancelled The next time anyone tries to view the TV channel it will be locked again When you want to cancel the CHILD LOCK function you must perform the operation To set the CHILD LOCK function again To stop it being easy to ch...

Страница 25: ...ars You can now edit the programme numbers PR list using the EDIT MANUAL function For details see EDIT MANUAL on page 26 When not using the EDIT MANUAL function If you do not need to use the EDIT MANUAL function go to the next step 4 Press the a button to display the T V LINK menu 5 Operate the T V LINK menu according to the type of video cassette recorder VCR you have connected to the EXT 2 termi...

Страница 26: ...nnels will change Using the MANUAL function for a TV channel for which the CHILD LOCK function has been set cancels the CHILD LOCK function for that channel Using the MANUAL function for a TV channel for which the DECODER EXT 2 function has been set to ON returns the setting of the DECODER EXT 2 function for that channel to OFF When a TV channel has already been registered in PR 99 using the INSER...

Страница 27: ...ss the a button to register the channel name ID to the TV channel INSERT INSERT INSERT INSERT Preparation You need to find the CH CC number for the TV channel Find the CH CC number from the CH CC NUMBER table on page 28 based on the channel number of the TV channel 1 Press the 6 buttons to choose a Programme number PR for which you will register a new TV channel 2 Press the green button and start ...

Страница 28: ...to know a particular TV channel s channel menu look in TV listings magazines or contact the broadcaster The UK model AV28CT1EK cannot receive the CC number channels or the channels from CH 02 to CH 12 CC Channel CC 01 S1 CC 02 S2 CC 03 S3 CC 04 S4 CC 05 S5 CC 06 S6 CC 07 S7 CC 08 S8 CC 09 S9 CC 10 S10 CC 11 S11 CC 12 S12 CC 13 S13 CC 14 S14 CC 15 S15 CC 16 S16 CC 17 S17 CC 18 S18 CC 19 S19 CC 20 S...

Страница 29: ... ON 2 Press the a button to complete the setting The DEMO function is set to ON and the demonstration will start To stop the demonstration Press one of the buttons on the remote control When the DEMO function is set to ON Each time the TV is turned on the demonstration starts automatically If you do not want that to happen cancel the DEMO function 1 Display the DEMO menu again 2 Press the6 buttons...

Страница 30: ...ion If you have a decoder connected to a T V LINK compatible VCR which in turn is connected to the EXT 2 terminal use the DECODER EXT 2 function to unscramble the scrambled TV channels 1 Turn on the decoder power 2 Display the scrambled TV channel on the TV Even if the decoder is working a scrambled picture appears 3 Press the a button to display the MENU The MENU main menu appears 4 Press the 6 b...

Страница 31: ...ff all the equipment including the TV The Specifications on the back cover give the details of the EXT terminals If you are connecting equipment not listed in the following connection diagram see the table to choose the best EXT terminal Connecting cables are not supplied 1VCR composite signal 2VCR composite signal S VIDEO signal 3T V LINK compatible VCR composite signal S VIDEO signal 4Decoder 5D...

Страница 32: ...programme number PR to ON to unscramble a scrambled TV channel For details see Using the DECODER EXT 2 function on page 30 Connecting headphones Connecting headphones Connecting headphones Connecting headphones Connect the headphones with a stereo mini jack 3 5mm diameter to the headphone jack at the TV front panel When you connect the headphones the TV speakers go off Video or sound signal output...

Страница 33: ...r Panel 1Remote control sensor 5P buttons q q q q buttons page 10 2Headphone jack mini jack page 31 6Power lamp pages 5 and 8 3EXT 4 terminal pages 21 and 31 7Main power button pages 5 and 8 4r r r r Volume button page 10 8Aerial socket page 4 0EXT 2 terminal pages 4 7 21 and 31 9EXT 1 terminal pages 4 21 and 31 EXT 3 terminal pages 21 and 31 EXT 2 EXT 1 EXT 3 S S EXT 1 ...

Страница 34: ...ilure When the picture disappears from the screen the unnatural colours will also disappear When viewing images from commercially available video software products or videos from videotapes which have been recorded improperly the top of the image may be distorted This is due to the condition of the video signal and not because of malfunction Poor sound Poor sound Poor sound Poor sound Have you adj...

Страница 35: ...tem Teletext systems FLOF Fastext WST World Standard Text Power requirements 220 240 V AC 50 Hz Power consumption Maximum 156 W Average 122 W Standby 0 8 W Picture tube size Viewable area 66 cm measured diagonally Audio output Rated Power output 5 W 5 W Speakers 10 cm 3 cm oval 2 EXT 1 terminal Euroconnector 21 pin SCART Video input Audio L R inputs and RGB inputs are available TV broadcast output...

Отзывы: