background image

14

Using the Tuner

Receiving FM Stations with RDS

You can use the RDS (Radio Data System) by using the but-
tons on the Remote Control.
RDS allows FM stations to send additional signals with
their regular program signals. For example, the stations
send their station names, and information about what type
of program they broadcast, such as sports or music, etc. This
Unit can receive the following types of RDS signals:

PS (Program Service):

shows commonly known station names.

PTY (Program Type):

shows types of broadcast programmes.

RT (Radio Text):

shows text messages the station sends.

What information can RDS signals provide?

The display shows RDS signal information that the station
sends.
• The RDS indicator lights up when turned to a station that

provides RDS information.

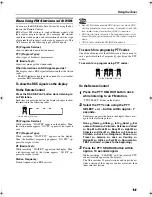
To show the RDS signals on the display

On the Remote Control

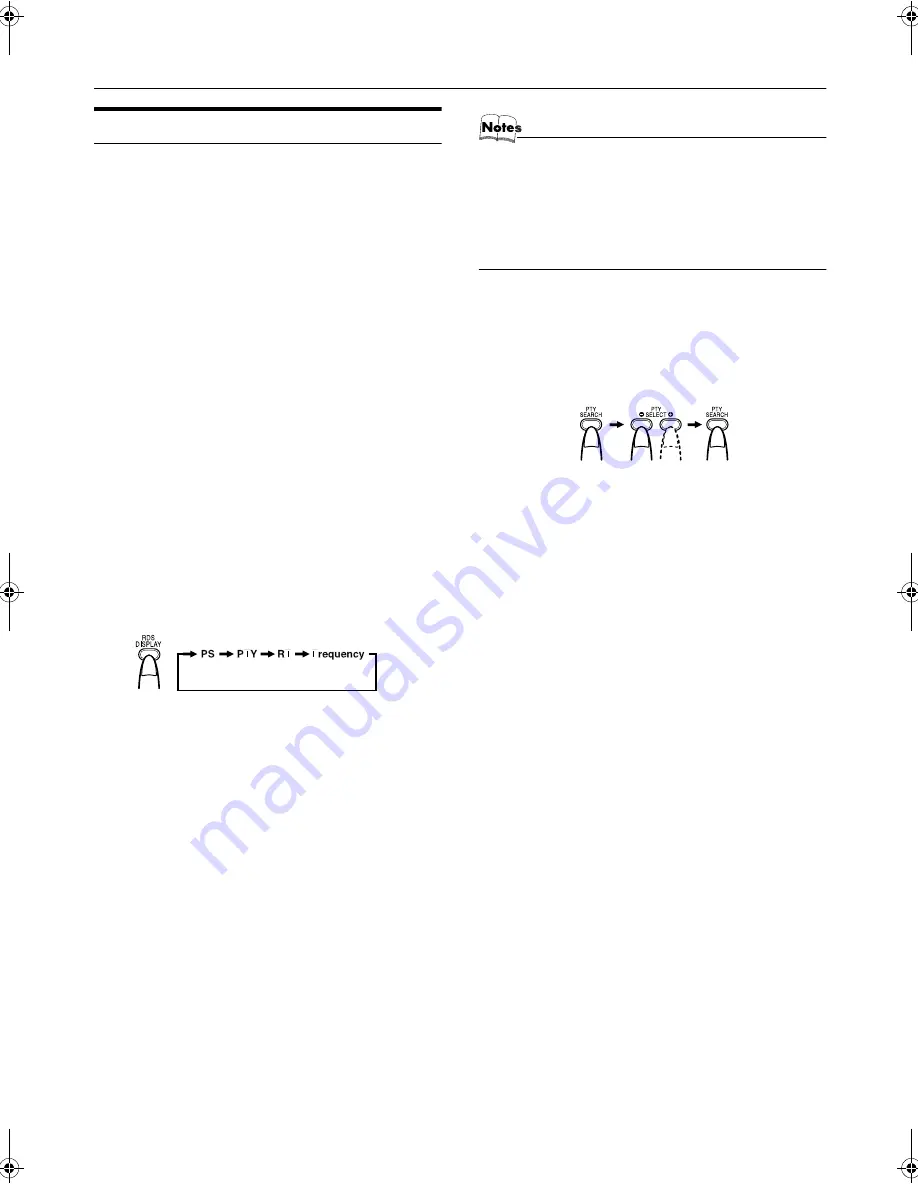
Press the RDS DISPLAY button while listening to 
an FM station.

Each time you press the button, the display changes to show
information in the following order:

PS (Program Service):

While searching, “WAIT PS” appears on the display. Then,
the station name appears. “NO PS” appears if no signal is
sent.

PTY (Program Type):

While searching, “WAIT PTY” appears on the display.
Then, the broadcast program type appears. “NO PTY” ap-
pears if no signal is sent.

RT (Radio Text):

While searching, “WAIT RT” appears on the display. Then,
a text message sent by the station appears. “NO RT” ap-
pears if no signal is sent.

Station Frequency:

Station frequency (non-RDS service)

• Not all FM stations provide RDS signals, nor do all RDS 

stations provide the same services. If in doubt, check with 
local radio stations for details on RDS in your area.

• RDS may not work correctly if the received station is not 

transmitting the signals properly or if the signal strength is 
weak.

• RDS is not available for AM (MW) broadcasts.

To search for a program by PTY codes

One of the advantages of the RDS service is that you can lo-
cate a particular kind of program by specifying the PTY
codes.

To search for a program using PTY codes:

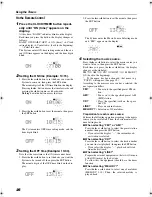
On the Remote Control

1

Press the PTY SEARCH button once 
while listening to an FM station.

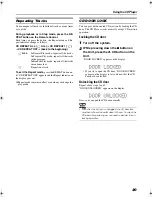
“PTY SELECT” blinks on the display.

2

Select the PTY code using the PTY 
or – button within approx. 7 
seconds.

Each time you press the button, the display shows a cat-
egory in the following order:

None 

 News 

 Affairs 

 Info 

 Sport 

 Ed-

ucate 

 Drama 

 Culture 

 Science 

 Varied

 Pop M 

 Rock M 

 Easy M 

 Light M 

Classics 

 Other M 

 Weather 

 Finance 

Children 

 Social 

 Religion 

 Phone In 

Travel 

 Leisure 

 Jazz 

 Country 

Nation M 

 Oldies 

 Folk M 

 Document 

TEST 

 Alarm! 

 (back to the beginning)

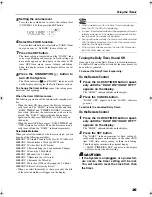
3

Press the PTY SEARCH button within 
approx. 10 seconds again.

While searching, “SEARCH” and the selected PTY
code alternately appears on the display.
The Unit searches 30 preset stations and stops when it
finds a station of the category you have selected, then
tunes into that station.

On the Remote Control

On the Remote Control

FS-X5(B)_E.book  Page 14  Friday, March 28, 2003  2:49 PM

Содержание 0403MNMCREJEM

Страница 1: ...low the Model No and Serial No which are located either on the rear bot tom or side of the cabinet Retain this information for future reference Model No Serial No INSTRUCTIONS LVT1041 002A B FS X5 Consists of CA FSX5 and SP FSX5 SP FSX5 CA FSX5 SP FSX5 ...

Страница 2: ... level surface Maintain an adequate air path for ventilation by plac ing on a stand with a height of 10 cm or more Caution STANDBY ON button Disconnect the main plug to shut the power off completely The STANDBY ON button in any position does not disconnect the main line The power can be remote controlled When the unit is on standby the STANDBY ON indicator lights red When the unit is turned on the...

Страница 3: ...equipment switched on when it is unattended unless it is specifically stated that it is designed for unat tended operation or has a standby mode Switch off using the switch on the equipment and make sure that your family know how to do this Special arrangements may need to be made for infirm or handicapped people DON T use equipment such as personal stereos or radios so that you are distracted fro...

Страница 4: ...onditions How This Manual Is Organized Basic information that is the same for many different functions e g setting the volume is given in the section Basic Operations and not repeated under each function The names of buttons controls and display messages are written in all capital letters e g FM AM CD NO DISC System functions are written with an initial capital letter only e g Normal Play Use the ...

Страница 5: ... Reinforcing the Bass Sound Active Hyper Bass Pro 10 Tone Control BASS TREBLE 11 Auto Power Off A P off 11 Entering the Number with the Remote Control Numeric Keys 11 Using the Tuner 12 Tuning In a Station 12 Presetting Stations 13 To Change the FM Reception Mode 13 Beat Cut AM MW Reception 13 Receiving FM Stations with RDS 14 Using the CD Player 17 To Insert a CD 17 To Unload a CD 18 Basics of Us...

Страница 6: ...Table of Contents 3 Setting the SLEEP Timer 27 Timer Priority 27 Troubleshooting 28 Care And Maintenance 29 Specifications 30 ...

Страница 7: ...mpartment CAUTION Handle batteries properly To avoid battery leakage or explosion Remove batteries when the Remote Control will not be used for a long time When you need to replace the batteries replace both batteries at the same time with new ones Do not use an old battery with a new one Do not use different types of batteries together Using the Remote Control The Remote Control makes it easy to ...

Страница 8: ...t reception If reception is poor connect the outdoor antenna Using the Coaxial Type Connector Not Supplied A 75 ohm antenna with coaxial type connector IEC or DIN 45 325 should be connected to the FM 75 ohm COAXIAL terminal Before attaching a 75 ohm coaxial lead the kind with a round wire going to an outdoor antenna disconnect the supplied FM Wire Antenna on the side panel FM wire antenna supplied...

Страница 9: ...t touch any other terminals connecting cords and power cord This could cause poor reception If reception is poor connect an outdoor single vinyl covered wire to the AM EXT terminal Keep the AM MW loop antenna connected Attach the AM MW loop to its base by snapping the tabs on the loop into the slot in the base AM MW loop antenna Supplied Turn the loop until you have the best reception Outdoor sing...

Страница 10: ...the right or left side Do not connect other speakers to the Unit The difference of the load impedance causes failures Do not use the supplied speakers in parallel with other speakers CAUTIONS A TV may display irregular colors if located near the speakers If this happens set the speak ers away from the TV Handling the speakers Do not hold the speaker incorrectly Otherwise it will be damaged Also dr...

Страница 11: ...o or listen to an external equipment with a single press of the play button for that function One Touch Operation turns the power on for you then starts the function you have specified If the System is not ready no CD in place the System still powers on so you can insert a CD How One Touch Operation works in each case is explained in the section dealing with that function The COMPU PLAY buttons ar...

Страница 12: ...n you unplug the AC power cord the clock will be reset to 0 00 Changing the Source The System has four sound sources CD FM AM MW and LINE Select one of sources you want to listen For example when you want to listen to the CD select the source CD On the Unit Turn the Source selector to select the source you want Each time you turn it clockwise or counterclockwise the source changes as follows CD Ô ...

Страница 13: ... out of the speakers Be sure to turn down the volume before connecting or put ting on headphones CAUTION DO NOT turn off the System with the volu me set to an extremely high level otherwi se a sudden blast of sound could damage your hearing speakers and or headphones when you turn on the System or start play ing any source next time REMEMBER you cannot adjust the volume level while the System is i...

Страница 14: ...follows A P off SET Ô A P off STOP When no signal condition is detected the A P off indica tor will start blinking soon No signal condition Source CD CD is stopped or no CD is inserted When no signal condition continues A P off 20 sec 20 seconds left before elapsed time reaches three minutes ap pears on the display The displayed time is counted down and finally the System is turned off Standby mod...

Страница 15: ...Control repeatedly to move from frequency to frequency until you find the station you want OR Auto Tuning If you press and hold the or 4 button on the Unit or the 5 or button on the Remote Control for one second or more the frequency changes up or down automatically until a station is found OR Preset Tuning using the Remote Control Possible only after presetting stations Select the desired preset ...

Страница 16: ...M Reception Mode When you are tuned into an FM stereo broadcast the ST indicator lights up and you can hear stereo effects If an FM stereo broadcast is hard to receive or noisy you can select Monaural mode Reception improves but you lose stereo effect FM AUTO mode is also useful to suppress static noise be tween stations To enter Monaural mode while receiving an FM broadcast press the FM PLAY MODE...

Страница 17: ...t message sent by the station appears NO RT ap pears if no signal is sent Station Frequency Station frequency non RDS service Not all FM stations provide RDS signals nor do all RDS stations provide the same services If in doubt check with local radio stations for details on RDS in your area RDS may not work correctly if the received station is not transmitting the signals properly or if the signal...

Страница 18: ...sic from another nation region in that country s language Oldies Classic pop music Folk M Folk music Document Programs dealing with factual matters pre sented in an investigative style TEST Test broadcasts Alarm Emergency broadcasts To temporarily switch to a broadcast pro gram of your choice Enhanced Other Network mode is another convenient RDS service that allows this Unit to switch temporarily ...

Страница 19: ... the Alarm signal Test function The TEST signal is used for testing the Alarm signal Therefore it makes the Unit work in the same way as the Alarm signal does If a TEST signal is received from a station while listening to an RDS station sending the Enhanced Other Network da ta the Unit automatically switches to the station broadcast ing the TEST signal More about the Enhanced Other Network functio...

Страница 20: ...utomatically turned on and if a CD is already inserted it will start playing from the first track If no CD is inserted CD NO DISC appears on the dis play and the CD Player remains in Stop mode To Insert a CD 1 Select the source CD using the Source selector on the Unit 2 Press the 0CD button on the Unit or the CD DOOR 0 button on the Remote Control The CD door opens 3 Place a CD with its label side...

Страница 21: ...s the or 3 button once to skip to the beginning of the next track Press the 4 or 2 button to skip to the beginning of the track being played Press twice quickly to skip to the beginning of the previous track When the 3 or 2 button on the Remote Control is kept pressing the track continuously skips Press the Numeric Keys to select truck number See page 11 In Stop mode Press the or 4 or 3 or 2 butto...

Страница 22: ...display The PRGM in dicator goes out To re enter the Program Play mode press the FM PLAY MODE button until CD PROGRAM appears on the display The PRGM indicator lights up If the total playback time of the programmed tracks ex ceeds 1 hour and 40 minutes will appear on the dis play If you try to program the 33rd track MEMORY FULL ap pears on the display for about 2 seconds To Modify the Program Modi...

Страница 23: ...epeat indicator on the display goes out Repeat mode remains in effect even when you change the play mode CD DOOR LOCK You can prevent unwanted CD ejection by locking the CD door The CD Player works normally except CD ejection operation Locking the CD door 1 Turn off the system 2 While pressing down the 7 button on the Unit press the 0 CD button on the Unit DOOR LOCKED appears on the display If you...

Страница 24: ...ct other source e g CD For operation of the external equipment refer to its In structions Changing the Equipment s Name You can change the equipment s name according to the equipment to be used At purchase LINE is selected On the Remote Control 1 Press the LINE button to select the source LINE 2 Press the LINE button for two seconds or more NAME CHANGE blinks on the display 3 While NAME CHANGE is ...

Страница 25: ... jacks is too loud or is not loud enough when changing the source to the external component without adjusting the volume level you can change the input level through the LINE IN jacks On the Remote Control 1 When the source is LINE press and hold the SET button If you have changed the source name of the external component the currently selected source will appear see page 21 2 Press the 3 or 2 but...

Страница 26: ...th On the Remote Control 1 Press the CLOCK TIMER button The hour digit of the time indication blinks on the dis play also the Clock indicator blinks If the clock is already set and the Clock indicator is not blinking press the CLOCK TIMER button repeatedly until the clock setting display appears on the display Each time you press the CLOCK TIMER button the dis play changes as follows DAILY ON DAIL...

Страница 27: ...ton the display changes as follows Example 2 Perform steps 2 to 5 in Setting the Clo ck on page 23 24 When the System is in power saving mode nothing ap pears on the display To see the clock press the DIMMER button on the Remote Control The clock may gain or lose one to two minutes per month If there is a power failure the clock loses its setting 0 00 blinks on the display and the clock must be re...

Страница 28: ...g mode and FM appears on the display 4 Selecting the music source Press the 3 or 2 button to select the music source you want to listen to then press the SET button Each time you press the 3 or 2 button the display changes as shown below FM Ô AM Ô CD Ô LINE Ô MELODY Ô back to the beginning If the name has been changed that name e g TAPE will appear See page 21 According to the music source you hav...

Страница 29: ...bel MELODY 6 Menuett by J S Bach MELODY 7 Humoresk by A Dvorak MELODY 8 Serenade by J Haydn MELODY 9 Jesus Joy Of Man s Desiring by J S Bach MELODY10 Ravel s Bolero by Ravel When you select the melody as the source only the title of the selected melody will appear on the display When a melody is set for the Daily Timer while playing back the CD the CD will stop playing In step 4 the selected melod...

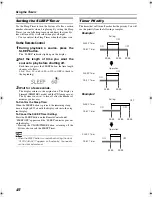
Страница 30: ...he System is now set to turn off after the number of minutes you have set To Confirm the Sleep Time When the SLEEP button is pressed the remaining sleep time is displayed Wait until the display returns to the orig inal display To Cancel the SLEEP Timer Setting Press the SLEEP button on the Remote Control until SLEEP OFF appears and the SLEEP indicator goes out on the display Pressing the CLOCK TIM...

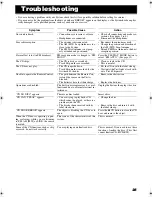
Страница 31: ...Track Skip mark is recorded for the first track of the disc Put the CD in with the label side up Wait until the Unit finds a track with out a Track Skip mark Unable to operate the Remote Control The path between the Remote Con trol and the sensor on the Unit is blocked The batteries have lost their charge Remove the obstruction Replace the batteries Operations are disabled The built in microproces...

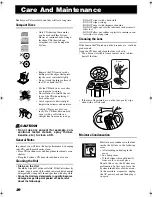
Страница 32: ...tc could de grade sound Open the CD door and clean the lens as shown Use a blower available from a camera store to blow dust off the lens If there are fingerprints etc on the lens gently wipe clean with a cotton swab Moisture Condensation Only CDs bearing these marks can be used with this System However continued use of irregu lar shape CDs heart shape octagonal etc can damage the System Remove th...

Страница 33: ...er Requirements AC 230 V 50 Hz Power Consumption 30 W power on mode 2 0 W on Standby with display off 7 0 W on Standby with display on Center Unit Dimensions 160 mm 130 mm 242 mm W H D Mass Approx 2 3 kg Speaker Specifications each unit SP FSX5 Type 2way Bass reflex type Main Speaker 9 5 cm 1 cm Direct drive Power Handling Capacity 30 W Impedance 4 Ω Sub woofer 9 0 cm cone Power Handling Capacity ...

Страница 34: ...VICTOR COMPANY OF JAPAN LIMITED EN 0403MNMCREJEM 2003 VICTOR COMPANY OF JAPAN LIMITED ...

Отзывы: