8
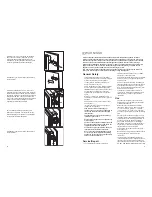
Fugenabdeckprofil am Gerät, wie in Abbildung
gezeigt ankleben.
D765
Das Gerät muß unbedingt vorschriftsmäßig geerdet
werden. Zu diesem Zweck ist der Stecker des
Speisekabels mit dem dafür vorgesehenen Kontakt
versehen. Sollte die Netzleitung im Haus nicht mit
einer Erdleitung versehen sein, so muß das Gerät
an eine getrennte Erdleitung vorschriftsmäßig und
unter Hinzuziehung eines Fachmanns
angeschlossen werden.
Die Erzeugerfirma lehnt jede Verantwortung ab,
falls diese Unfallverhütungsvorschrift nicht
beachtet wird.
Dieses Gerät entspricht der folgende EWG
Richtlinie:
ACHTUNG!
Es muß möglich sein, das Gerät vom Netz zu
trennen; nach der Installation muß die Steckdose
daher zugänglich bleiben.
Montageanleitung für den
integrierten Einbau
Nischenmaße
Höhe 880
mm
Tiefe 550
mm
Breite 560
mm
Aus Gründen der Sicherheit muß eine
Mindestbelüftung gesichert sein, wie aus der
Abb.hervorgeht.
Achtung: Die Ventilations - Öffnungen müssen
immer saubergehalten werden.
Ferner ist auch am hinteren Einbauschrankteil ein
Lüftungskamin mit filgenden Massen notwendig:
Tiefe
50 mm
Breite
540 mm
50 mm
min.
200 cm
2
200 cm
2
min.
D567
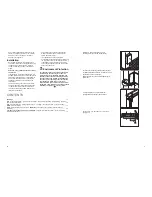
Türanschlagwechsel
Zur Transportsicherung wurde die Gerätetür an
beiden Anschlagseiten mit Scharnierstiften befestigt.
Je nach Türanschlag, Scharnierstift auf einer Seite
oben und unten entfernen.
- 87/308 EWG vom 2.6.87 (Deutschland-
Ausführung) bzw. der ÖVE-Richtlinie Nr. F
61/84 (Österreich-Ausführung) bezüglich
Funkentstörung.
- 73/23 EWG vom 19/02/73 (Niederspannung)
und folgende Änderungen;
- 89/336 EWG vom
03/05/89(Elektromagnetische Verträglichkeit)
und folgende Änderungen.
PR01
540
50
B
T
H
13
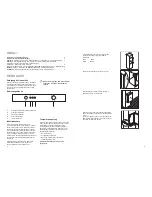
Cleaning the interior
Before using the appliance for the first time, wash
the interior and all internal accessories with luke-
warm water and some neutral soap so as to remove
the typical smell of a brand-new product, then dry
thoroughly.
Operation
Insert the plug into the wall socket. Turn the
thermostat knob (E), clockwise, beyond the «O»
(STOP) position.The pilot light (D) will light up,
indicating that the appliance is powered. The
warning light (C) will light up and the sound signal
alarm will get on, indicating that the temperature
inside the appliance is to high.
Push the button (A), the sound signal alarm will get
off and the super control light (B) light up. The
freezer will start to operate.
To stop operation, simply turn the thermostat knob to
position «O».
Temperature regulation
The temperature is automatically regulated and can
be increased to achieve a higher temperature
(warmer) by rotating the thermostat knob toward
lower settings or reduced (colder) rotating the knob
towards higher settings.
However, the exact setting should be chosen
keeping in mind that the temperature inside the
refrigerator depends on:
•
room temperature;
•
how often the door is opened;
•
the quantity of food stored;
USE
Do not use detergents or abrasive
powders, as these will damage the finish.
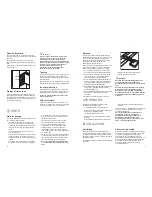
Control Panel
A.
Normal/Super push button/
Sound signal alarm
B.
Super control light
C.
Warning light
D.
Pilot light
E.
Thermostat knob
Quick-freezing
For quick-freezing, push the button (A). The super
control light (D) will then light up.
Warning light (C)
The temperature alarm light turns on automatically
whenever the temperature within the freezer rises
above a certain value which might endanger
satisfactory long-term conservation.
It is perfectly normal for the temperature alarm light
to remain lit up for a short time after the freezer is
initially turned on. It will remain lit up until the
optimum temperature for the conservation of frozen
food is attained.
Sound signal alarm (A)
This appliance incorporates an alarm which gives off
a sound signal when the temperature inside the
freezer has risen to a point where the safe storage
of frozen food is no longer ensured.
This sound can be turned off be depressing
pushbutton (A).
•
location of appliance.
A medium setting is generally the most suitable.
A
B
C
D
E
2
3
4
5
6
1


