16
Instructions for totally built-in appliances
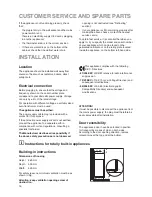
50 mm
min.
cm
2
200
200 cm
2
min.
D567
Building-in instructions
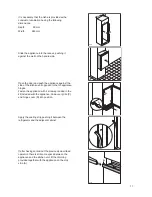
Dimensions of housing
Height 880
mm
Depth 550
mm
Width 560
mm
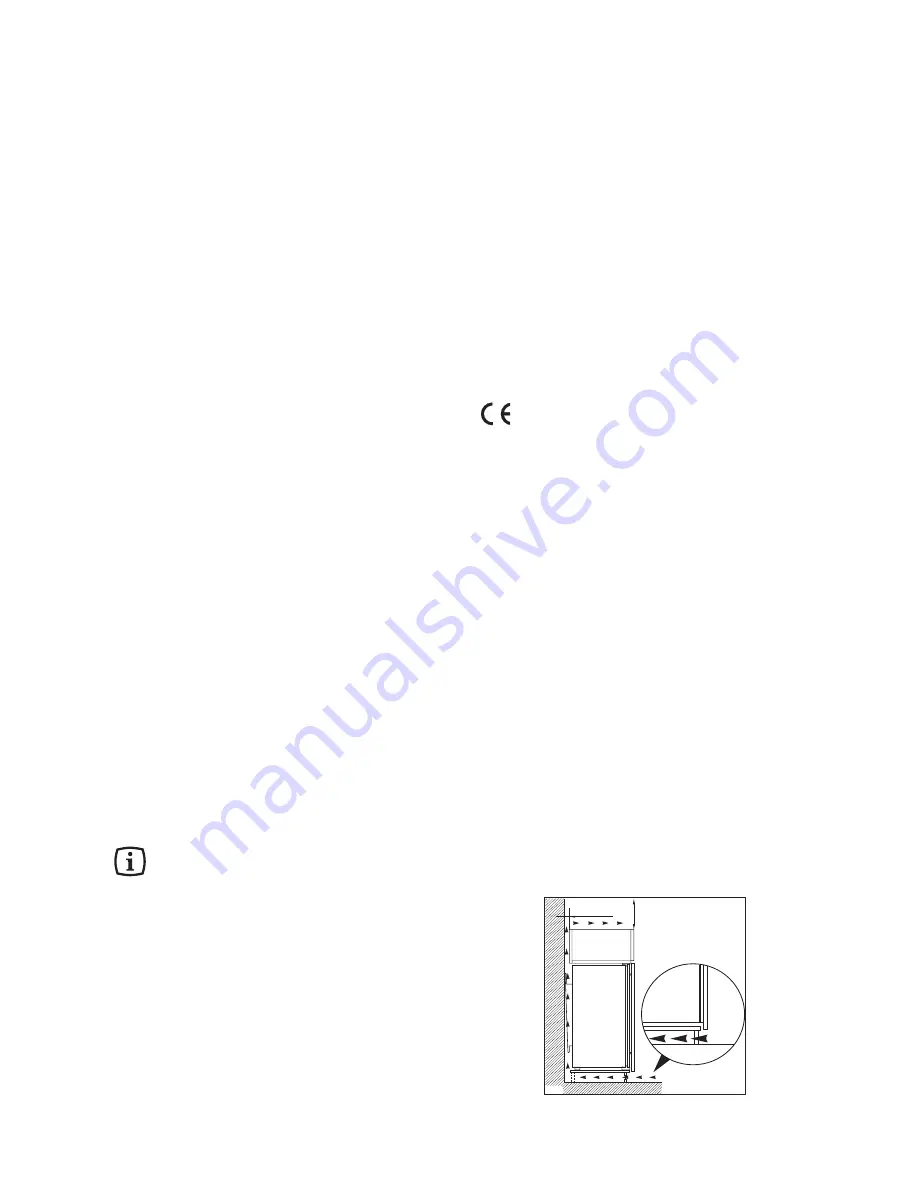
For safety reasons, minimum ventilation must be as
shown in Fig.
Attention: keep ventilation openings clear of
obstruction.
ATTENTION!
It must be possible to disconnect the appliance from
the mains power supply; the plug must therefore be
easily accessible after installation.
Electrical connection
Before plugging in, ensure that the voltage and
frequency shown on the serial number plate
correspond to your domestic power supply. Voltage
can vary by ±6% of the rated voltage.
For operation with different voltages, a suitably sized
auto-transformer must be used.
The appliance must be earthed.
The power supply cable plug is provided with a
contact for this purpose.
If the domestic power supply socket is not earthed,
connect the appliance to a separate earth in
compliance with current regulations, consulting a
specialist technician.
The Manufacturer declines all responsibility if
the above safety precautions are not observed.
INSTALLATION
Location
The appliance should be installed well away from
sources of heat such as radiators, boilers, direct
sunlight etc.
This appliance complies with the following
E.E.C. Directives:
- 87/308 EEC
of 2/6/87 relative to radio interference
suppression.
- 73/23 EEC
of 19.2.73 (Low Voltage Directive) and
subsequent modifications;
- 89/336 EEC
of 3.5.89 (Electromagnetic
Compatibility Directive) and subsequent
modifications.
CUSTOMER SERVICE AND SPARE PARTS
If the appliance is not functioning properly, check
that:
¥
the plug is firmly in the wall socket and the mains
power switch is on;
¥
there is an electricity supply (find out by plugging
in another appliance);
¥
the thermostat knob is in the correct position.
¥
If there are water drops on the bottom of the
cabinet, check that the defrost water drain
opening is not obstructed (see ÒDefrostingÓ
section).
¥
If your appliance is still not working properly after
making the above checks, contact the nearest
service centre.
To obtain fast service, it is essential that when you
apply for it you specify the model and serial number
of your appliance which can be found on the
guarantee certificate or on the rating plate located
inside the appliance, on the bottom left-hand side.
Door reversibility
The applianceÕs door have been locked in position
for transport by means of pins on both sides.
According to the door opening direction, remove
relevant pins at the top and at the bottom.


