


Steps to Add or Replace I/O Modules in a Deployed IDP 8200
3
2
Steps to Add or Replace I/O Modules in a Deployed IDP 8200
The steps provided in this section assume you have already installed IDP 8200 with
one or more I/O modules and deployed the appliance to your network.
Follow these steps to add or replace I/O modules to an IDP 8200 you have already
deployed:
1.
For IDP 8200 appliances running software version 4.2r1, you must download
and install an updated network driver patch to support the following I/O
modules.
I/O modules not listed do not require the updated network driver patch.
For detailed procedures, see “Downloading and Installing the Updated Network
Driver Patch IDP 8200” on page 4.
2.
Power off the device. Verify that the POWER LED is off.
3.
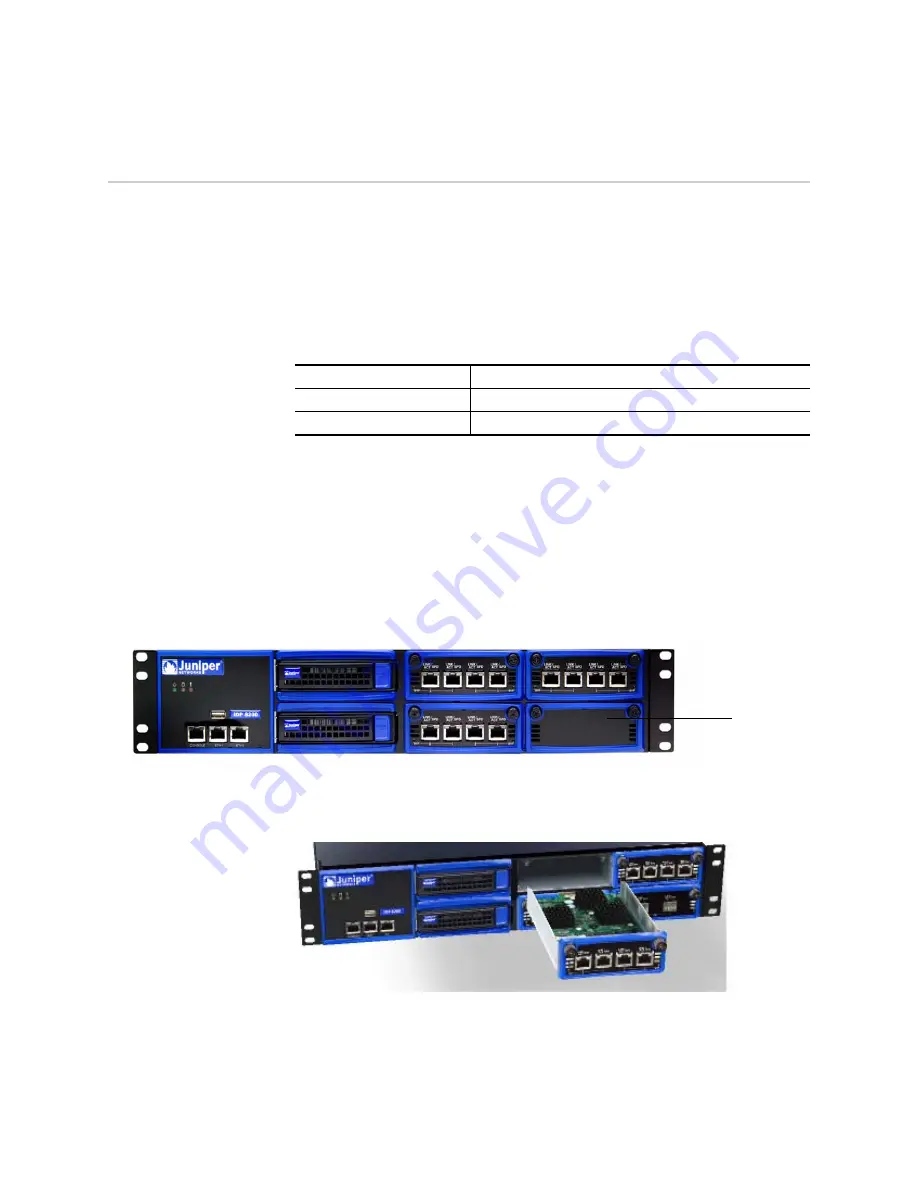
Unscrew the blank or replaceable module tray and remove it from the chassis.
Figure 3: Identifying the I/O Module Blank Tray
4.
Carefully replace the blank or replaceable module tray with the new I/O module
tray.
Figure 4: Replacing the Blank Tray with the I/O Module Tray
5.
Tighten the screws on each side of the faceplate.
6.
Power on the device. Verify that the green POWER LED lights steadily.
7.
Connect to the Appliance Configuration Manager (ACM) as described Chapter 4
of the
Juniper Networks Intrusion Detection and Prevention Installation Guide
.
IDP-1GE-4SX-BYP
4-port 1 GigE SX fiber interface card with bypass
IDP-10GE-2SR-BYP
2-port 10 GigE SR interface card with bypass
IDP-10GE-2XFP
2-port 10 GigE XFP interface card (non-bypass)
I/O Module
Blank Tray