


Figure 33: Mounting the Switch on Front Posts of a Rack
g022534
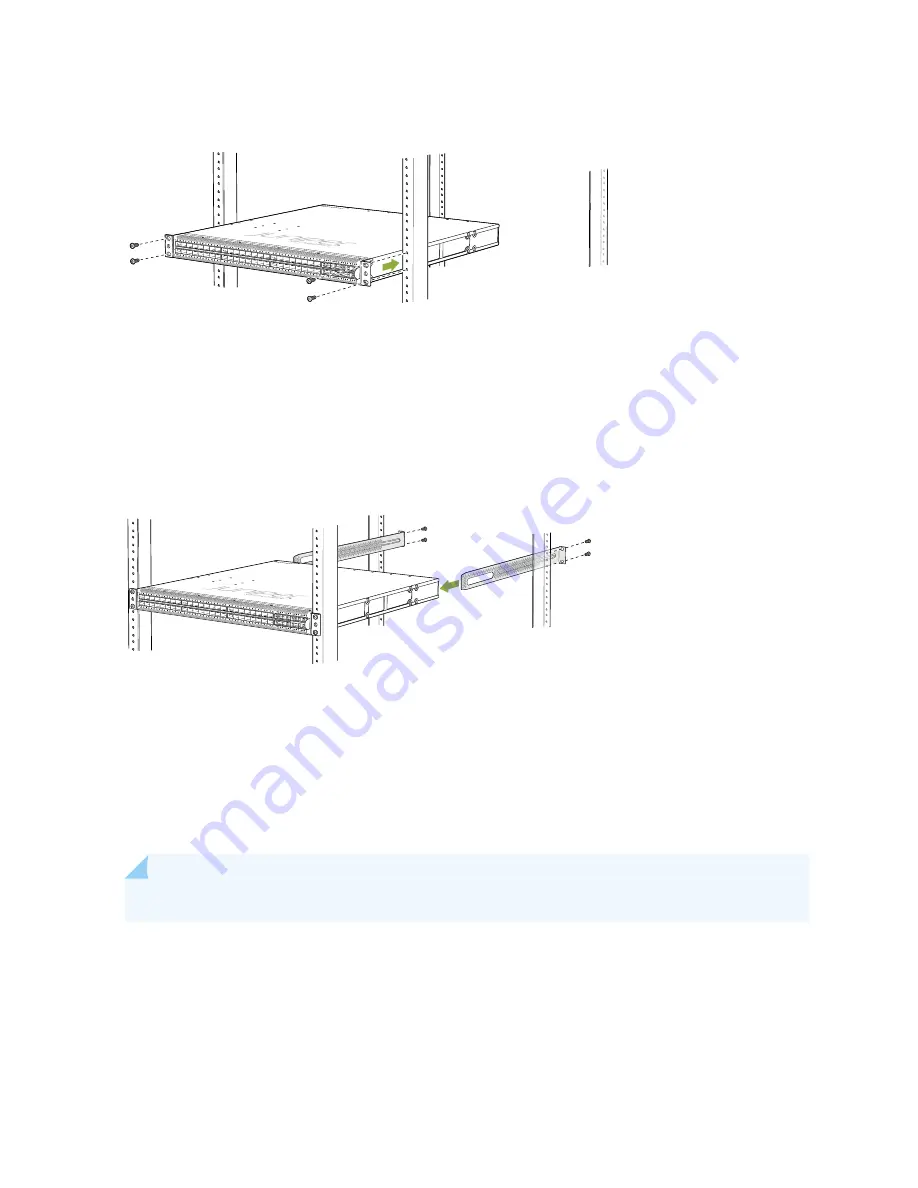
6. Have a second person secure the front of the switch to the rack by using the appropriate screws for
your rack.
7. Slide the rear mounting-blades into the side mounting-rails. See
.
Figure 34: Sliding the Rear Mounting-Blades into the Side Mounting-Rails
g022535
8. Attach the rear mounting-blades to the rear post by using the appropriate screws for your rack. Tighten
the screws.
9. Ensure that the switch chassis is level by verifying that all the screws on the front of the rack are aligned
with the screws at the back of the rack.
NOTE:
We recommend that you install cover panels in the unused power supply slots.
86
Содержание EX4650 Series
Страница 1: ...EX4650 Switch Hardware Guide Published 2019 10 10 ...
Страница 17: ......
Страница 55: ......
Страница 78: ......
Страница 105: ......
Страница 126: ...5 CHAPTER Troubleshooting Hardware Troubleshooting the EX4650 Components 131 ...
Страница 127: ......
Страница 133: ......
Страница 151: ...Restricted Access Warning 155 ...
Страница 166: ...Jewelry Removal Warning 170 ...
Страница 169: ...Operating Temperature Warning 173 ...
Страница 178: ...DC Power Disconnection Warning 182 ...
Страница 182: ...DC Power Wiring Sequence Warning 186 ...
Страница 185: ...DC Power Wiring Terminations Warning 189 ...


