Connect the Gateway
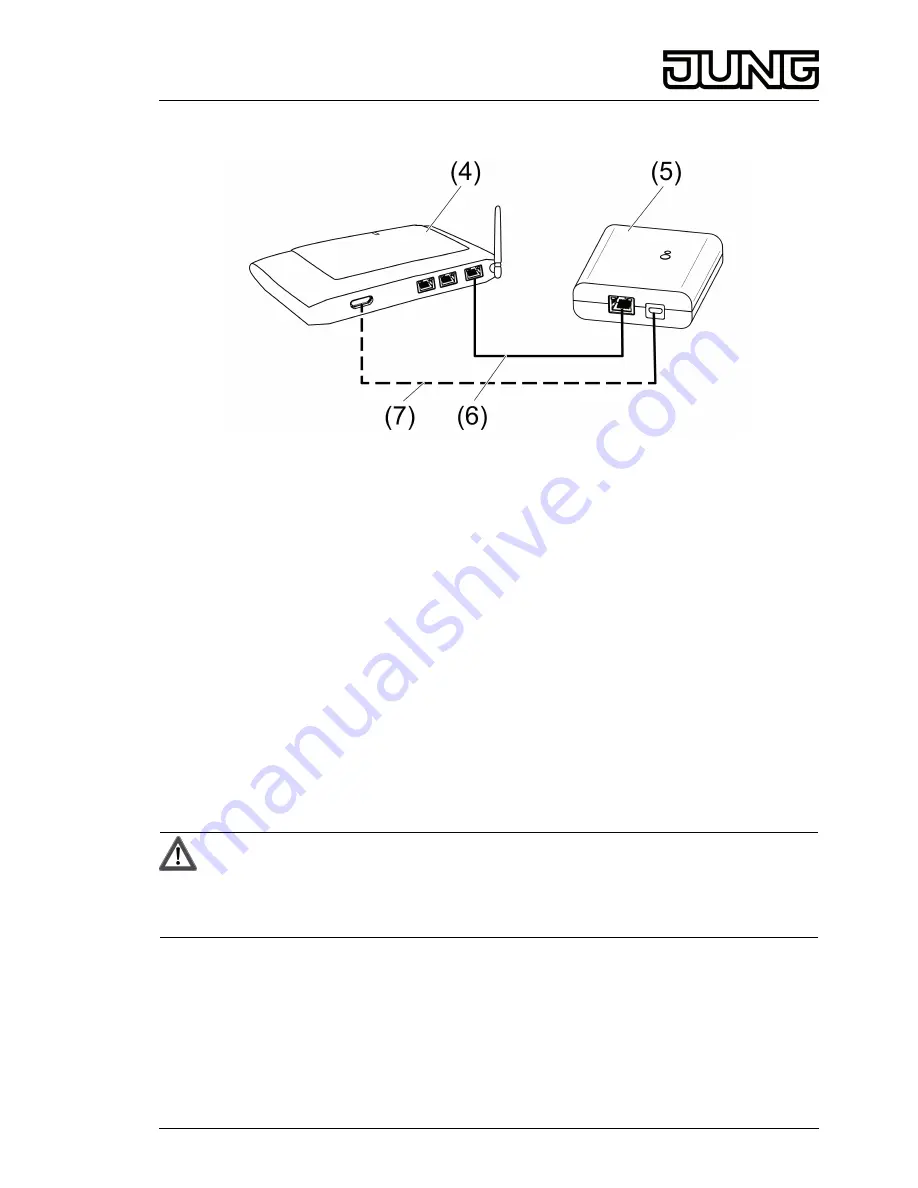
Figure 3: Connection of the Gateway
(4) WiFi router or access point
(5) Gateway
(6) Ethernet cable
(7) USB cable, Micro USB plug.
WiFi route supports DHCP and the Gateway is set up for operation with DHCP (default setting).
o
Using the supplied USB cable, connect the Gateway to a free USB connection of the WiFi
router or a USB power supply (not included in the scope of supply).
The Status LED (1) flashes green every 10 seconds (no LAN connection available).
o
Establish network connection. To do this, connect the LAN connection to a free LAN
connection of the WiFi router using the Ethernet cable supplied.
The orange LED of the LAN connection lights up when the connection is correct. The green
LED of the LAN connection flashes during data transmission.
The Status LED (1) flashes green, the Gateway is obtaining the IP address of the WiFi
router via DHCP.
The Status LED (1) turns green, meaning the Gateway is ready for operation.
5.2 Commissioning
DANGER!
Electrical shock when live parts are touched.
Electrical shocks can be fatal.
During commissioning, cover the parts carrying voltage on radio transmitters
and actuators and in their surrounding area.
i
The Gateway can also be commissioned with eNet server as an alternative to the
commissioning described here.
Connecting a tablet PC or smartphone with the Gateway
o
Connect the tablet PC or smartphone with the WiFi router.
o
Download the app.
o
Launch the app, scan for IP devices and set up the connection.
i
The details for connecting the terminal and the Gateway depend on the app used.
4/8
82589503
J:0082589503
27.03.2014
eNet
Radio IP gateway


