background image

53

52

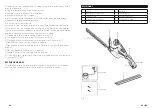
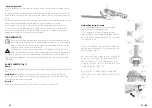
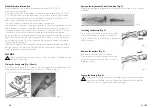
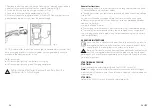
Rimuovere il fodero dalla lama. (Fig. 3)

Nota: si raccomanda di indossare i guanti durante la rimozione del fodero per 
evitare lesioni.

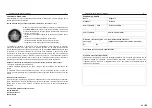
Ricarica (Fig. 6)

Attenzione! Utilizzare il caricabatterie solo in luoghi asciutti.
Prima di utilizzare il prodotto per la prima volta, ricaricare la batteria 


per almeno 3-5 ore. Utilizzare solo il caricabatteria originale.

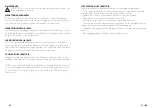
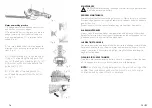
Estrazione della batteria (Fig. 5)

Per estrarre la batteria dal dispositivo, pre-
mere i pulsanti di rilascio su entrambi i lati 
della batteria e, nel contempo, estrarre qu-
est’ultima tirandola nella direzione indicata 
dalla freccia (Fig. 5)

Installazione della batteria (Fig. 4)

Inserire la batteria nell’impugnatura principale 
nella direzione indicata dalla freccia come 
illustrato in (Fig. 4) e accertarsi che sia corret-
tamente bloccata in posizione sull’impugna-
tura.

Fig. 3

Fig. 4

Fig. 5

Fig. 6

1. Togliere la batteria dall‘apparecchio.Premere i pulsanti di rilascio su 
entrambi i lati della batteria,
contemporaneamente estrarla tirando nella direzione indicata in (Fig. 6)
2. Inserire la batteria nel caricabatterie nel modo illustrato in (Fig. 6)
3. Collegare il caricabatteria alla presa elettrica.
4. Dopo un tempo di ricarica sufficiente (circa 3-5ore, la spia sul caricabatte-
ria diventerà verde), scollegare il caricabatteria dalla presa elettrica

NOTA: è normale che la batteria e il caricabatteria diventino caldi (ma non 
bollenti) durante il processo di ricarica. Se la batteria non si carica corretta-
mente, controllare che la presa elettrica sia funzionante. 

Note sul caricabatteria :
• Il LED si illumina di rosso: la batteria è in ricarica.
• Il LED si illumina di verde: la ricarica è completata.

Scaricamento delle batterie! Togliere la batteria dal caricabatte-
ria quando è completamente carica.

I

Содержание M1E-270A/10.8

Страница 1: ...Originalbetriebsanleitung TAILLE HAIES SANS FIL M1E 270A 10 8 Traduction des instructions d origine TAGLIASIEPI A BATTERIA M1E 270A 10 8 Traduzione delle istruzioni originali Battery powered Hedge Tri...

Страница 2: ...ngeren Zeitraum unbeaufsichtigt lassen Schutzhandschuhe tragen Schallleistungspegel LWA ber das Ladeger t Handbuch lesen Elektroger t der Klasse II Das Batterieladeger t nur in geschlossenen R umen v...

Страница 3: ...eines elektri schen Schlages e Wenn Sie mit einem Elektrowerkzeug im Freien arbeiten verwenden Sie nur Verl ngerungskabel die auch f r den Aussenbereich geeignet sind Die Anwendung eines f r den Auss...

Страница 4: ...und Brandge fahr f hren c Halten Sie den nicht benutzten Akku fern von B roklammern M nzen Schl sseln N geln Schrauben oder anderen kleinen Metallgegenst nden die eine berbr ckung der Kontakte verursa...

Страница 5: ...kommt sp len Sie die betroffene Stelle mit reichlich Wasser ab Bei einer Reaktion oder falls Fl ssigkeit in die Augen oder an die Schleimh ute kommt ziehen Sie einen Arzt zurate f Akku vor Hitze und F...

Страница 6: ...Expositionsbewertung verwendet werden Der angege bene Schwingungspegel gilt f r die wichtigsten Anwendungen des Ger tes Wird das Ger t jedoch f r weitere Anwendungen mit anderem Zubeh r oder im schle...

Страница 7: ...ern Sie sich dass der Akku sicher im Griff eingerastet ist Abb 3 Abb 4 Abb 5 Abb 6 1 Entfernen Sie den Akku aus dem Ger t Dr cken Sie die Freigabetasten an beiden Seiten des Akkus und ziehen Sie ihn d...

Страница 8: ...t ein geschaltet ist Vor jeder Benutzung auf besch digte bzw abgenutzte Teile pr fen insbesondere die Klinge auf ordnungsgem sse Ausrichtung pr fen EIN UND AUSSCHALTEN EINSCHALTEN Dr cken Sie die Sich...

Страница 9: ...e Fl che Tragen Sie leichtes Maschinen l entlang der Kante der oberen Schneide auf REINIGEN DER HECKENSCHERE Halten Sie den Motor an und Entfernen Sie den Akku Entfernen Sie Schmutz und Ablagerungen v...

Страница 10: ...heidung vorbehalten das Ger t gem ss geltenden Garantiebestimmungen entweder zu reparieren oder auszutauschen Bitte schicken Sie folgende Dokumente bei der R ckgabe Ihres Produktes zur Reparatur mit 1...

Страница 11: ...21 20 bersetzung der Originalbetriebsanleitung...

Страница 12: ...z le chargeur de batterie l int rieur uniquement Polarit Fusible Sur la batterie Prot gez la batterie de la chaleur et du feu Prot gez la batterie de l eau et de l humidit Prot gez la batterie des tem...

Страница 13: ...usage d un outil dans un emplacement humide est in vitable utiliser une alimentation prot g e par un dispositif courant diff rentiel r siduel RCD L usage d un RCD r duit le risque de choc lectrique an...

Страница 14: ...eur qui est adapt un type de bloc de batteries peut cr er un risque de feu lorsqu il est utilis avec un autre type de bloc de batteries b N utiliser les outils qu avec des blocs de batteries sp cifiqu...

Страница 15: ...cin f Prot gez la batterie de la chaleur et du feu g Prot gez la batterie de l eau et de l humidit h Prot gez la batterie des temp ratures sup rieures 45 C i Ne d montez pas n ouvrez pas et ne lac rez...

Страница 16: ...paraison d appareils Elle est galement appropri e pour une estimation pr liminaire de la sollicitation vibratoire L amplitude d oscillation change en fonction de l utilisation de l appareil lectroport...

Страница 17: ...terie est fermement install e dans la poign e Fig 3 Fig 4 Fig 5 Fig 6 1 Retirez la batterie de l appareil Appuyez sur les boutons d jection des deux c t s de la batterie tout en la faisant sortir dans...

Страница 18: ...outil est sous tension Avant chaque utilisation v rifiez l outil pour d celer les pi ces endommages us es En particulier v rifiez que la lame est bien align e MISE EN ROUTE ARR T Mise en route Pousse...

Страница 19: ...e Appliquez de l huile le long du bord de la lame sup rieure NETTOYAGE DU TAILLE HAIES Arr tez le moteur et et retirez la batterie Nettoyez la salet et les d bris du corps du taille haie l aide d un c...

Страница 20: ...s notre discr tion de r parer ou d changer l appareil conform ment la l gislation portant sur la garantie Fournissez les documents suivants lors du retour de votre produit pour r paration 1 Le re u pr...

Страница 21: ...41 40 Traduction des instructions d origine FR F...

Страница 22: ...avvertenze e le norme di sicurezza Elektroger t der Klasse II Il caricabatteria va utilizzato solo in ambienti interni Polarit Fusibile Sul batteria Proteggere l accumulatore contro il calore e la fia...

Страница 23: ...sterno utilizzare solo prolunghe concepite per un tale impiego In questo modo possibile evitare i rischi di scosse elettriche f Se non possibile evitare di utilizzare l apparecchio in un ambiente umid...

Страница 24: ...rgenza a lesioni e comportare il rischio d incendi c Non avvicinare batterie non utilizzate a fermagli monete chiavi chiodi viti e neppure ad altri piccoli oggetti metallici che potrebbero provocare u...

Страница 25: ...medico f Proteggere l accumulatore contro il calore e la fiamma g Proteggere l accumulatore contro l acqua ed umidit h Proteggere l accumulatore contro le temperature superiori a 45 C i Non disassembl...

Страница 26: ...forme alla nor ma EN 60745 2 15 e pu essere utilizzato per confrontare gli elettroutensili Lo stesso idoneo anche per una valutazione temporanea della sollecitazi one da vibrazioni Il livello di vibra...

Страница 27: ...rret tamente bloccata in posizione sull impugna tura Fig 3 Fig 4 Fig 5 Fig 6 1 Togliere la batteria dall apparecchio Premere i pulsanti di rilascio su entrambi i lati della batteria contemporaneamente...

Страница 28: ...pecialmente quando l apparecchio acceso Prima di utilizzare l apparecchio controllare sempre che non pre senti parti danneggiate usurate e verificare che la lama sia correttamente allineata AVVIO E AR...

Страница 29: ...e PULIZIA DELL APPARECCHIO Spegnere il motore e togliere la batteria Togliere la sporcizia e i detriti dal corpo dell apparecchio utilizzando un panno umido e un detergente delicato NOTA non utilizzar...

Страница 30: ...i verranno riparati o sostituiti a discrezione del costruttore e conformemente alle leggi vigenti in materia di garanzia Quando si restituisce un prodotto a scopo di riparazione includere quanto segue...

Страница 31: ...61 60 Traduzione delle istruzioni originali IT I...

Страница 32: ...tect the battery against heat and fire Protect the battery against water and moisture Protect the battery against temperatures above 45 C Recyclable materialLi ion Do not throw the batteries in househ...

Страница 33: ...ctive equipment Always wear eye protection Protec tive equipment such as dust mask non skid safety shoes hard hat or hea ring protection used for appropriate conditions will reduce personal injuries c...

Страница 34: ...o reign objects may damage the cutting blades Pay special attention when cutting hedges which are laid out a long a wire fence and have grown th rough the fence The blade must not contact the fence Ot...

Страница 35: ...utting length 250 mm Net weight with battery 1 5 kg Sound power level LwA 90 dB A k 3 dB A Sound pressure level LpA 79 dB A k 3 dB A Guaranteed sound power level LWA 93 dB A Vibration ah 2 5 m s k 1 5...

Страница 36: ...over the total working period Identify additional safety measures to protect the operator from the effects of vibration such as maintain the tool and the accessories keep the hands warm organisation...

Страница 37: ...The battery must then be recharged before the trimmer can be used again Always recharge the lithium ion battery prior to any prolonged period of non use i e before storing the hedge trimmer The charg...

Страница 38: ...stic parts Most plastics are suscepti ble to damage from various types of commercial solvents and may be dama ged by their use Always ensure that the ventilation openings are kept clear from debris BL...

Страница 39: ...ended Wasnotoverloaded Wasnotusedwiththewrongaccessories Repairswherenotcarriedoutbyanyotherthantheauthorizedworkshop The warranty certificate isonlyvalid in connection with thereceipt Pleasekeepbothi...

Страница 40: ...leasealsoattach a copy of thesales receipt Yes No Purchased at Jumbo store Whicherroroccurred pleasespecify Pleasedescribe the problem or malfunction of yourdevice as accurately as possible This allow...

Страница 41: ...80 jumbo ch Hergestellt in China Fabriqu en chine Fabbricato in Cina CH Import Distribution exklusiv durch Jumbo Markt AG Industriestrasse 34 8305 Dietlikon...

Отзывы: