OPERATING AND INSTALLATION
– MARCH 2013
WWW.JSI-UK.COM
Page 7 of 9
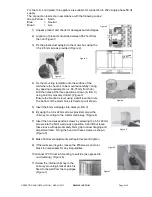
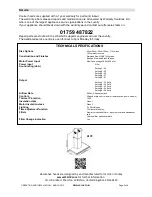
Changing the 20w halogen lamps
Remove the glass cover with a material that will not scratch the surface of the product as
Shown. Remove the faulty bulb by pulling downwards and replace with new bulb.
Do not hold the new lamp with the bare hand as skin contains salt and will cause the lamp to
fail. (see figures 8)
Replacing the 50w halogen lamps
Isolate the electrical supply to the appliance. Remove the aluminium cassette filter by bearing
down lightly on the retaining strip and replace with new unit. (Figure 9)
Replacing the 25w bulbs
To change the bulb, ensure lights are off and turn it anticlockwise to remove it. Replace with a
new one of same value and refit by placing in holder and turning clockwise.
Range of Applications
This hood is designed to be used for either recirculating mode i.e. the hood is fitted to the wall and air
is recirculated though it or it can extract through an outside wall.
In the case of use in re-circulating mode, addition carbon filters will be required (not supplied).
The product code for the correct charcoal filters for this model is JSI/90001
These filters remove a large amount of smells that recirculate within the cooking environment.
Aluminium Grease Filters
These are supplied with your product and the appliance should never be operated without them.
These filters are dishwasher safe and should be checked or cleaned approximately every month.
Even when charcoal filters are used, grease filters should be used as well.
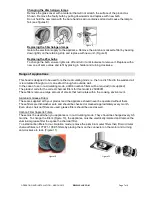
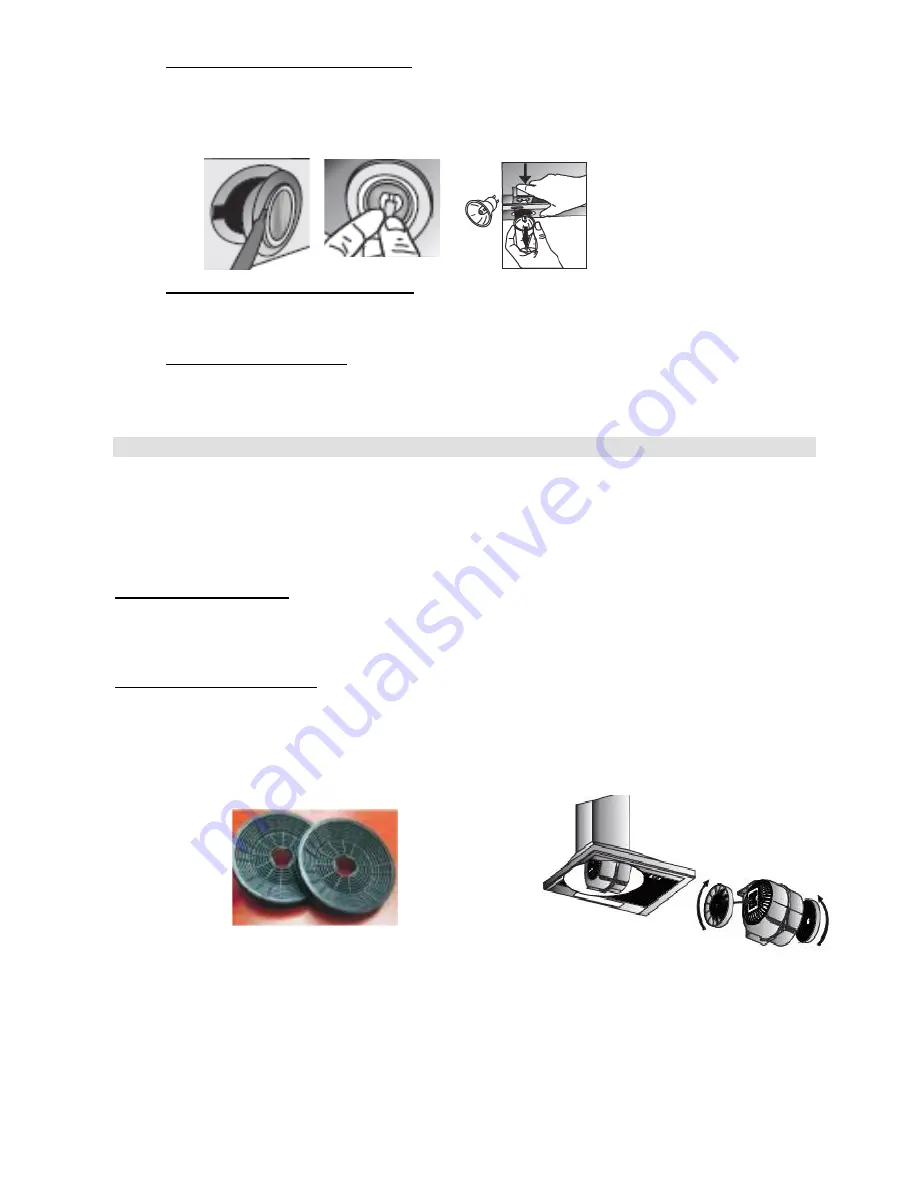
Carbon Filter Cassette Filters
These must be used when you appliance is in re-circulating mode. They should be changed every 3-5
months. To change the filters (Figure 10), the appliance must be electrically isolated and remove the
aluminium grease filter to expose the charcoal filter.
To install carbon filters for re-circulation mode, remove the aluminium outer filters then fit two circular
charcoal filters ref: YT971-100-05 filters by placing them on the connector on the motor and turning
anti-clockwise to lock. (Figure 11)
Figure 10
Figure 8
Figure 9
Figure 11


