


Section 19 Maintenance & Inspection
19-58
19.11.1 Starting the equipment with the OS in the D
drive
Start this equipment with OS in the D drive by using the following procedure.
1
Turn on the power supply of this equipment while pressing the [SILENCE] key and the
[ZOOM OUT] key of the trackball operation unit simultaneously. The power is supplied
to this equipment.
When the equipment starts, the following screen is displayed.
The SSD recovery tool can be executed in this state.
19.11.2 Executing the SSD recovery tool
Write back the images in the C drive by executing the SSD recovery tool.
1
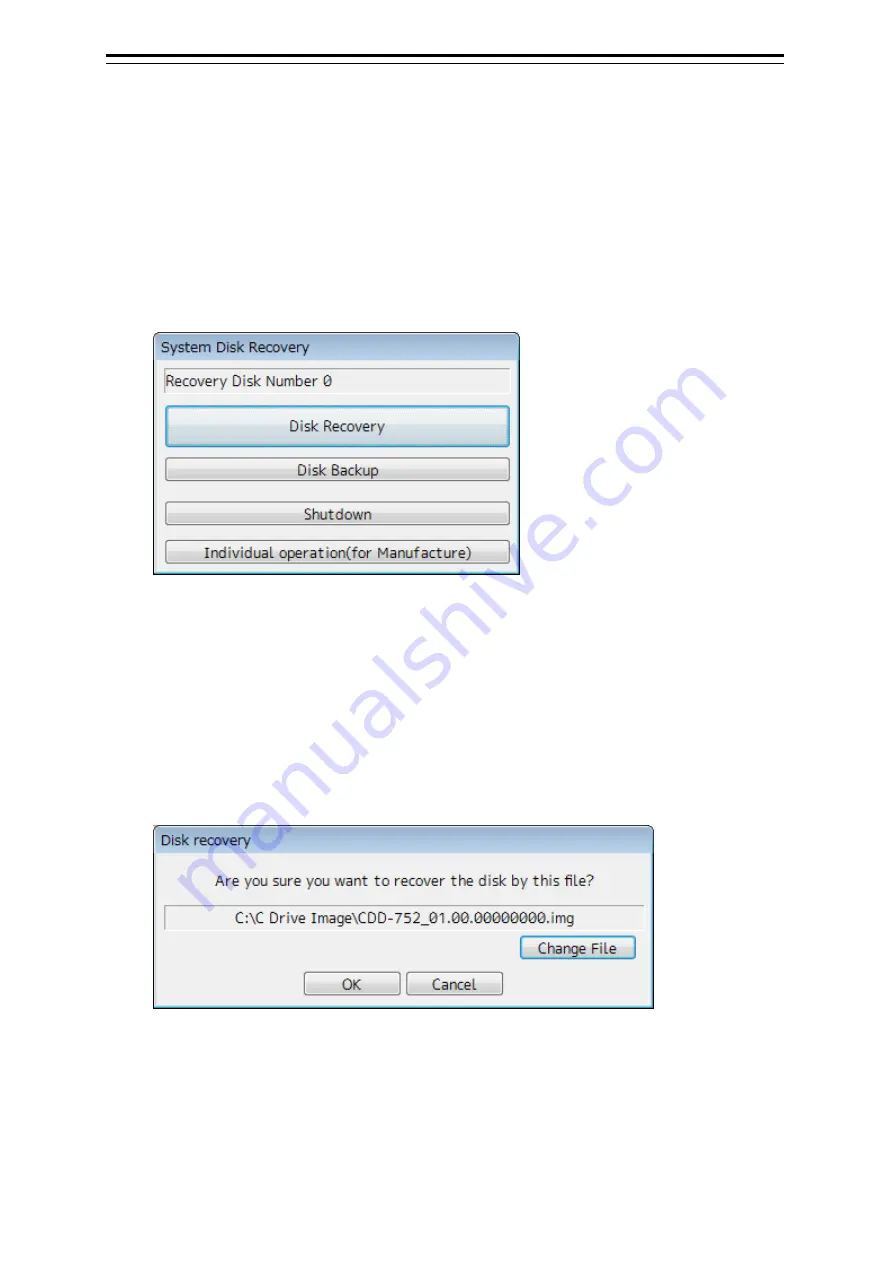
Click on the [Disk Recovery] button on the screen that is displayed at activation from
the D drive.
The following screen is displayed.
2
Select an image file to be written back to the C drive.
Normally, proceed with the next step with the image file that is currently displayed.
To specify a different image file, select a required image file from the list that is displayed by
clicking on the [Change File] button.
Содержание ECDIS
Страница 2: ......
Страница 10: ...Contents 8 ...
Страница 40: ...Section 17 Adjusting and Setting up Equipment for Services 17 30 ...
Страница 132: ...Section 20 Failures and After Sale Services 20 20 ...
Страница 152: ...Section 22 Specifications 22 18 ...
Страница 212: ...Appendix B Menu List and Materials B 32 B 1 16 Code Input Password ECDIS CONNING ...
Страница 282: ...Appendix B Menu List and Materials B 102 Object name Icon button display example Remarks Weed Kelp Wreck ...
Страница 330: ...Appendix B Menu List and Materials B 150 No Drawn object name Drawn object display example 8 Plotted Position ...
Страница 368: ...Appendix B Menu List and Materials B 188 ...
Страница 369: ......


