


DP350 User's Manual
- 7 -
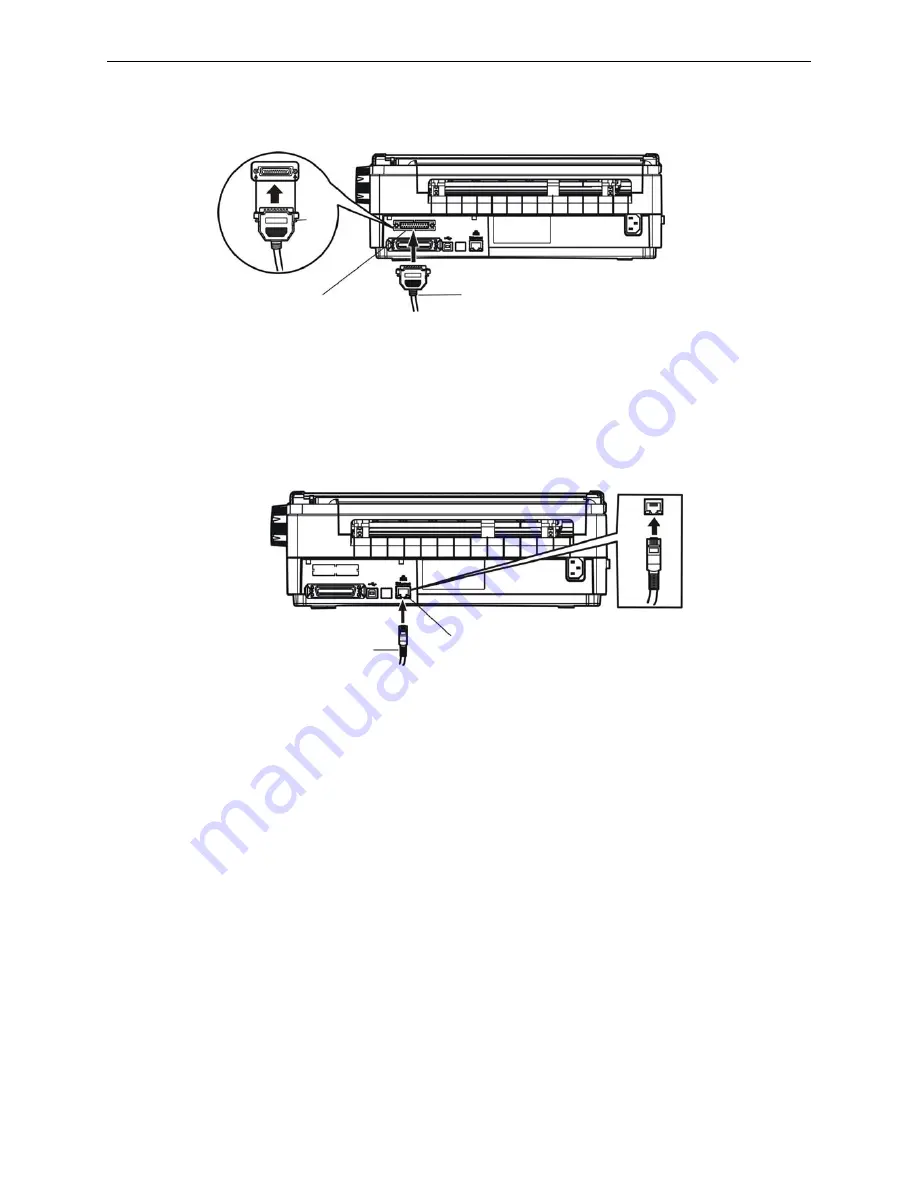
1.8.3 Connecting to the Serial Interface
1. Turn off both the computer and the printer. Plug the serial cable connector securely into the printer’s
serial interface. Tighten the screws on either side of the connector.
2. Plug the other end of the cable into the computer’s serial interface; then tighten the screws on either
side of the connector.
1.8.4 Connecting to the Ethernet Interface
Plug the RJ-45 crystal end of the Ethernet cable into the printer, and plug the other end into the LAN.
(Shown as figure 1-16)
Note: The details of Ethernet interface printer’s net setting please refer to the User’s Manual.
1.9 Installing Printer Driver
Please use the cable to connect computer with printer, then turn on the computer and the printer, put
the drive CD into the CD-ROM. Install driver by the following way:
Auto-install way
Double click the file "Setup.exe" in the driver disc, install driver by the following direct.
Note: Auto-install just run in the operation system of Windows 2000 or above.
Hand operated installing way
Note: The hand-operated install ways of serial interface and parallel interface are the same.
The installing steps for Windows 2000/XP/Vista with parallel cable are as follows:
1. Click "Start"
→
"Settings", select "Printers".
2. Click "Add Printer", then it will show a window of "Add Printer Wizard", click "Next", then please
read the select direct carefully, Such as, select "Local printer" in the "Local or Network Printer"
window, then click "next".
3. Come out a window of "Select the Printer Port", select a usable port. Such as, select "LPT1: printer
port", click "Next".
Figure 1-15 connect to serial interface
Figure 1-16 connect to the Ethernet interface
Serial interface
Serial cable
Screw
Ethernet interface
Ethernet cable
Содержание DP350
Страница 1: ...User s Manual DP350 Dot Matrix Printer...
Страница 24: ...DP350 User s Manual 19...
Страница 53: ......


