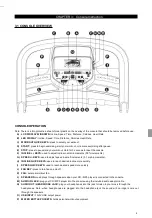
Q) TABLET/READING RACK:
holds tablet or reading material.
R) BLUETOOTH INDICATOR LIGHT:
informs user that the Bluetooth connection as been made.
S) HEART RATE PULSE GRIPS:
used to measure heart rate.
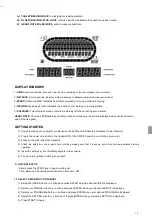
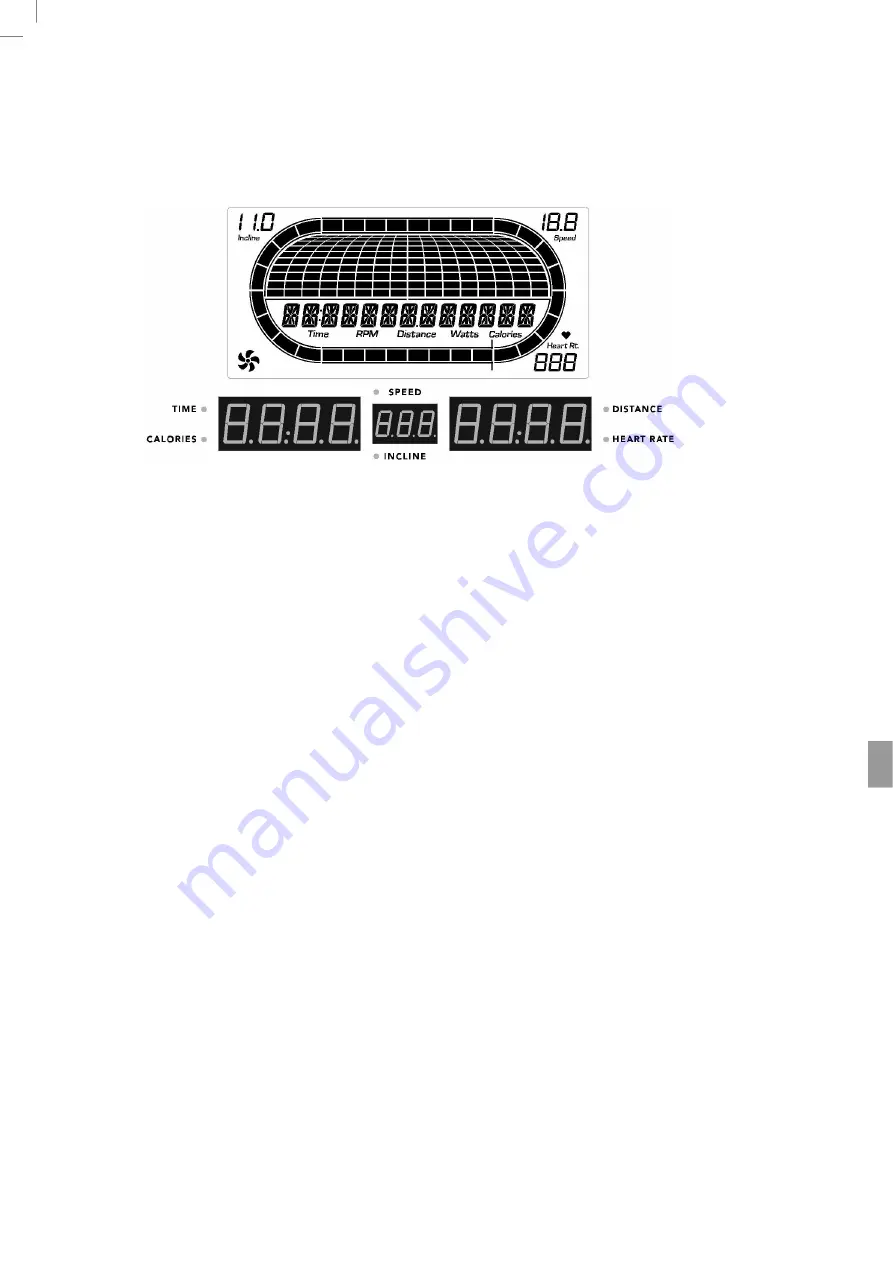
DISPLAY WINDOWS
1)
TIME:
Shown as minutes : seconds. View the time remaining or the time elapsed in your workout.
2)
DISTANCE:
Shown as miles. Indicates distance traveled or distance remaining during your workout.
3)
SPEED:
Shown as MPH. Indicates how fast your walking or running surface is moving.
4)
INCLINE:
Shown as percent. Indicates the incline of your walking or running surface.
5)
CALORIES:
Total calories burned or calories remaining left to burn during your workout.
HEART RATE:
Shown as BPM (beats per minute). Used to monitor your heart rate (displayed when contact is made
with both pulse grips)
GETTING STARTED
1) Check to make sure no objects are placed on the belt that will hinder the movement of the treadmill.
2) Plug in the power cord and turn the treadmill ON. (The ON/OFF switch is next to the power cord.)
3) Stand on the side rails of the treadmill.
4) Attach the safety key clip to part of your clothing making sure that it is secure and will not become detached during
operation.
5) Insert the safety key into the safety keyhole in the console.
6) You have two options to start your workout:
2) QUICK START UP
Simply press the START key to begin working out.
Time, distance, and calories will all count up from zero. OR...
1.1 SELECT A WORKOUT OR TARGET
1) Select the USER with the +/- buttons and press ENTER when the desired USER is displayed.
2) Select your WEIGHT with the +/- buttons and press ENTER when your desired WEIGHT is displayed.
3) Select your PROGRAM with the +/- buttons and press ENTER when your desired PROGRAM is displayed.
4) Adjust the SETTING with the +/- buttons and press ENTER when your desired SETTING is displayed.
5) Press START to begin.
10
Содержание Horizon Fitness T202
Страница 2: ...2...
Страница 5: ...CHAPTER 1 Serial Number Location 1 1 Serial Number Location 5...
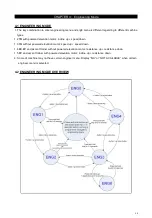
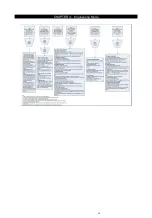
Страница 14: ...CHAPTER 4 Engineering Mode 14...
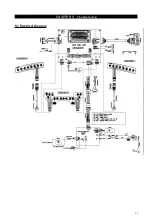
Страница 15: ...CHAPTER 5 Troubleshooting 5 1 Electrical Diagram 15...

