background image

Connections

For information about exacqVision C-Series Standard front panel connections, see Figure 3, Table 2, Figure 4, and Table 3.

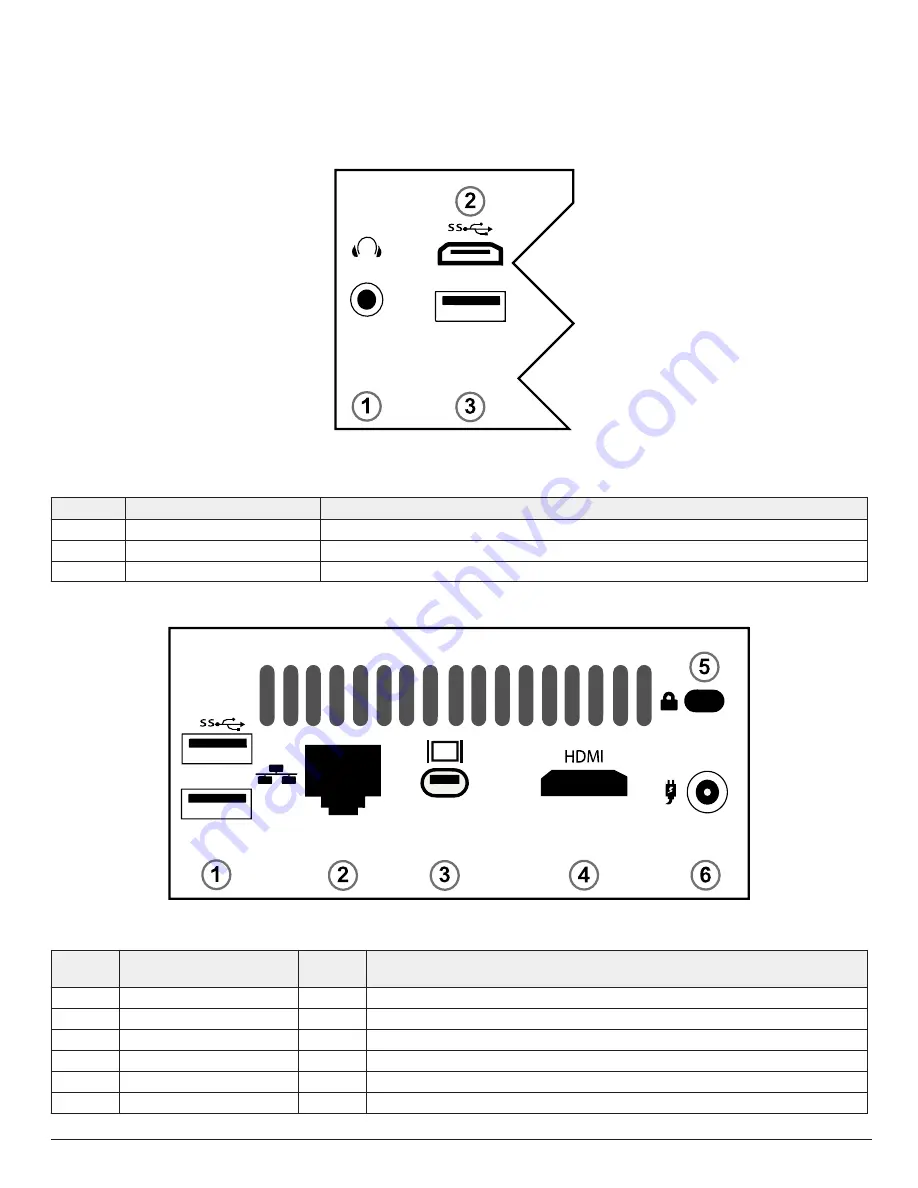
Figure 3: C-Series Standard front panel ports

Table2: C-Series system front panel

Item

Name

Description

1

Audio

Port to connect microphone or headphone.

2

USB C

Port to connect USB 3.0 Type C device.

3

USB 3.0

Port to connect a USB device such as a keyboard, mouse, or memory device.

Figure 4: C-Series Standard back panel ports

Table3: C-Series system back panel

Item

Name

No. of

ports

Description

1

USB 3.0

2

Port to connect a USB device such as a keyboard, mouse, or memory device.

2

10/100/1000 Ethernet

1

Dual on board NIC port.

3

Mini Display

1

Port to connect a monitor.

4

HDMI 2.0

1

Port to connect a monitor.

5

Anti-theft lock

1

Switch to lock or unlock unit.

6

Power supply

1

Input: AC 100 to 240 V, Output: DC 19 V, Current: 2.1 A

© 2020 Johnson Controls. All rights reserved. JOHNSON CONTROLS, TYCO and Exacq

are trademarks and/or registered trademarks. Unauthorized use is strictly prohibited. 

Содержание tyco exacqVision Standard C-Series

Страница 1: ...a monitoring station The system is built to achieve the kind of performance that the video security industry demands and guarantees to achieve specific decode and display frame rates The new C Series is the best way to experience the exacqVision video management system VMS The exacqVision C Series Standard can display and decode 16 HD streams simultaneously 2020 02 14 Rev C C Series Standard Quick...

Страница 2: ...ord or allow anything to rest on it Do not spill water or any other liquids on your system When the system is turned OFF a small amount of electrical current still flows Always unplug all power modem and network cables from the power outlets before cleaning the system If you encounter the following technical problems with the product unplug the power cord and contact a qualified service technician...

Страница 3: ...pted log back on to the operating system with the user name and password you just created Configuring the exacqVision client To configure the exacqVision client to connect to one or more exacqVision servers complete the following steps 1 Start the exacqVision client application 2 Click the Config Setup window icon on the toolbar 3 From the navigation tree select Add Systems 4 To connect to the exa...

Страница 4: ...ice Figure 4 C Series Standard back panel ports Table3 C Series system back panel Item Name No of ports Description 1 USB 3 0 2 Port to connect a USB device such as a keyboard mouse or memory device 2 10 100 1000 Ethernet 1 Dual on board NIC port 3 Mini Display 1 Port to connect a monitor 4 HDMI 2 0 1 Port to connect a monitor 5 Anti theft lock 1 Switch to lock or unlock unit 6 Power supply 1 Inpu...

Отзывы: