Wall mount applications
To mount an FX-PCG directly on a wall or other flat vertical surface:
1. Pull the two bottom mounting clips outward and ensure they are locked in the extended
position as shown in Figure 2.
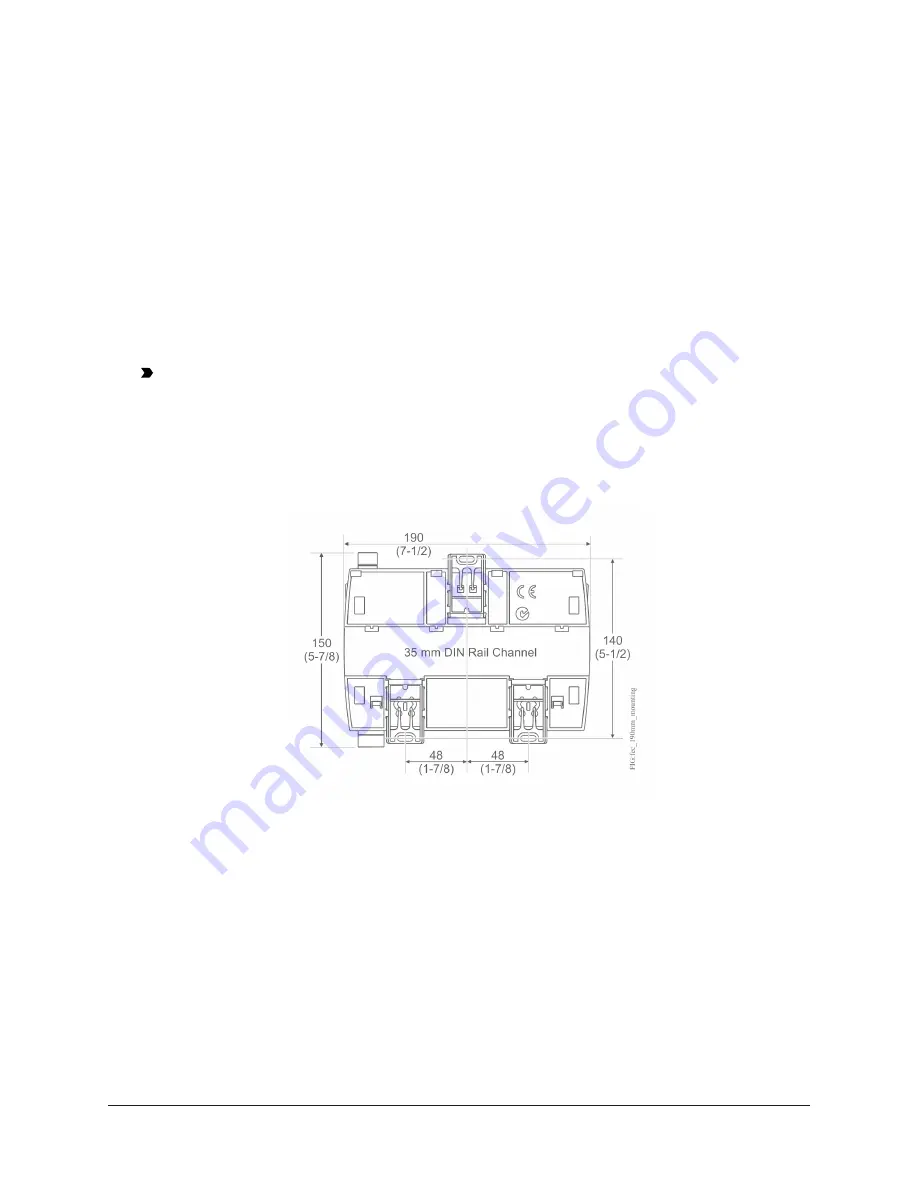
2. Mark the mounting hole locations on the wall using the dimensions in Figure 2 and one of the
mount positions shown in Figure 1. Or hold the controller up to the wall or surface in a proper
mount position and mark the hole locations through the mounting clips.
3. Drill holes in the wall or surface at the marked locations, and insert appropriate wall anchors in
the holes (if necessary).
4. Hold the controller in place, and insert the screws through the mounting clips and into the
holes (or anchors). Carefully tighten all of the screws.
Important:
Do not overtighten the mounting screws. Overtightening the screws may
damage the mounting clips.
Mounting features and dimensions
Figure 2: Back of Controller showing extended mounting
clips, DIN rail channel, and mounting dimensions, mm (in.)
FX-PCG26 General Purpose Programmable Controller Installation Instructions
4


