11
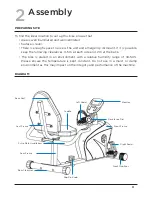
RE100 ASSEMBLY
The bike has been assembled and tested at the factory, so you shouldn’t have any
problems putting all the parts together. Components are designed to fit together, and
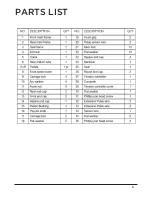
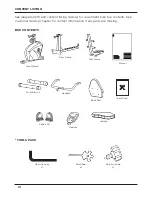
only basic tools are required for the assembly process. Inside the box you will find a Tools
Pack (Hex Allen Key, Multi-Tool, Washers and Bolts). See previous page.
To assemble your JLL RE100 please follow these easy steps:
STEP 1
Attach the front and rear stabilisers to the front and
rear frames using four carriage bolts, four arc
washers and four cap nuts.
NOTE: The front stabiliser will be the shorter one
with the transport wheels.
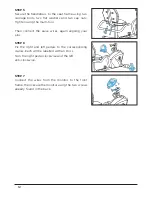
STEP 2
Connect the sensor wires from each frame, making
sure your pins are aligned and you hear a click. Then
slide the rear frame into the front frame and lock in
place with an pop pin knob.
Be careful not to trap your wires.
STEP 3
Attach the saddle and back rest to the seat frame
using eight Allen head bolts and eight flat washers.
Tighten using your Allen key.
STEP 4
Attach the seat frame to the rear frame using four
Allen head bolts and four flat washers. Tighten using
your Allen key.
Содержание RE100
Страница 1: ...INSTRUCTION MANUAL Please read this book thoroughly before operating the bike ...
Страница 3: ...Contact information Disclaimer 5 ADDITIONAL INFORMATION p 18 p 18 ...
Страница 4: ...4 1 EXPLODED DIAGRAM ...
Страница 5: ...5 PARTS LIST ...
Страница 19: ...19 ...
Страница 20: ...20 WWW JLLFITNESS COM Follow us on Facebook and Twitter JLLFitness JLL Fitness Ltd All Rights Reserved ...


