background image

User Manual 

19 

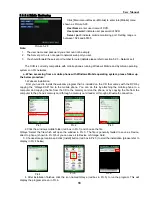
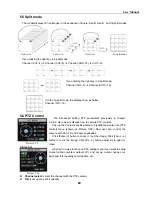
5. Settings: Click [Setting] button (red box in Pic 6) to enter into the Setting menu shown as Pic 7 


User name:

 same as user name setup in DVR under Menu, Devices, and Mobile 

Password:

 same as password setup in DVR under Menu, Devices, Mobile 

Server address:

 Public IP address of router DVR is connected to. 

Web port:

 Same as the Server Port you setup in the DVR, it needs to be forwarded to the IP address of 

the DVR, setting range is between 1024 and 65535, the default setting is 18600. Note: this port is in addition to 
the ports used for standard remote access. 

Channel:

 Select the channel from the DVR you want to monitor and click [OK] button (red box in Pic 7) to 

display the screen in Pic 8 and start video connection. 

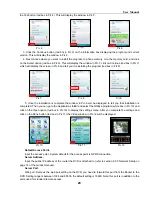
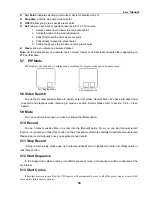
6. Main interface operation (Pic 8) 

Click [Disconnect] button to stop displaying live image of the channel. 
Click [Setting] button to modify the settings. 

7. Video connection Display 
Normal Mode: 
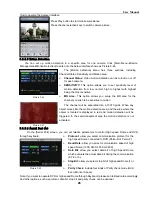
You will find network connection status info under the video image: 
Display on the left corner: Network transmission speed, Frame rate and Resolution. 
Display on right corner: percentage of buffer display, Connection success, Connection fail, Play and Stop. 

Function of Buttons under the video image from left to right: PTZ control (Left, Right, Up and 

Down), area select (Zoom out and Zoom in), Focus (Add “+” and deduct “-”) and Iris (Add “+” and 
deduct “-”) and Snap to capture screen image. 

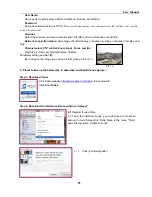
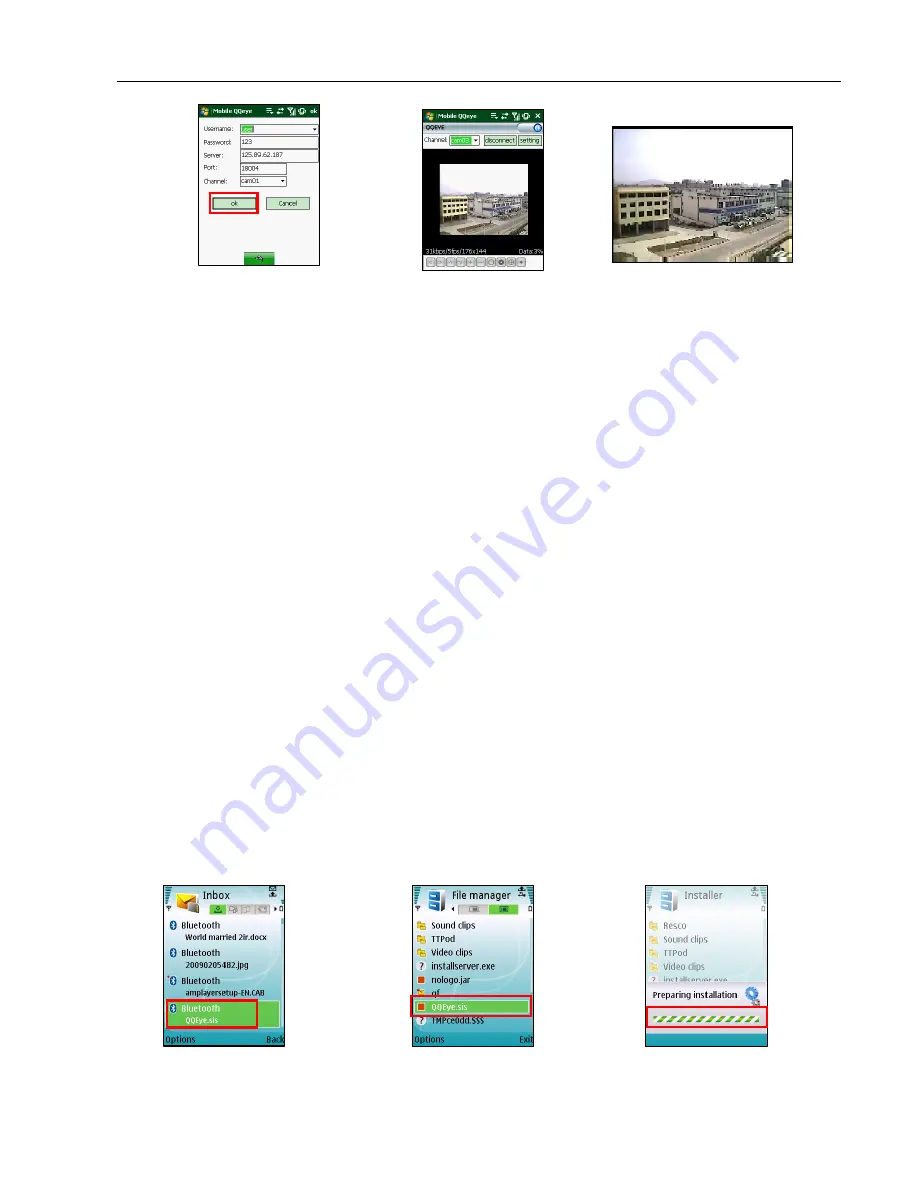
8. Display mode: You can convert normal display into full-screen display by clicking 

the screen on the    mobile phone (displayed as Pic 9)


b. When accessing from a mobile phone with Symbian operating system, please follow up the 

below procedure: 

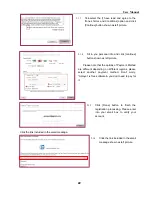
1. First you need to copy the file with suffix “QQeye.CAB” that is included on the CD disk to the mobile 

phone. 
Copying file is saving to storage card by default, and the file can also be transmitted from the CD through a 
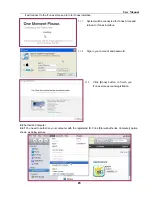
computer by Bluetooth technology to save to Inbox (Pic 1). Select the QQEye program (red box in Pic 1) which 
will display Pic 2.   

 
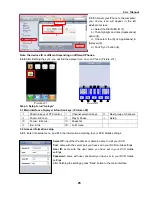
2. Select the QQEye icon in this window (red box in Pic 2) to install it, this will display Pic 3). 


After the phone finishes preparation it will display Pic 4 asking for permission to install the program. Select 

Pic 7


Pic 8


Pic 9


Pic 2

Pic 3


Pic 1


Содержание jed2216t

Страница 1: ...1...

Страница 2: ...TERFACE 8 CHAPTER 5 DVR MENU 8 5 1 CONTEXT SENSITIVE MENU 8 5 2 MAIN MENU PREVIEW 9 5 3 MAIN MENU 10 5 3 1 Camera Set 10 5 3 2 Record Set 10 5 3 3 Network Setup 11 5 3 4 Video Search 13 5 3 5 Device M...

Страница 3: ...GER INTERFACE 32 6 3 1 Menu toolbar 32 6 3 1 1 Live Display 32 6 3 1 2 Playback mode 32 6 3 1 3 Setup 33 Record Mode 33 Alarm Set 34 PTZ Control 34 Network Set 35 System Set 35 Host Info 36 6 3 2 PTZ...

Страница 4: ...orm or when unused for long periods of time 8 Accessories Do not place this equipment on an unstable cart stand or table When a cart is used use caution when moving the cart apparatus combination to a...

Страница 5: ...ent and external alarm signal inputs Network operation Supports remote surveillance by multiple users simultaneously Mouse Operation Supports Mouse operation for faster menu navigation PTZ Control Sup...

Страница 6: ...he hard drive is being read or written to 1 Indicator Power indicator PWR If the Green indicator is on the system is getting power normally 2 IR Receiver Receive infrared remote control signal Item Ma...

Страница 7: ...camera to RS 485A and RS485B accordingly Item Physical port Connection method 1 Power Switch Turn Power On And Off 2 USB Port Connect USB device Flash Drive Hard Drive and Recorder 3 Mouse Port Connec...

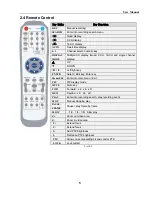
Страница 8: ...DOWN Left right key ENTER Select Edit key Enter key Menu ESC Enter into main menu Exit PIP PIP display mode MUTE Mute key FWD Forward x2 x4 x8 REW Rewind x2 x4 x8 PLAY Enter into recording search play...

Страница 9: ...ll time display is ON By clicking left key you can adjust Color control bar and volume control bar Clicking combo box to access pull down menu Click left key of Mouse By clicking left key you can sele...

Страница 10: ...CD on the power break mode 2 Insert data cord and power cable into HDD securely 3 Fix the HDD on the rack 4 Put the upper cover and LCD back carefully re attach screws 3 2 Camera and Monitor Connectio...

Страница 11: ...orm parameter settings for Main Menu Screen Split mode PTZ control PIP Search Mute Manual record Stop record and Start Cruise etc The Context Sensitive Menu appearing by right clicking the screen diff...

Страница 12: ...File File Backup Camera Recording HDD Management Alarm Setting PTZ Setting MP monitoring Motion System User password System Information Language Select System Maintenance Video Setting Time Setting De...

Страница 13: ...e and System as per user s needs Channel allows you select your desired channel by clicking the pull down menu Record Enable Once a channel is set to On the video from the channel can be recorded and...

Страница 14: ...when you click Apply and after system are restarted 2 User need to change MAC address when there are multiple DVRs at the same local area network Details please refer to section 5 6 2 5 System Informa...

Страница 15: ...ou to the port forwarding instructions for your router 3 Set the corresponding parameters illustrated in Picture 5 11 When server port and web port forwarding the DVR IP address user can visit the DVR...

Страница 16: ...ings for the time quantum will appear in the screen And you also can filter the recordings you want to view by the Channel or recording mode based on date time search LAST Last page Indicates the last...

Страница 17: ...to enter into the below windows illustrated in Picture 5 14 Picture 5 14 Tick select embedded DVD and click Confirm button system will start to backup the selected recordings shown as Picture 5 15 Pic...

Страница 18: ...do format the HDD before start the first record 5 3 5 2 Alarm Set HDD LOSS Options include On and Off If you select On there will be a buzzer sound and H sign appears on screen when HDD is not detect...

Страница 19: ...on Motion Detection When an object moves into motion detection area alarm will be triggered You can adjust sensitivity level to suit the needs of your actual application environment I O Status System...

Страница 20: ...The email address is used to receive image transmitted from motion detection alarm of DVR Please clear the images you have received as soon as possible to avoid overloading your email account For deta...

Страница 21: ...mory card on the phone or by copying the file from the computer to the phone s memory card through a memory card reader or through a Bluetooth connection 2 Click the windows mobile folder red box in P...

Страница 22: ...corner Network transmission speed Frame rate and Resolution Display on right corner percentage of buffer display Connection success Connection fail Play and Stop Function of Buttons under the video i...

Страница 23: ...en you can go to the Applications folder and select the QQEye program white box in Pic 10 and click on the Open option red box in Pic 10 to display the settings menu After you complete the settings an...

Страница 24: ...select PTZ control Zoom in out Focus and Iris Play Stop Full screen Normal Display Capture Parameter setting and Exit By clicking on the image you can see it full screen as in Pic 13 C Please follow u...

Страница 25: ...click continue button shown as left picture Please note that the options of Payment Method are different depending on different regions please select another payment method Don t worry Aplayer is free...

Страница 26: ...You need to authorize your computer with the registered ID Click Store Authorize Computer option shown as below picture 2 1 7 System will be connected to iTunes Store and turned to iTunes interface 2...

Страница 27: ...on 2 3 1 Click iTunes Store 1 then input aplayer into the search bar 2 on the right upper corner and press Enter 2 3 2 Aplayer icon appears in the screen shown as below picture 2 3 3 Click the Aplayer...

Страница 28: ...mation according to your DVR Mobile settings 1 2 3 4 Server IP input the IP address or domain name to visit your DVR Port same with the server port you have set in your DVR mobile settings User ID sam...

Страница 29: ...etection from low normal high to highest with highest being the most sensitive MD Area This option allows you setup the MD area for the channel you wish to be sensitive to motion The channel will be s...

Страница 30: ...nnel dwell time display Dwell time Settable period include 0s to 300s Channel sequence set the option allows you setup display position of any channel Virtual Volume control the option allows you set...

Страница 31: ...oot every day 00 00 and you can also set system auto reboot regularly daily weekly monthly as per user s need Load Default If Load Default is selected you can initialize the system to the ex factory d...

Страница 32: ...Pop up the Context sensitive Menu to highlight and enter into PTZ control menu shown as Picture 5 58 Now user can control the camera with Pan Tilt and Zoom capabilities Click Zoom button to zoom in ou...

Страница 33: ...o quickly enter into Video Search Menu We have introduced how to search and playback video recording in previous section Details please refer to section 5 2 4 Video Search 5 9 Mute You can control vol...

Страница 34: ...age Chinese or English and then enter password and click Log in button and now you can view DVR remotely through the Web Application Manager Please note default password is empty System allows Adminis...

Страница 35: ...mode you can operate the buttons on the right side of the screen and you also can control the PTZ if your DVR have been connected to PTZ camera 6 3 1 2 Playback mode The option allows you playback th...

Страница 36: ...a desired recording data and clicking Playback button system will playback the recorded file at the same time create a backup file in the preset route and start recorded file backup 6 3 1 3 Setup Cli...

Страница 37: ...ttings please refer to section 5 2 5 2 Alarm Set System allows you remotely perform MD area settings for each channel of DVR PTZ Control Click PTZ Control option to enter into the window shown as Pict...

Страница 38: ...e interface shown as Picture 6 11 Click button to preview Web Application Manager recording saving path and screen capture saving path The option also allows you set user name password and DST On Off...

Страница 39: ...preset point Set allow you set a set of specific preset points of a PTZ camera Clean allow you delete one selected preset Cruise allows you enable disable cruise function 6 3 3 Play Mode Note below i...

Страница 40: ...k removable HDD recorder and network backup Alarm Alarm mode Motion Detection Sensor triggered Video Loss HDD Full HDD Error Network Function Support Mobile surveillance Remote Live surveillance and p...

Страница 41: ...nd network download 13 HDD Manage Check HDD status usage space setting HDD auto overwrite 15 Basic setting VID AUD Setting Adjust VGA resolution select system and volume control set interval and chann...

Страница 42: ...trating picture Parenthesis generally indicate optional parameter value of previous menu Enter Clicking the button will save current parameter Default Recovery Clicking the button will recover current...

Страница 43: ...that means HDD alarm has occurred 8 3 Compatible mobile list Currently the model supports Windows and Sybian S60 Version 3 and we have passed the below mobile models NOKIA NOKIA N73 NOKIA N78 NOKIA N...

Страница 44: ...els display just a blank screen even if they receive video sources A Check if the camera is connected to the system properly displays the image check if the camera is properly supplied with power 5 Q...

Страница 45: ...User Manual 42 8 7 System Configuration 8 8 Accessory Power Cord Power Supply User Manual USB Mouse Remote Controller Software CD...

Страница 46: ...arantee is given as to the correctness of its contents We do not undertake any responsibility for the harms cause by using our product The model of the products in the user s manual only for recogniti...

Отзывы: