


5
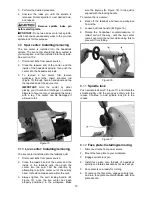
28. Do not attempt to engage the spindle lock pin
until the spindle has stopped. If leaving the
machine area, turn lathe off and wait until the
spindle stops before departing.
29. Make no adjustments except speed changes
with the spindle rotating, and always
disconnect the machine from the power source
when performing maintenance to avoid
accidental starting or electrical shock.
30. Provide for adequate space surrounding work
area and non-glare, overhead lighting.
31. When stopping the lathe, never grab the part
or faceplate to slow it down. Let the work coast
to a stop.
32. Use only JET factory authorized replacement
parts and accessories; otherwise, the warranty
and guarantee are null and void.
33. Do not use this JET wood lathe for other than
its intended purpose. If used for other
purposes, JET, disclaims any real or implied
warranty and holds itself harmless from any
injury that may result from that use.
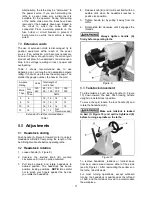
Familiarize yourself with the following safety notices used in this manual:
This means that if precautions are not heeded, it may result in minor injury and/or possible
machine damage.
This means that if precautions are not heeded, it may result in serious, or possibly even fatal,
injury.
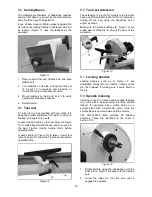
4.0
About this manual
This manual is provided by JET, covering the safe operation and maintenance procedures for a JET Model
JWL-1440VS Woodturning Lathe. This manual contains instructions on installation, safety precautions, general
operating procedures, maintenance instructions and parts breakdown. Your machine has been designed and
constructed to provide consistent, long-term operation if used in accordance with the instructions as set forth in
this document.
This manual is not intended to be an exhaustive guide to lathe operational methods, use of after-market
accessories, choice of stock, and such. Additional knowledge may be obtained from experienced users or
trade articles. Whatever accepted methods are used, always make personal safety a priority.
If there are questions or comments, please contact your local supplier or JET. JET can also be reached at our
web site: www.jettools.com.
Retain this manual for future reference. If the machine transfers ownership, the manual should accompany it.
Read and understand the entire contents of this manual before attempting assembly
or operation! Failure to comply may cause serious injury!
Содержание JWL-1440VS
Страница 28: ...28 16 2 1 JWL 1440VS Bed Assembly Exploded View...
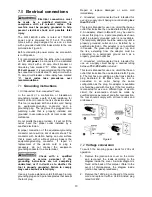
Страница 32: ...32 17 0 Electrical Connections...


