


face plate. A piece of paper in the glue joint will prevent
damaging the wood when separated later.
Mount the face plate with the workpiece already attached
onto the spindle nose thread and hand tighten.
If reversing spindle rotation, make sure face plate, chuck or
other work holding is secured with the set screws, to avoid
threading loose.
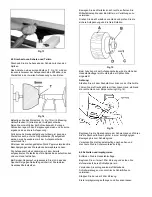
Move tailstock away, remove centre from tailstock to prevent
injury.
Turn the workpiece by hand to see if it rests securely and can
be rotated freely.
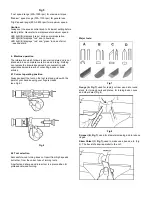
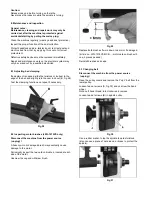
Fig 15
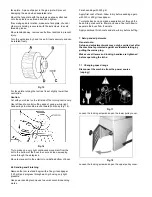
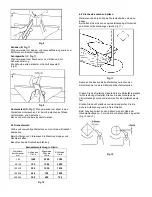
For face plate turning the tool rest is set slightly lower than
centre line.
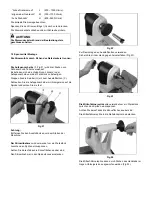
Caution:
Cut with your chisel on the left side of the turning centre only.
Use left hand to control cutting edge of gouge, while right
hand swings tool handle around toward your body (Fig 16).
Fig 16
Try to make one, very light continuous movement from the
rim to the bottom of the bowl to ensure a clean, sweeping
curve through the workpiece.
Move tool support to the exterior to re-define bottom of bowl.
6.6 Sanding and Finishing
Remove the tool rest and begin with a fine grit sandpaper
(120 grit) and progress through each grit, using only light
pressure.
Use power sanding techniques to avoid concentric sanding
marks.
Finish sanding with 220 grit.
Apply first coat of finish. Allow to dry before sanding again
with 320 or 400 grit sandpaper.
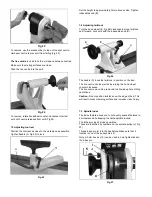
Turn lathe back on and make a separation cut through the
base. Stop at about dia. 80mm and use a fine tooth saw to
separate the bowl from the waste.
Apply additional finish coats and allow to dry before buffing.
7. Setup and adjustments
General note:
Setup and adjustment work may only be carried out after
the machine is protected against accidental starting by
pulling the mains plug.
Make sure all levers and locking handles are tightened
before operating the lathe.
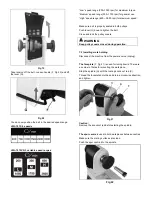
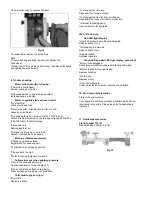
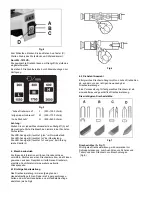
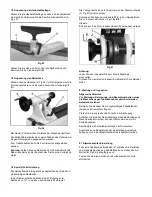
7.1 Changing speed range
Disconnect the machine from the power source
(unplug) !
Fig 17
Loosen the locking screw and open the lower pulley cover.
Fig 18
Loosen the locking screw and open the upper pulley cover.


