15
EVBS-20
6.
Set pressure selector switch (counterclockwise rota -
tion) to the approximate setting required for the width
of the blade being welded.
7.
Press and hold weld button (Figure 14). When weld
button is pushed, the left clamp moves to the right to
apply pressure to the blade ends. Simultaneously,
sparks will be emitted from the blade ends as they
are being welded. Do not release weld button until
blade joint is “red hot.”
8.
Release weld button, and wait 3 or 4 seconds until
blade returns to original color. Unclamp blade.
9.
Rotate pressure selector switch back to “0”.
10. Remove blade from clamps, and carefully inspect it.
The spacing of the teeth should be uniform and the
weld should be located in center of gullet. Misalign-
ment is easily noted at this time from the weld ap-
pearance. See Figure 15 for examples of incorrect
welds.
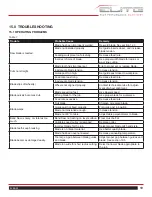
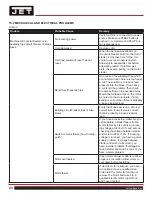
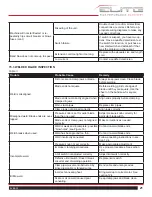
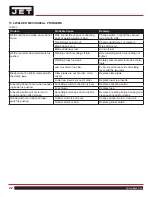
11. If the weld is imperfect, refer to section 15.3 for pos -
sible remedies to any problems. Make corrections
before
annealing.
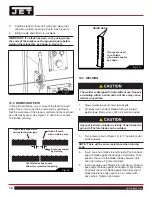
Fig. 14
Misaligned Weld
Incomplete Weld
“Blown-out” Weld
Overlapped Weld
Fig. 15
!
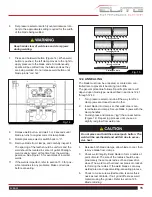
Keep hands clear of weld area and clamp jaws
during welding.
12.4 ANNEALING
The blade must now be annealed, or cooled at a con-
trolled rate to prevent it becoming too brittle.
The general procedure follows. Specifi c procedure will
depend upon blade type, as described in sections 12.4.1
through 12.4.3.
1.
Turn pressure selector knob all the way to left so
clamp jaws are closest to each other.
2.
Insert blade into clamps so that weld area is cen-
tered between clamps. Secure blade in jaws with the
clamp
handles.
3.
Quickly press and release (“jog”) the anneal button
(Figure 14). Repeat jog process until you see a
slightly red glow from weld area.
4.
Release both blade clamps, allow blade to cool, then
remove blade from clamps.
5.
Check weld integrity. Bend blade to form a radius at
point of weld. The size of the radius should be ap-
proximately the same as radius of band saw drive
wheel. The weld must hold and not break or crack af-
ter forming the radius. If the weld breaks, cut away
welded area and repeat welding-annealing process.
6.
Check to make sure welded section is same thick
ness as rest of blade. If not, grind off excess weld
material using the grinder. Refer to section 12.5,
Blade Grinding
.
!
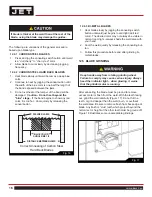
Do not press and hold the anneal push button. The
weld will be overheated and will fail due to exces-
sive heat.
Содержание 891100
Страница 34: ...34 Vertical Band Saw 19 0 WIRING DIAGRAM ...
Страница 35: ...35 EVBS 20 NOTES ...
Страница 36: ...36 Vertical Band Saw NOTES ...


