17
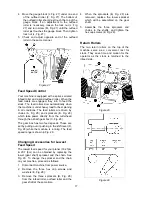
4. Move the gauge block (J, Fig. 27) under one end
of the outfeed roller (F, Fig. 27). The bottom of
the outfeed roller should just touch the top of the
gauge block. If an adjustment to the outfeed
roller is necessary, loosen the lock nut (L, Fig
27) and turn screw (M, Fig. 27) until the outfeed
roller just touches the gauge block. Then tighten
lock nut (L, Fig. 27).
5. Check and adjust opposite end of the outfeed
roller in the same manner.
Figure 27
Feed Speed Control
Your machine is equipped with a spiral, serrated
infeed roller and a solid outfeed roller. When the
feed rollers are engaged, they turn to feed the
stock. The feed rollers slow automatically when
the machine is under heavy load for best planing
in all conditions. The feed rollers are driven by
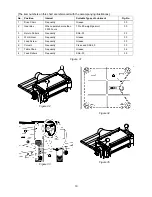
chains (A, Fig. 28) and sprockets (B, Fig. 28)
which take power directly from the cutterhead
through the oil bath gear box (C, Fig. 28).
The gear box has two feed speeds. These are
set by pulling out or pushing in the shift lever (D,
Fig. 28) while the machine is running. The feed
speed range is shown in Fig. 29.
Changing Accessories for Lowest
Feed Speed
The lowest feed speed for your planer (16.2 fpm
& 20.7 fpm) can be obtained by replacing the
lower (gear shaft) sprocket and the chain. See
Fig. 29. To change the sprocket and the chain
on your machine, proceed as follows:
1. Disconnect machine from power source.
2. Remove the three hex cap screws and
washers (E, Fig. 28).
3. Remove the three sprockets (B, Fig. 28)
from the infeed roller, outfeed roller and the
gear shaft at the same time.
4. When the sprockets (B, Fig. 28) are
removed, replace the lower sprocket
which will be assembled on the gear
shaft.
5. Assemble the three sprockets and
chains to the shafts, and tighten the
hex cap screws (E, Fig. 28).
Return Rollers
The two return rollers on the top of the
machine serve as a convenient rest for
stock. They save time and motion for the
operator as the stock is returned to the
infeed side.
Figure 28
Figure 29
Содержание 708528
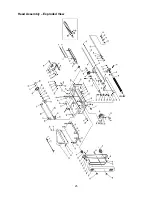
Страница 25: ...25 Head Assembly Exploded View ...
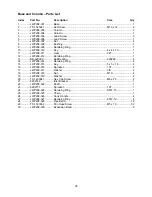
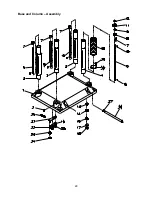
Страница 29: ...29 Base and Column Assembly ...
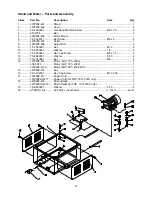
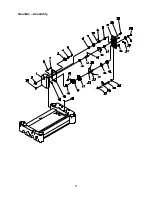
Страница 31: ...31 Gearbox Assembly ...
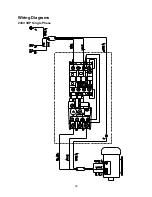
Страница 32: ...32 Wiring Diagrams 230V 3HP Single Phase A2 14NO 17 13NO O ManAuto 97 95 96 98 R R 4T2 6T3 2T1 3L2 5L3 1L1 A1 ...
Страница 33: ...33 230V 5HP Single Phase A2 14NO 17 13NO O ManAuto 97 95 96 98 R R 4T2 6T3 2T1 3L2 5L3 1L1 A1 ...
Страница 34: ...34 230V 5HP Three Phase 4T2 ManAuto 97 A2 95 R 96 O R 14NO 6T3 17 98 2T1 3L2 13NO 5L3 1L1 A1 ...
Страница 35: ...35 460V 5HP Three Phase 4T2 ManAuto 97 A2 95 R 96 O R 14NO 6T3 17 98 2T1 3L2 13NO 5L3 1L1 A1 ...
Страница 36: ...36 427 New Sanford Road LaVergne Tennessee 37086 Phone 800 274 6848 www jettools com ...


