32
The fabric must be tensioned at any time.
If there is no fabric-tension while extending the awning, please turn the
handle counter-clockwise until full tension is achieved.
Do not block the awning with objects or body parts (like your hands)
during the process of extending and retracting. Hazard of damage or
crush!
When the front bar touches the roller during retraction, do not try to pull
them any closer as this might damage the product.
Remove the hand crank from the loop after every use and store it in
a safe place out of
children’s reach (to make sure children do not play
with the awning).
8. ADJUSTMENT OF MOTOR STOP LIMITS
The motor-stop limits are already pre-set in the factory, so the awning can be
used without prior adjustment. If an individual setting should be necessary, the
stop limits can be adjusted with the help of well experienced and
correspondingly qualified personal.
Adjustments have to be made if one of the following applies:
➔
The awning does not close completely
➔
The cover is loose
➔
The motor does not stop automatically when the awning is completely closed
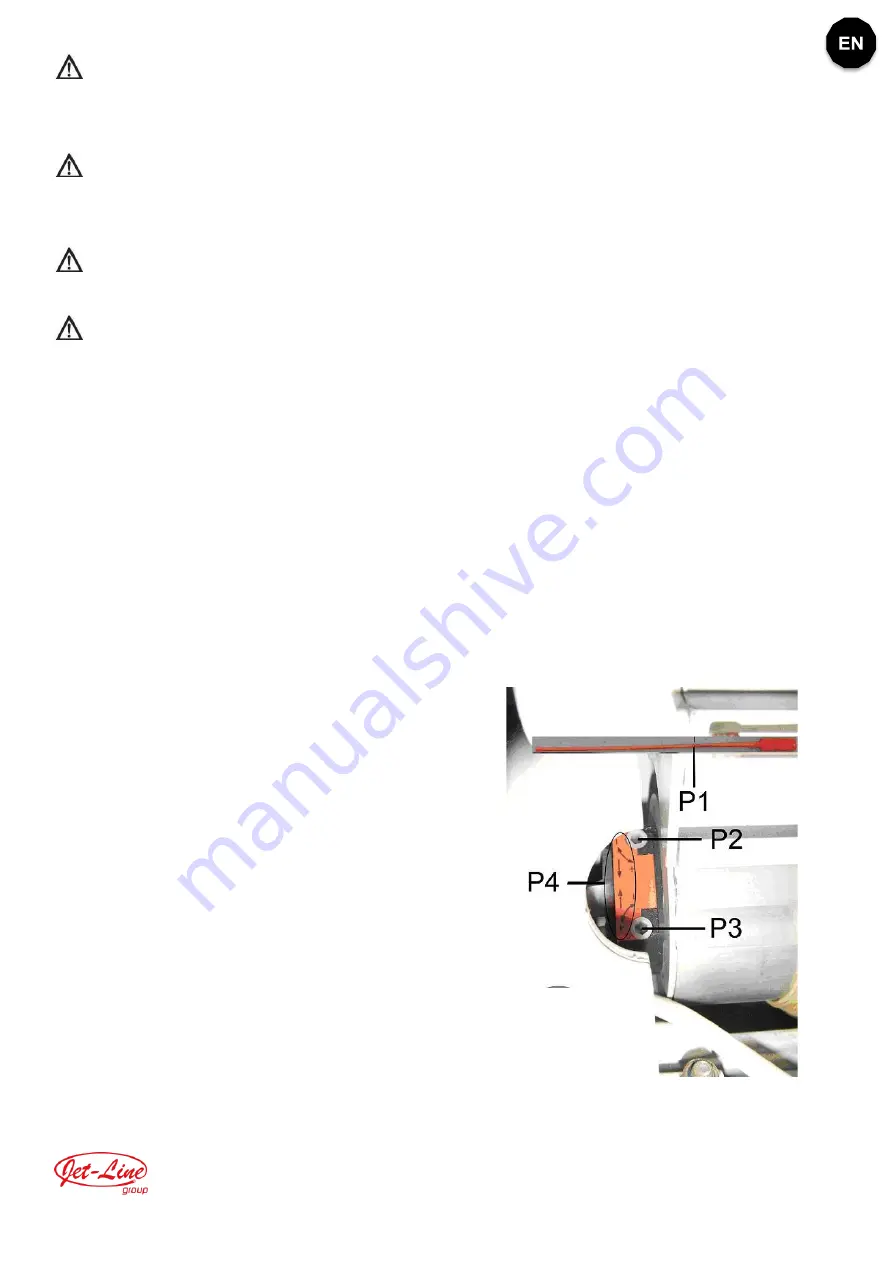
1. Distance between fabric and roll:
Put the hexagonal head of the motor limit
stop adjusting pole (P1) in P3 (upper limit
adjusting button) to adjust the distance;
turn counter-clockwise for less, and
clockwise for more distance.
2. Fabric-winding:
Put the hexagonal head of the motor limit
stop adjusting pole (P1) in P2 (lower limit
adjusting button) to adjust the maximum
extension; turn counter-clockwise for
more, clockwise for less extension.
P1: Motor Limit Stop Adjusting Pole
P2: Lower Limit Adjusting Button
P3: Upper Limit Adjusting Button
P4: Indication of adjustment and direction of movement


