WALL MOUNTING
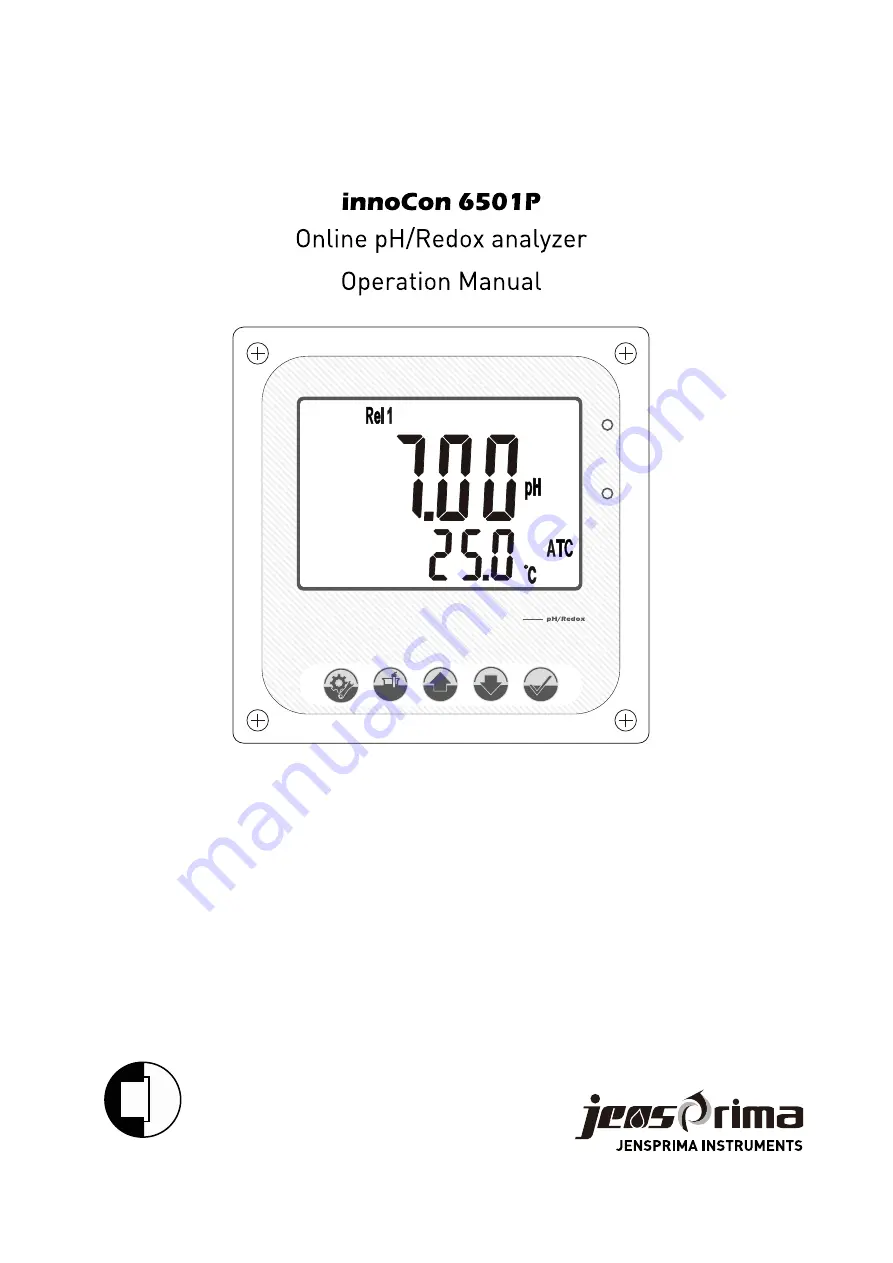
innoCon 6501
CAL
Страница 1: ...WALL MOUNTING innoCon 6501 CAL...
Страница 2: ......
Страница 3: ...uration Mode Calibration Mode Maintenance P010 Temperature parameter setting Controller Installation Sensor Installation P020 Relay 1 parameter setting 15 15 16 pH Calibration ORP Calibration P030 Rel...
Страница 4: ...s delivered to the third party along with innoCon 6501 Please use sensors manufactured by JENSPRIMA Damages to the instruments caused by the use of sensors not manufactured by JENSPRIMA withinthe warr...
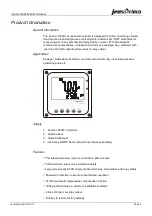
Страница 5: ...tons Sewage wastewater treatment environmental monitoring industrial processes swimming pools etc Supply 1 innoCon 6501P Controller 2 Fixed bracket 3 Operation Manual 4 innoSens pH ORP Sensor Need to...
Страница 6: ...125 pH Sensor Applicable to pH measurement of high temperature and high pollution wastewater such as pulp electroplating desulfurization wastewater innoSens 130 pH Sensor Applicable to pH measurement...
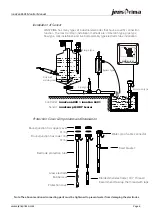
Страница 7: ...ase put the instrument into the case from the front of the panel of the case insert screws from the back cover and then lock the fastening block to the fastening bar from the back of the panel Panel M...
Страница 8: ...ver Components and Installation innoCon 6501 Monitor Manual www jensprima com Page 6 innoSens 120 pH Electrode pH 0 14 5 70 Controller innoCon 6800 innoCon 6501 Sensor innoSens pH ORP Sensor Flange ty...
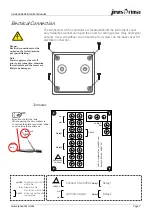
Страница 9: ...r screws on the back cover for electrical connection Terminals Page 7 Extension of electrical wire When opening the wire make sure to remove the black conductive rubber cover outside the central axis...
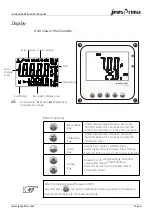
Страница 10: ...return to the previous menu Under measurement interface press and hold this button for 3 seconds to enter the calibration menu Accept input value or selected menu Under measurement interface press thi...
Страница 11: ...rrect password 0011 key to enter password interface The backlight is automatically lit at this time Press Enter key If there is no button operation within 3 minutes it will automatically return to the...
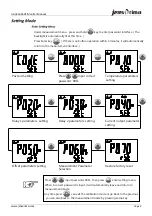
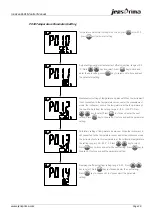
Страница 12: ...s the temperature of the liquid to be tested the setting range is 10 0 120 0 C Press key to select Press to store and enter the next setting Press key to choose not to store and exit the parameter set...
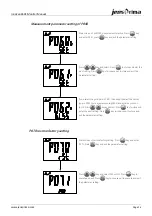
Страница 13: ...setting Action mode selection of Relay 1 Press and Select relay is high action or low action Press to store and enter the next setting press key to choose not to store and exit the parameter setting O...
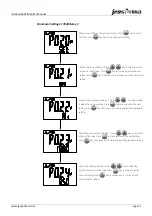
Страница 14: ...de selection of Relay 1 Press and select the relay is high action or low action Press to store and enter the next setting Press key to choose not to store and exit the parameter setting Operating poin...
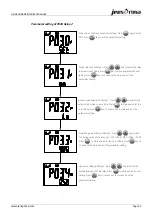
Страница 15: ...tore and enter the next setting Press key to choose not to store and exit the parameter setting Corresponding value setting of 20mA output Press key to select range is pH 1 00 16 00 1900 2000mV Press...
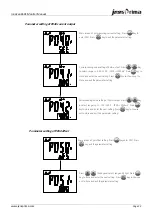
Страница 16: ...and exit the parameter setting If you select the pH mode in P091 then need to select the sensor type in P092 there are glass sensor GLSS and antimony sensor Anti Press key and select Press key to sto...
Страница 17: ...een press key to leave the calibration mode Display the first standard solution value buffer 1 press button to select 7 00 or 6 86 the next time you enter the last option will be automatically remembe...
Страница 18: ...ss than the standard solution value Greater than the standard solution value Error Indication The calibration icon will ash automatically during the calibration process During calibration when the val...
Страница 19: ...ry dirty Regular cleaning Keep the exudation interface of the reference electrode clean Keep the glass film clean Cleaning Cycle Cleaning requirements are different based on different applications Rec...
Страница 20: ...JENSPRIMA INSTRUMENTS LIMITED Web www jensprima com Email info jensprima com 2017 JENSPRIMA INSTRUMENTS all rights reserved...