6
STEREO PHONOGRAPH OPERATION
Please Note - Before Use
-
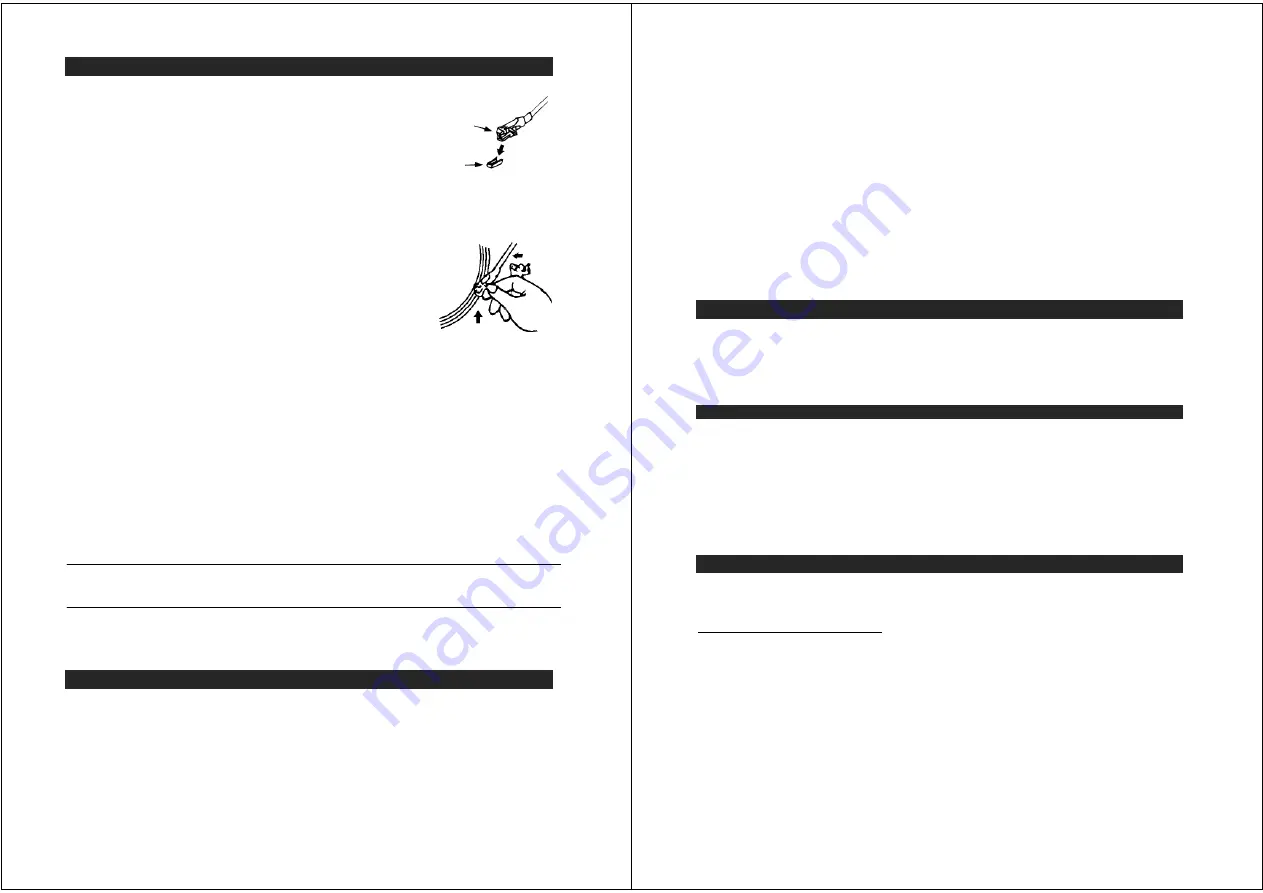
Remove the stylus protector.
-
Make sure that the tone arm is unlocked and free
to move from the tone arm rest prior to operating.
Lock the tone arm in place again when not in use.
1. Slide the Power On/Off switch to the On position
2. Raise the turntable dust cover.
3. Place a record on the turntable platter (use the 45 RPM record
adaptor if you are
playing 45 RPM records).
4. Set the speed selector to the proper position for the record you are playing.
5. Lift the tone arm from the rest and slowly move it over the
record. The turntable platter will begin spinning.
6. Place the tone arm down onto the record at the location that
you want to play.
7. Adjust the volume to the desired level.
8. At the end of record, the platter will automatically stop spinning.
Lift the tone arm from the record and return it to the rest.
9. To stop playing manually, lift the tone arm from the record and return it to the rest.
NOTES:
1. Certain types of records may have an auto-stop area outside the preset limit, so
the turntable may stop before the last track finishes. If this occurs, set the
AUTO-STOP switch to the “OFF” position. This allows the record to play to the
end, but please note that it will not stop automatically. You must manually raise
the tone arm and place it back in the rest and then turn off the power to stop the
turntable from spinning.
2. The turntable will automatically disconnect and stop playing when a 3.5mm
stereo aux-in cord (not included) is plugged into the Aux-in Jack on the back.
The turntable cannot be used while using the Aux-in, so be sure to disconnect
the Aux-in cord prior to using the turntable.
TONE CONTROL
Rotate the TONE control knob to adjust the treble level of the music you are playing.
PITCH CONTROL
The Pitch Control allows you to fine tune the playing speed of the record once the correct
speed (33/45/78 RPM) is chosen. Slide the Pitch Adjust Control to slightly increase or
decrease the speed of the turntable if necessary.
AUXILIARY INPUT
This unit provides an auxiliary audio signal input jack for connecting external audio
devices like MP3 players, CD players and older, non-dockable iPods (except iPod
shuffle 3
rd
gen) so you can listen to your external source through the speakers of this
system.
1. Use an audio cable (not included) with one 3.5 mm stereo plug on each end of the
cable.
2. Plug one end into the AUX-IN jack on the main unit and the other end of the cable
Cartridge
Stylus assembly
7
into the Line-out Jack or Headphone Jack of your external audio device. It will
automatically switch the unit to AUX mode.
3. Turn on unit power and your external audio device.
4. The volume level can now be controlled through the main unit. Operate all other
functions on the auxiliary device as usual.
Note:
(1). If the Line Out Jack of your external device is connected, then you only need to
adjust the volume control of this system. If the Headphone Jack of your external
device is connected, then you may need to adjust both the volume control of your
external device and the volume control of this system to find the most desirable
volume setting.
(2). The turntable cannot be used while using the Aux-in cord is plugged in, so be sure to
disconnect the Aux-in cord prior to using the turntable.
(3). Slide the POWER ON/OFF switch to turn off the system when you finish listening.
Don't forget to switch off the power on your external device as well.
LINE OUT CONNECTION
You can connect this unit to an external Hi-Fi / AMPLIFIER system by connecting the
LINE OUT RCA Jacks to the auxiliary input jacks on your Hi-Fi / AMPLIFIER system with
RCA cables (not included).
Note:
The Volume control on the main unit will not adjust the volume when using the
LINE OUT.
USING HEADPHONES(NOT INCLUDED)
Inserting the plug of your headphones into the Headphone jack will enable you to listen
in private.
READ THIS IMPORTANT INFORMATION BEFORE USING YOUR HEADPHONES
1. Avoid extended play at very high volume as it may impair your hearing.
2. If you experience ringing in your ears, reduce the volume or shut off your unit.
3. Keep the volume at a reasonable level even if your headset is an open-air type designed to
allow you to hear outside sounds. Please note that excessively high volume may still block
outside sounds.
CONNECTING TO A COMPUTER FOR RECORDING
Before getting start, please install the “ AUDACITY ” recording software to your computer.
Below is an example using a computer with Microsoft XP and the Audacity software
installed. For other Windows OS or Mac OS, please visit Audacity website for details.
http://audacity.sourceforge.net/
INSTALLING THE AUDACITY SOFTWARE
1. Insert the Audacity disc (included) into the CD drive of your computer.
2. Click on My computer on the desktop.
3. Double click CD drive to view the contents of the CD and select “Windows” under
“Audacity” folder.
4. Open “Windows” folder and select “Audacity 2.0 (Windows 2000, XP, Vista, 7)”.
5. Open the folder and then double click Audacity set up icon with file name
“audacity-win-2[1].0.exe)” to install the Audacity software according to the
instruction, read license agreements of Audacity before installation.
NOTE:
Free software (AUDACITY) licensed under the GNU general public license (GPL).


