background image

AUX OPERATION

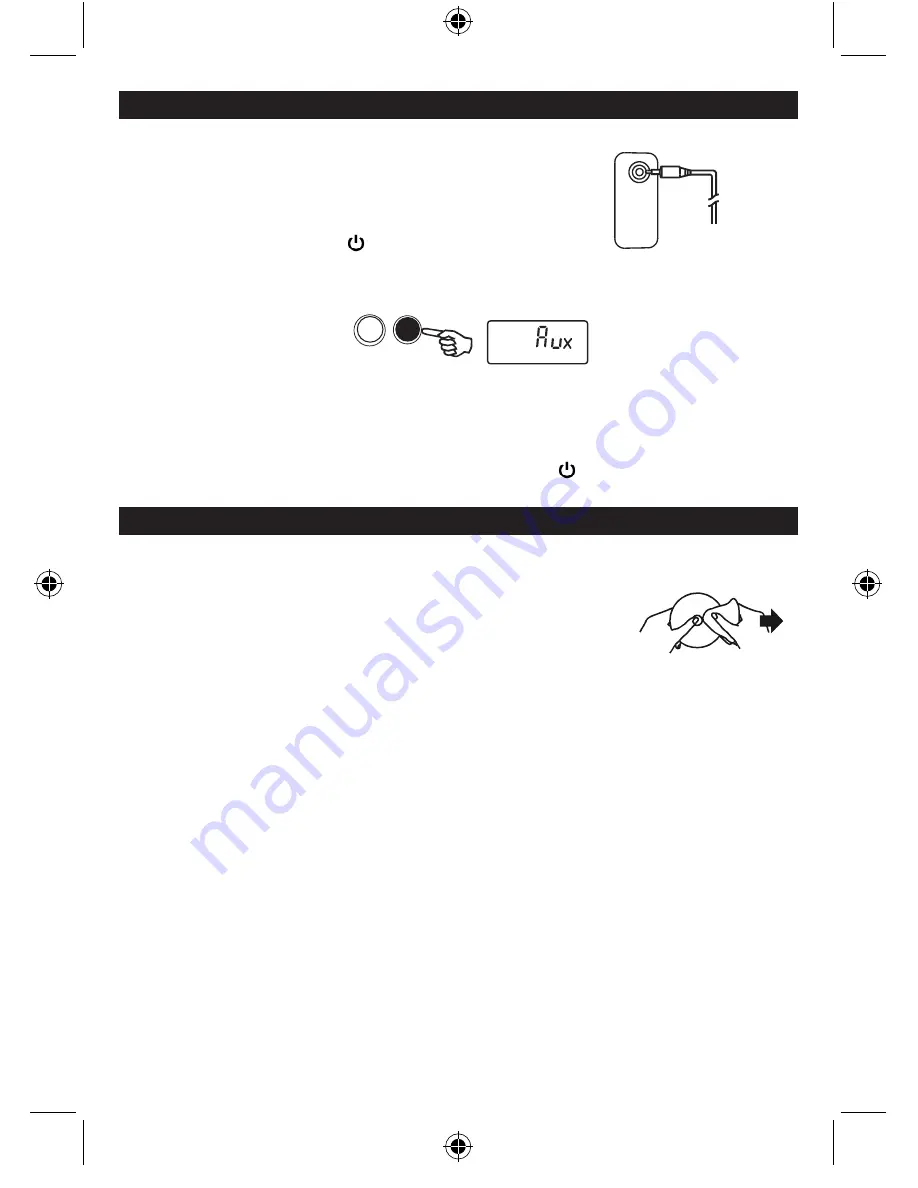
You can playback your favorite music from your MP3 player or a portable digital audio player using 
the AUX IN jack.
1. Connect the headphone jack of your external device and the 
  AUX IN Jack located on the left side of this Docking System. 

  (The connection cable is not included.)  

2. Press the POWER / STANDBY      Button once to turn on the System.  
  The LCD backlight will light.
3. To enter the AUX function mode, press the FUNCTION Button to select AUX mode. 


4. Start to playing your MP3 player or other audio device.
5. Slowly adjust both the volume controls on your Docking System and the external device.
6. Turn off your MP3 player or other audio device etc. and unplug the AUX IN jack when finish 

  listening.

7. To turn the Docking System off, press the POWER / STANDBY     Button. The LCD backlight will 

  go off.   

( Plug other 

end into

external 

source ) 

FUNCTION

AUX.

    IN

CARE AND MAINTENANCE

1. Avoid operating your unit under direct sunlight or in hot, humid or dusty places.
2. Keep your unit away from heating appliances and sources of electrical noise such as fluorescent  

  lamps or motors.

3. If drop-outs or interruptions occur in the music during CD play, 
  or if the CD fails to play at all, its bottom surface may require cleaning.  
  Before playing, wipe the disc from the center outwards with a good soft cleaning cloth.
4. Unplug the unit from the electrical power outlet immediately in case of malfunction.

Cleaning the Unit

•  To prevent fire or shock hazard, disconnect your unit from the AC power source when cleaning.
•  The finish on the unit may be cleaned with a dust cloth and cared for as other furniture. 
  Use caution when cleaning and wiping the plastic parts.
•  If the cabinet becomes dusty wipe it with a soft dry dust cloth. Do not use any wax or polish sprays  

  on the cabinet.

•  If the front panel becomes dirty or smudged with fingerprints it may be cleaned with a soft cloth  
  slightly dampened with a mild soap and water solution. Never use abrasive cloths or polishes as  
  these will damage the finish of your unit.

CAUTION:

 Never allow any water or other liquids to get inside the unit while cleaning. 

11

CD814 IPOD JENSEN IM 120V GB CUS12   12

2010/1/12     02:01:53

Содержание JiSS-115

Страница 1: ...usic System for iPod Owner s Manual JiSS 115 iPod Not Included Please read this Instruction Manual carefully before using the unit and retain it for future reference CD814 IPOD JENSEN IM 120V GB CUS1...

Страница 2: ...cordance with the manufacturer s instructions 8 Do not install near any heat sources such as radiators heat registers stoves or other apparatus including amplifiers that produce heat WARNING TO REDUCE...

Страница 3: ...n the apparatus has been damaged in anyway such as power supply cord or plug is damaged liquid has been spilled or objects have fallen into the apparatus the apparatus has been exposed to rain or mois...

Страница 4: ...GE Before use check that the rated voltage of your unit matches your local voltage ON CONDENSATION When left in a heated room where it is warm and damp water droplets or condensation may form inside t...

Страница 5: ...nt into an outlet on a circuit different from that to which the receiver is needed Consult the dealer or an experienced radio TV technician for help WARNING Changes or modifications to this unit not e...

Страница 6: ...l thoroughly and retain it for future reference GETTING STARTED Unpacking the Docking System Please save all the original packaging It provides the safest way to transport your unit POWER SOURCE This...

Страница 7: ...d or leaking battery can cause damage to the unit and may void the warranty d Do not dispose batteries in fire Batteries may leak or explode B AC POWER CONNECTION 1 Insert one end of the power cord to...

Страница 8: ...ETTING PROGRAM CLOCK ADJ LISTENING TO THE RADIO 1 Press the POWER STANDBY Button once to turn on the System The LCD backlight will light 2 Press the FUNCTION Button to select TUNER mode 3 Set the BAND...

Страница 9: ...efly display flashing and then the total number of tracks on the CD will appear in the LCD Display after a few seconds 6 Press the PLAY PAUSE Button to start playback The Play Indicator will light and...

Страница 10: ...K 15 To play the tracks in random in Stop mode press the PLAY MODE Button three times The Random Indicator will appear in the Display 16 Press the PLAY PAUSE Button once A track is picked at random an...

Страница 11: ...once to turn on the System The LCD backlight will light 4 Press the FUNCTION Button to select iPod mode 5 Your iPod can now be inserted onto the iPod connector by aligning the connector on the bottom...

Страница 12: ...unit away from heating appliances and sources of electrical noise such as fluorescent lamps or motors 3 If drop outs or interruptions occur in the music during CD play or if the CD fails to play at al...

Страница 13: ...connectors in the dock and on your iPod then reseat it in the dock iPod does not respond to the unit iPod is not installed properly Remove your iPod from the dock and check for any obstruction on the...

Страница 14: ...d necessary maintenance as outlined in the owner s manual 3 Warranty of all SPECTRA products applies to residential use only and is void when products are used in a nonresidential environment or insta...

Отзывы: