14
When the unit is at the power off mode.
Set Clock
1. Press the
MODE
button 3 times, the clock display flashes.
2.
To set the hour, press the
/
button to set advance or reverse hour setting.
Press and hold the button for fast advance / reverse value.
3.
To set the minute, press the
/ -
button to set advance or reverse minute setting.
Press and hold the button for fast advance / reverse value.
Set 12/24 Hour format
4. Press the
MODE
button again to enter 12/24 hour format setting mode.
5.
To select 12/24 hour format, press either the /
button.
Set Year
6. Press the
MODE
button again to enter the year setting mode, the year reading flashes.
7.
To set year, press the
/
button to set advance or reverse the year.
Press and hold the button for fast advance / reverse value.
Set Month/Date
8. Press the
MODE
button again to enter the month/date setting mode, the month/date reading flashes.
9.
To set Month, press the
/
button to set advance or reverse the month.
Press and hold the button for fast advance / reverse value.
10. To set Date, press the
/ -
button to set advance or reverse date.
Press and hold the button for fast advance / reverse value.
Exit setting mode
11.
To save all settings and exit the setting mode, press the
MEM
button.
CLOCK AND CALENDAR SETTINGS
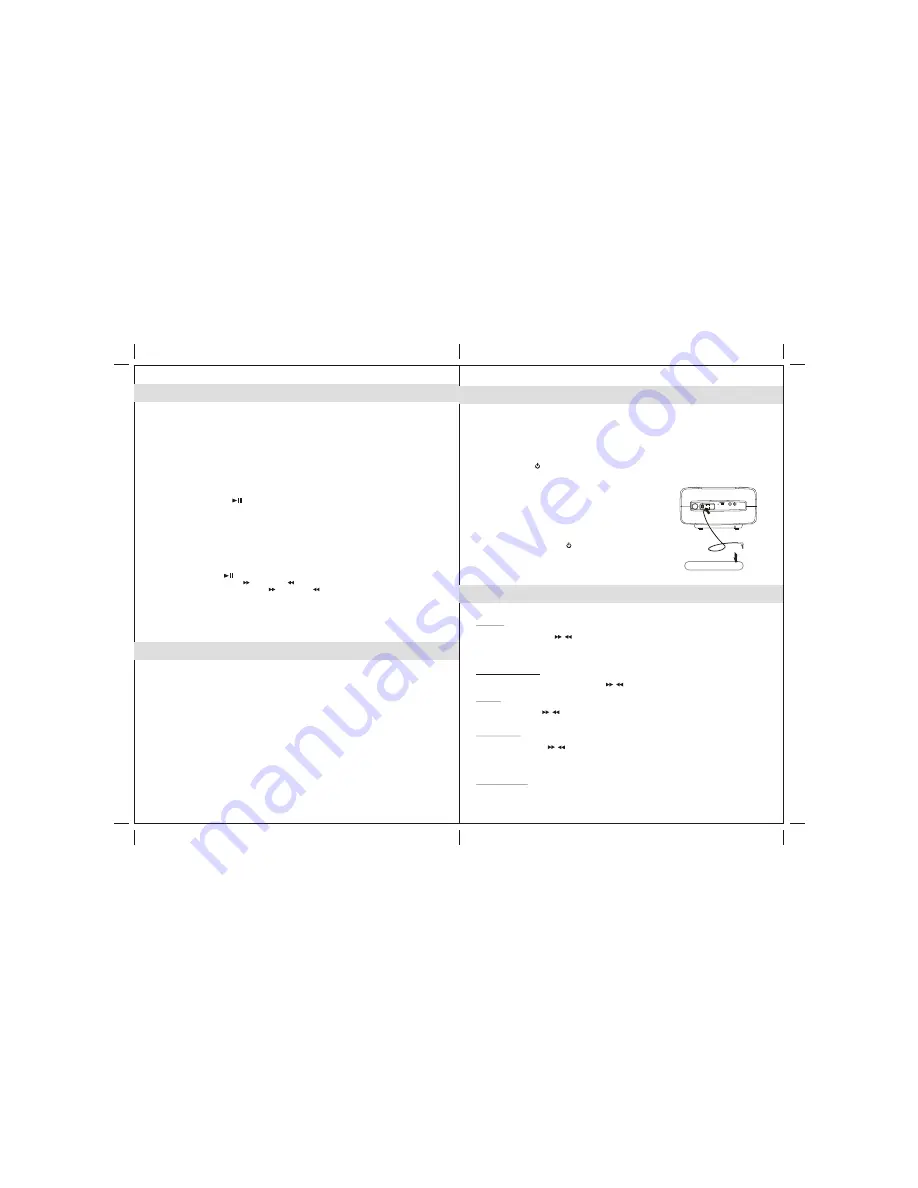
This unit provides an auxiliary audio signal input for connecting external audio devices.
Use the included audio cable with 3.5 mm stereo plug to connect the external device to the AUX IN Jack
located on the back of the unit.
AUXILIARY INPUT
1. Pull out the audio AUX LINE-IN cable located on the back of the unit and extend it to a desired length.
2. Connect the 3.5mm
AUX IN stereo plug
to the line out jack or Headphone jack of your external
audio device
3. Press the
POWER
button to turn on the unit.
4. To select auxiliary audio input, press the
FUNCTION
button. “AUX” indicator show on display.
5. Turn on the auxiliary device.
6. The volume and equalizer can now be controlled through the main
unit. Operate all other functions on the auxiliary device as usual.
To external auxiliary device
Note:
(1) If you connected the Line Out Jack of your external device then you
only need to adjust the volume control of this unit. If you connected
the Headphone Jack of your external device then you may need to
adjust both the volume control of your external device and the volume
control of this unit to find the most desirable volume setting.
(2) Press the
POWER ON / OFF
button turning off the unit when you
finish listening.
Don't forget to switch off the power of your external device as well.
13
The unit has 4 preset EQ settings for your selection.
In either RADIO, iPod, CD or AUX modes:
To select preset EQ: ROCK, CLASSIC, POP or JAZZ ; press
EQ
button.
The corresponding indicator shows on
.
display
EQ SETTING
iPod OPERATIONS
If the docking port will not be used for an extended period of time, it is recommended to push-close the iPod
docking drawer to cover the docking port and prevent damage.
1. Push-Open the iPod docking drawer.
2. Use the iPod adapter included with your iPod and insert it into the docking area. Your iPod can now be
inserted into the docking port by placing the connector on the bottom of the iPod onto the connector in
the docking bay.
Note
- Please be careful when seating the iPod into the docking to avoid
damaging the 30-pin connector on the iPod or in the docking
system.
3. Press the
POWER
button to turn on the unit.
4. Press the
FUNCTION
button to select iPod mode. The iPod will start playing automatically and start
charging immediately.
5. Press the
PLAY / PAUSE
button to pause or resume iPod playback.
6.
Adjust the sound level by pressing the
/ -
button.
Note : The volume level cannot be adjusted using the volume control on your iPod after being
docked.
7
. The iPod charges even during playback.
Note : The iPod will only charge in iPod, AUX or power “OFF” modes.
8
. To remove the iPod from the unit, press and hold the
PLAY/PAUSE
button for three seconds to switch
off the device and then gently remove it from the docking connector.
9. Gently push the iPod docking drawer back into the unit and locked.
iPod playback control:
- Press the
PLAY/PAUSE
button to pause or resume the iPod playback;
- Press the Skip/Search Forward or Backward button to skip to the next or previous song;
- Press and hold the Skip/Search Forward or Backward button for fast-forwarding or fast-rewinding
during playback.