


5
This page contains valuable information regarding the handling, cleaning,
and storage of discs
played in this unit.
Handling
Do not touch the playback side of the disc.
Do not attach paper or tape to discs.
Do not stick or write anything on the surface.
Protect against fingerprints.
Always hold a disc by the center and edge portions.
Cleaning
Fingerprints and dirt on the disc may cause picture and/or sound deterioration. Wipe the disc from
the center outward with a soft cloth. Always keep the disc clean.
If you can not wipe the dirt off, lightly use a slightly moistened soft cloth and finish with a dry cloth.
Do not use any type of solvent such as
p
aint thinner, benzene, commercially available cleaners or
anti-static spray for vinyl LPs.
Storing
Do not store discs in places subject to direct sunlight or near heat sources.
Do not store discs in places subject to moisture and dust.
Store discs vertically in a case. Stacking or placing objects on discs outside of their cases may
cause warping.
NOTE:
We are not responsible for damage that may occur to any disc that is operated in this unit or
not handled, cleaned or stored as suggested above.
USE OF DISCS
24
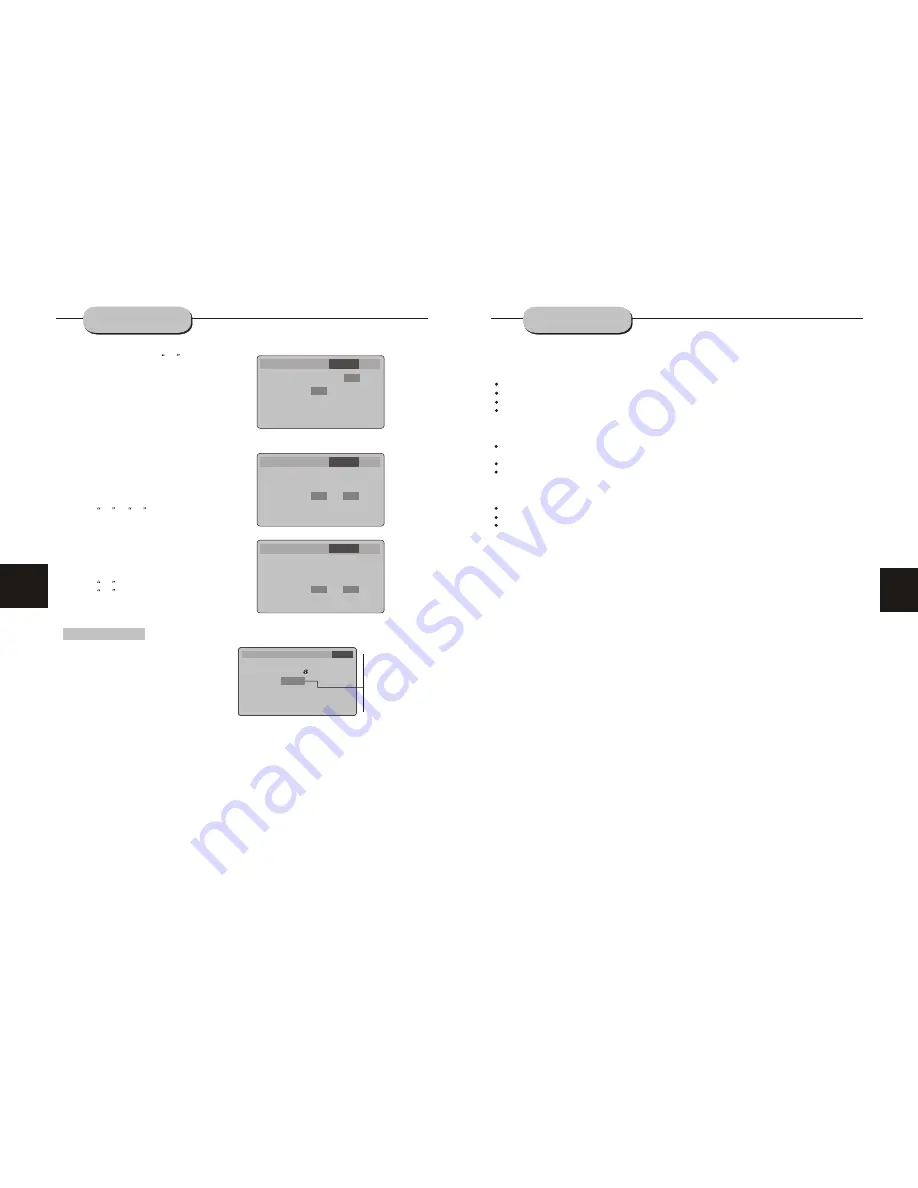
SYSTEM SETUP
Language Video Audio More Aud Rating
Language Video Audio More Aud Rating
Rating Setup
Password ----
Password ----
Rating
LOAD Factory
Rating
LOAD Factory
8.
8. Adult
Adult
Reset
Reset
1:Kid Safe
2:G
3:PG
4:PG-13
5:PG-R
6:R
7:NC-17
8:Adult
The Rating
Setup
menu allows you to block
playback
of DVDs based on their ratings.
Setting the Password & Rating Level
The DVD player allows you to block playback
of inappropriate content with a password-
protected
r
ating system (not all discs are rated).
A. From Stop mode, press SETUP.
B. Select Rating and press ENTER.
C. Select Rating and press ENTER repeatedly to set the rating from 1 (most restrictive)
to 8
(least restrictive ).
If a password has already been set, the lock icon will be closed. You will not be
able to select Rating until you SELECT the correct password using the 0-9 keys.
D. Select Password.
E. Use the 0-9 keys to SELECT a 4-digit password and press ENTER. The lock icon will
close to indicate that the rating and password are set.
F.
Press SETUP to save and exit.
Not all DVDs are rated.
DVDs that are rated higher than the level you select will not
play without SELECTING
t
he correct password.
If you forget your password, select 8888 to clear the memory. Keep this pass
word
out of reach of children as i
t
will always unlock the Parental Control setting.
Off
Left
Center
Right
Left Surr
Right Surr
Language
Language
Video
Video
Audio
Audio
Rating
Rating
More Aud
More Aud
Prologic
Subwoofer
Pink Noise
DRC
LPCM 48k DS
Prologic
Subwoofer
Pink Noise
DRC
LPCM 48k DS
On
On
Off
Off
Off
On
On
Off
Off
Off
Off
On
Language Video Audio
Rating
More Aud
Prologic
Subwoofer
Pink Noise
DRC
LPCM 48k DS
On
On
Off
Off
Off
Off
On
Pink Noise Setting
Pink Noise is test tone set to
Off
and
can
select test
LEFT, CENTER, RIGHT, RIGHT SURROUND and LEFT
SURROUND chann
els
.
A. From Stop mode, press SETUP.
B. Select More Audio and press ENTER.
C. Select Pink Noise and press ENTER.
D. Select the desired Pink Noise setting and press
ENTER.
T
his function can select test LEFT,
CENTER, RIGHT, RIGHT SURROUND and
LEFT SURROUND chann
els
.
E. Press SETUP to save and exit.
DRC Setting
DRC is Dynamic Range Control.
A. From Stop mode, press SETUP.
B. Select More Audio and press ENTER.
C. Select DRC and press ENTER.
D. Select the desired DRC setting and press ENTER.
Select
Off
or
On
state.
E. Press SETUP to save and exit.
LPCM 48k DS Setting
A. From Stop mode, press SETUP.
B. Select More Audio and press ENTER.
C. Select LPCM 48k DS and press ENTER.
D. Select the desired LPCM 48k DS setting and press
ENTER.
Select
Off
is LPCM 48k.
Select
On
is LPCM 96k.
E. Press SETUP to save and exit.


