


11
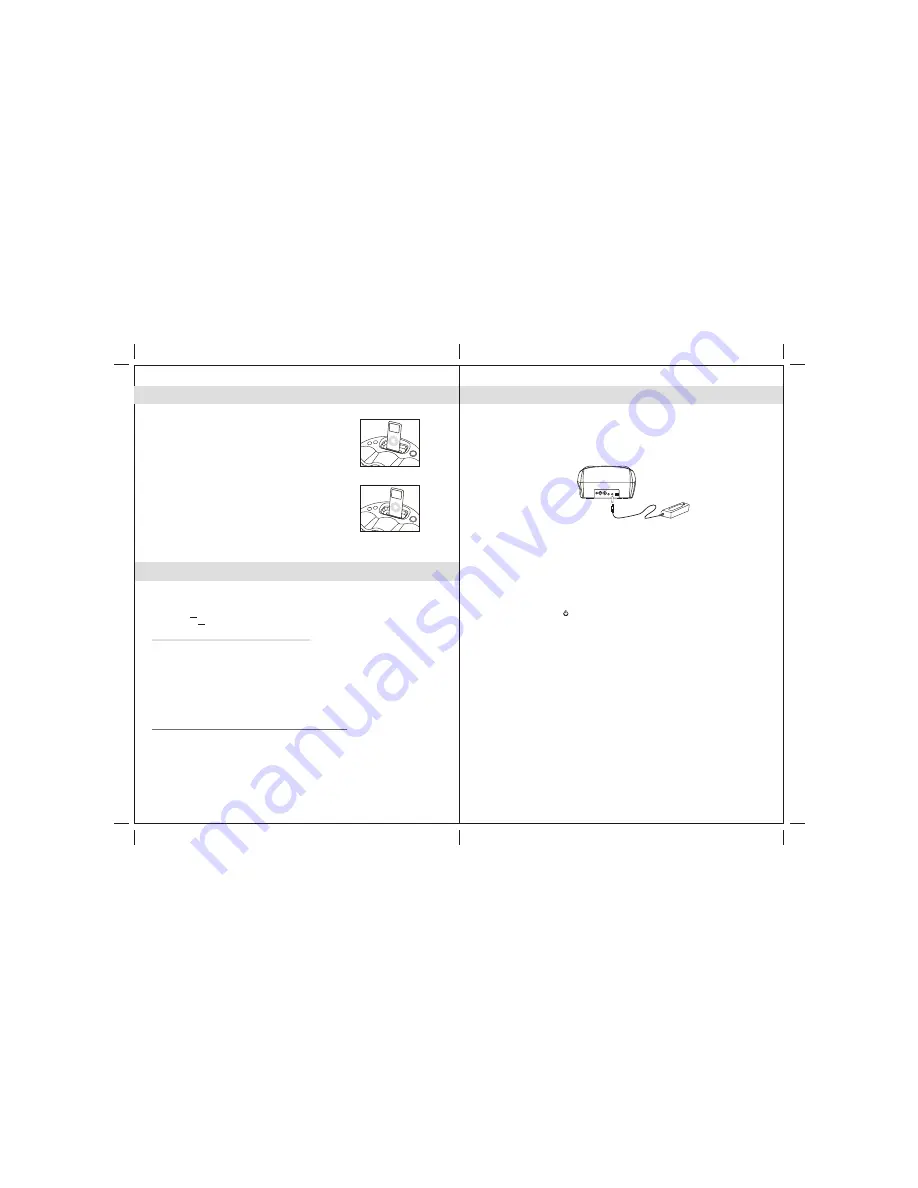
AUXILIARY INPUT
This model provides an auxiliary audio signal input for connecting an external audio device.
You may connect an audio cable with 3.5 mm stereo plug (included) to the
AUX IN
Jack located on
the back of the unit. Connect the other end of the cable to the Line Out Jack or Headphone Jack of
your MP3 player, CD player and other non-dockable iPods.
You can now listen to your external source through the speakers of this system.
1. Connect an audio cable with 3.5 mm stereo plug to the
AUX IN
Jack located on the back of the
unit.
2. Slide the
Audio Input Selector
switch to
AUX IN
position.
3. Connect the other end of the cable to the Line Out Jack or Headphone Jack of your external
audio device.
4. Turn on the external audio device.
5. The volume level can now be controlled
using
the main unit.
Operate all other functions on the
attached auxiliary device as your normally would.
If your connected using the Line Out Jack of your external device, then you can only adjust the
volume using the JiSS-330 control. If your connected using the Headphone Jack of your
external device, then you may need to adjust both the volume controls (JiSS-330 and external
device) to get the best volume level.
(2) Press the
ON/STANDBY
button to turn off the unit when you finish listening.
Don't forget to switch off the power of your external device as well.
Note:
(1)
3.5mm
Stereo plug
External Audio Device
VIDEO OUT FROM THE iPod
You are able to view videos and photos stored in your 5th Generation iPod on a larger television screen
or monitor using the
built-in Video Output jacks on the back of the unit.
Two video output jacks are available on the back of the unit.
(1) S-VIDEO S-Video signal.
(2) RCA VIDEO composite video signal (most common on standard televisions with video in).
Video Out (For
5th Generation
iPods with video ONLY)
1. You can connect this unit to a television or other video display that has S-video or composite
video inputs.
2. Securely dock the iPod with video in the docking bay.
3. Connect the S-video cable
(included)
into the rear S-video jack or yellow RCA cable
(included)
to rear
RCA video jack on the unit.
4. Connect the other end of the S-video or yellow RCA cable to VIDEO IN on your television or video display.
5. Slide the Audio Input Selector switch on the back of the unit
to iPod position.
6. Select a movie from your iPod menu.
7. iPod: On the main menu choose video then select video setting.
8. iPod: Make sure the TV Out section is set to
“
ON
”
.
9. iPod: Switch back to the movie library and play the movie of your choice.
unit
to iPod position.
the audio will only playback through the speakers on this unit.
For Photo view (For iPod with color display ONLY - excludes nano)
1. Slide the Audio Input Selection switch on the back of the
2. Securely dock the iPod with color display.
3. iPod: At TV Out section, make sure it is set to
“
ON
”
4. iPod: Go to Photo Library and then press play. The slideshow will play on your device.
Note:
1. The RCA Video input connector on a television is usually color coded yellow to match the
color on the AV cable.
2. When playing slideshows or videos,
10
F irs t ins ta ll the iP od na no bra cket into the
s t
s t
1 G ener a tio n iP o d na no : Align your 1 genera tion iP od na no to the
L E F T s ide of the opening in the na no bra cket (F igure 1 ). Ma ke s ure
the connector on the bottom of the na no is pos itioned over the
connector in the J
dock prior to s ea ting the na no. C a refully
s lide the na no down onto the connector in order to ins ure a s ecure
connection.
J iS S -330 B a y.
iS S -330
n d
nd
2 G e n e r a tio n iP o d n a n o : A lign your 2 ge ne ra tion iP od na no to the
R IG H T
the ope ning in the na no bra cke t (F igure 2 ). Ma ke s ure
the conne ctor on the bottom of the na no is pos itione d ove r the
conne ctor in the J iS S -330 dock prior to s e a ting the na no. C a re fully
s lide the na no down onto the conne ctor in orde r to ins ure a s e cure
conne ction.
s ide of
N o te : B e ca re ful not to da ma ge the conne ctor whe n docking the na no.
N e ve r us e force whe n docking the na no onto the conne ctor.
s t
n d
D O C K IN G 1 A N D 2 G E N E R A T IO N iP o d n a n o s
Figure 2
Figure 1


