


24
16022089
©2005 Maytag Services
Disassembly Procedures
To avoid risk of electrical shock, personal injury or
death; disconnect power and gas before servicing.
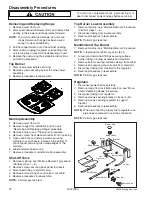
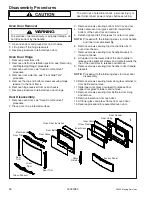
Electronic Control
1. Remove control panel, see “Control Panel”
procedure, steps 1 through 4.
2. Remove screws securing electronic control bracket to
control panel.
3. Label and disconnect terminal wiring from electronic
control.
4. Reverse procedure to reinstall electronic control.
Control
Panel
Electronic
Control
Transformer
1. Remove power from unit.
2. Remove back panel, see "Back Panel" procedure.
3. Label and disconnect wire terminals from cooling fan.
4. Remove screws securing fan to range chassis.
5. Reverse procedure to reinstall cooling fan.
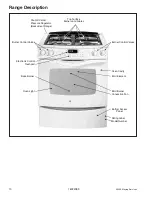
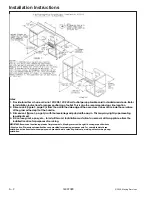
Oven Sensor
Meat
Probe
Broil Element
Cooling
Fan
Transformer
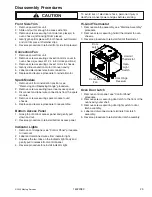
Oven Light Bulb/Oven Light Socket
NOTE:
Requires removal of unit to replace oven light
socket.
The light automatically comes on when the door is
opened. The light will not operate during a clean cycle.
1. Remove power from unit.
2. Open oven door and locate oven light.
3. Grasp lens cover and pull outward on one side to
gain access to bulb.
4. Carefully remove old bulb, by lifting bulb straight out
of ceramic base.
NOTE:
To avoid damaging the new bulb and
decreasing life of the bulb, do not touch new
bulb with bare hands or fingers.
Hold with a cloth or paper towel.
NOTE:
Proceed with the following steps for oven light
socket removal.
5. Remove unit from installation position, see
“Removing and Replacing Range” procedure.
6. Disconnect or unplug the power cord leading from
unit to fuse box or junction box depending on unit.
7. Carefully displace fiberglass insulation away from
rear of light socket.
8. Release metal tabs on light socket and push socket
assembly away from the oven cavity.
9. Label and disconnect wires from light socket.
10. Reverse procedure to reinstall light socket.
Reposition insulation around lamp socket.
NOTE:
Reposition fiberglass insulation around light
socket to eliminate the possibility of any heat
related problems.
Lens
Bulb
Socket
Bulb specifications
G5.3 Type Halogen Bi-Pin 25W-120V
Oven Light Switch
1. Remove power from unit.
2. Remove control panel, see "Control Panel"
procedure.
3. Remove screws securing oven light switch to front of
oven chassis.
4. Reverse procedure to reinstall oven light switch.
Oven Sensor
1. Remove power from unit.
2. Open oven door and remove screws securing sensor
to oven cavity.
NOTE: Gently
pull wiring through cavity wall.
3. Disconnect oven sensor at the connector terminal
and remove.
4. Reverse procedure to reinstall sensor.
NOTE:
Verify sensor wires are pushed through the
insulation.
Содержание JGS8750ADB
Страница 27: ... 2005 Maytag Services 16022089 A 1 Appendix A ...
Страница 33: ... 2005 Maytag Services 16022089 B 1 Appendix B ...
Страница 34: ...B 2 16022089 2005 Maytag Services Use Information ...
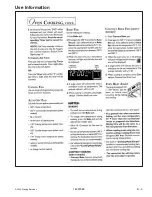
Страница 35: ... 2005 Maytag Services 16022089 B 3 Use Information ...
Страница 36: ...B 4 16022089 2005 Maytag Services Use Information ...
Страница 37: ... 2005 Maytag Services 16022089 B 5 Use Information ...
Страница 38: ...B 6 16022089 2005 Maytag Services Care Information ...
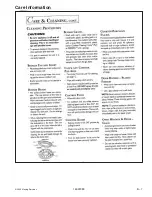
Страница 39: ... 2005 Maytag Services 16022089 B 7 Care Information ...
Страница 40: ...B 8 16022089 2005 Maytag Services Care Information ...
Страница 41: ... 2005 Maytag Services 16022089 C 1 Appendix C ...