background image

5

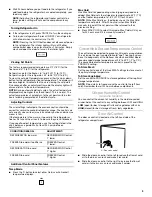
The Dispenser Lock (on some models)

The dispenser can be turned off for easy cleaning or to avoid 
unintentional dispensing by small children and pets. 
NOTE: The lock feature does not shut off power to the product, to 
the ice maker, or to the dispenser light. It simply deactivates the 
ice and water dispensers. To turn off the ice maker, see “Ice 
Maker and Storage Bin.”

Press and hold LOCKOUT for 3 seconds to lock the 
dispenser. While the dispenser is locking, “LOCKING” will 
appear on the display screen and the blue indicator light 
around the LOCKOUT button will flash. When the dispenser is 
locked, the indicator light will change to red for a few seconds, 
then turn off. 

Press and hold LOCKOUT a second time to unlock the 
dispenser. While the dispenser is unlocking, “UNLOCKING” 
will appear on the display screen and the red indicator light 
around the LOCKOUT button will flash. When the dispenser is 
unlocked, the indicator light will change to blue for a few 
seconds, then turn off.

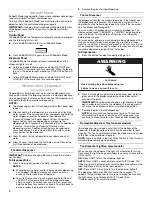
Ice Maker and Storage Bin

Turning the Ice Maker On/Off

The On/Off switch is located on the top right-hand side of the 
freezer compartment.
To turn on the ice maker, slide the control to the ON (left) position.
To manually turn off the ice maker, slide the control to the OFF 
(right) position.
NOTE: Your ice maker has an automatic shutoff. The ice maker 
sensors will automatically stop ice production, but the control will 
remain in the ON (left) position.

REMEMBER:

Allow 24 hours to produce the first batch of ice. Discard the 
first three batches of ice produced.

The quality of your ice will be only as good as the quality of the 
water supplied to your ice maker. Avoid connecting the ice 
maker to a softened water supply. Water softener chemicals 
(such as salt) can damage parts of the ice maker and lead to 
poor quality ice. If a softened water supply cannot be avoided, 
make sure the water softener is operating properly and is well 
maintained.

Do not use anything sharp to break up the ice in the storage 
bin. This can cause damage to the ice container and the 
dispenser mechanism.

Do not store anything on top of or in the ice maker or storage 
bin.

Removing and Replacing Ice Storage Bin

1. Hold the base of the storage bin with both hands and press 

the release button to lift the storage bin up and out.
NOTE: It is not necessary to turn the ice maker control to the 
OFF (right) position when removing the storage bin. The 
sensor cover (“flipper door”) on the left wall of the freezer 
stops the ice maker from producing ice if the door is open or 
the storage bin is removed.

2. Replace the storage bin on the door and push down to make 

sure it is securely in place.

Water Filtration System

Water Filter Status Display (on some models)

The filter status display will help you know when to change your 
water filter. When the display reads 10%, order a new filter. It is 
recommended that you replace the filter when the display reads 
0% OR when water flow to your water dispenser or ice maker 
decreases noticeably. The filter should be replaced at least every 
6 months depending on your water quality and usage.
After changing the filter, reset the display by pressing the button. 
The display will read 99% when the system is reset.

Non-Indicator Water Filter (on some models)

If your refrigerator does not have the water filter status light, you 
should change the water filter cartridge at least every 6 months 
depending on your water quality and usage. If the water flow to 
the water dispenser or ice maker decreases noticeably before 
6 months have passed, replace the water filter more often.

Changing the Water Filter

1. Press the eject button to release the filter from the base grille.
2. Pull the filter straight out.

3. Turn the cap counterclockwise to remove it from the filter.

IMPORTANT: Do not discard the cap. It is part of your 
refrigerator. Keep the cap to use with the replacement filter. 

4. Align the ridge on the cap with the arrow on the new filter and 

turn the cap until it snaps into place.
NOTE: You can run the dispenser without a filter. Your water 
will not be filtered. Simply insert the cap all of the way into the 
base grille and rotate the cap until it is firmly in place. 

5. Remove the covers from the O-rings. Be sure the O-rings are 

still in place after the covers are removed.

6. Push the filter into the base grille. The eject button will pop 

back out when the filter is fully engaged.

7. Flush the water system. See “Water and Ice Dispensers.”

REFRIGERATOR CARE

Cleaning

Both the refrigerator and freezer sections defrost automatically. 
However, clean both sections about once a month to avoid 
buildup of odors. Wipe up spills immediately.

Do not use with water that is microbiologically unsafe or of 
unknown quality without adequate disinfection before or 
after the system.

WARNING

Explosion Hazard

Use nonflammable cleaner.

Failure to do so can result in death, explosion, or fire.

Содержание JCD2591WES00

Страница 1: ...WATER FILTER CERTIFICATIONS 9 PERFORMANCE DATA SHEETS 10 WARRANTY 14 S CURIT DU R FRIG RATEUR 15 UTILISATION DU R FRIG RATEUR 16 ENTRETIEN DU R FRIG RATEUR 20 D PANNAGE 21 ACCESSOIRES 23 FEUILLES DE D...

Страница 2: ...erous even if they will sit for just a few days If you are getting rid of your old refrigerator please follow these instructions to help prevent accidents Before You Throw Away Your Old Refrigerator o...

Страница 3: ...l Control Panel Features Temp Mode Press the C button to select either Celsius or Fahrenheit temperature displays Max Cold Use Max Cold to speed cooling when large grocery loads are added Max Cold set...

Страница 4: ...nds To switch from cups to liters press and hold the buttons for another 3 seconds To switch back to ounces repeat the process a third time 2 Remove the glass to stop dispensing The Ice Dispenser Ice...

Страница 5: ...ontrol to the OFF right position when removing the storage bin The sensor cover flipper door on the left wall of the freezer stops the ice maker from producing ice if the door is open or the storage b...

Страница 6: ...with one of the same size shape and wattage 4 Replace light shield when applicable 5 Plug in refrigerator or reconnect power TROUBLESHOOTING First try the solutions suggested here or visit our website...

Страница 7: ...for ice production to begin Allow 3 days after ice production begins to completely fill ice container Does the ice maker mold have water in it or has no ice been produced Make sure your refrigerator...

Страница 8: ...e it is used Is the refrigerator connected to a cold water line with water pressure of at least 30 psi 207 kPa The water pressure to the home determines the flow from the dispenser Is there a water fi...

Страница 9: ...9 WATER FILTER CERTIFICATIONS...

Страница 10: ...or cold water use only Do not use with water that is microbiologically unsafe or of unknown quality without adequate disinfection before or after the system Refer to the Warranty section for the Manuf...

Страница 11: ...r use only Do not use with water that is microbiologically unsafe or of unknown quality without adequate disinfection before or after the system Refer to the Warranty section for the Manufacturer s na...

Страница 12: ...y While testing was performed under standard laboratory conditions actual performance may vary The product is for cold water use only Do not use with water that is microbiologically unsafe or of unkno...

Страница 13: ...y While testing was performed under standard laboratory conditions actual performance may vary The product is for cold water use only Do not use with water that is microbiologically unsafe or of unkno...

Страница 14: ...ratches dents chips or other damage to the finish of your major appliance unless such damage results from defects in materials or workmanship and is reported to Jenn Air within 30 days from the date o...

Страница 15: ...es de s curit et de vous y conformer AVERTISSEMENT DANGER Voici le symbole d alerte de s curit Ce symbole d alerte de s curit vous signale les dangers potentiels de d c s et de blessures graves vous e...

Страница 16: ...oid que le r glage recommand ne refroidira pas les compartiments plus rapidement Mise en marche du r frig rateur Si le r frig rateur n est pas allum appuyer sur ON OFF marche arr t pour mettre en marc...

Страница 17: ...s 24 heures ou lorsque la fonction Max Cold est manuellement d sactiv e les valeurs de r glage reviendront leur r glage ant rieur Appuyer sur MAX COLD pour s lectionner ce mode La fonction Max Cold r...

Страница 18: ...ibuteur Accorder 24 heures pour que le r frig rateur se refroidisse et refroidisse l eau Accorder 24 heures pour produire la premi re quantit de gla ons Jeter les trois premi res quantit s de gla ons...

Страница 19: ...e Lorsque le distributeur est verrouill le t moin lumineux passe au rouge pendant quelques secondes puis s teint Appuyer nouveau sur LOCKOUT pour d verrouiller le distributeur Lorsque le distributeur...

Страница 20: ...ig ration et de cong lation se d givrent automatiquement Toutefois nettoyer les deux sections environ une fois par mois pour viter une accumulation d odeurs Essuyer les renversements imm diatement IMP...

Страница 21: ...tion la plus froide ne refroidira aucun des compartiments plus rapidement Le moteur semble trop tourner Il se peut que votre nouveau r frig rateur fonctionne plus longtemps que l ancien en raison du c...

Страница 22: ...install e La temp rature du cong lateur est elle assez froide pour produire de la glace Attendre 24 heures apr s le raccordement de la machine gla ons avant qu elle produise des gla ons Pr voir un d...

Страница 23: ...correctement V rifier ce qui suit La porte du cong lateur est elle compl tement ferm e La valve du robinet d arriv e d eau est elle ferm e mal install e ou obstru e La conduite d eau est elle connect...

Страница 24: ...le rendement r el peut varier Le produit doit tre utilis pour l eau froide seulement Ne pas utiliser pour le filtrage d une eau microbiologiquement pollu e ou de qualit inconnue en l absence d un disp...

Страница 25: ...peut varier Le produit doit tre utilis pour l eau froide seulement Ne pas utiliser pour le filtrage d une eau microbiologiquement pollu e ou de qualit inconnue en l absence d un dispositif de d sinfe...

Страница 26: ...otre approvisionnement d eau M me si le test a t effectu dans des conditions de laboratoires standard le rendement r el peut varier Le produit doit tre utilis pour l eau froide seulement Ne pas utilis...

Страница 27: ...votre approvisionnement d eau M me si le test a t effectu dans des conditions de laboratoires standard le rendement r el peut varier Le produit doit tre utilis pour l eau froide seulement Ne pas utili...

Страница 28: ...ation et ne soient signal s Jenn Air dans les 30 jours suivant la date d achat 6 Toute perte d aliments ou de m dicaments due une d faillance du r frig rateur ou du cong lateur 7 Le ramassage et la li...

Отзывы: