9
F
RESH
F
OOD
F
EATURES
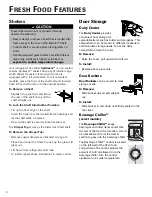
Shelves
Your refrigerator has either
Spillsaver™
or non-sealed
shelves. Spillsaver™ shelves have a spill retainer edge
which allows for easier clean up and some are
equipped with a roll out feature. To roll out (select
models), grasp the front of the shelf and pull forward.
Push in the shelf to return to the original position.
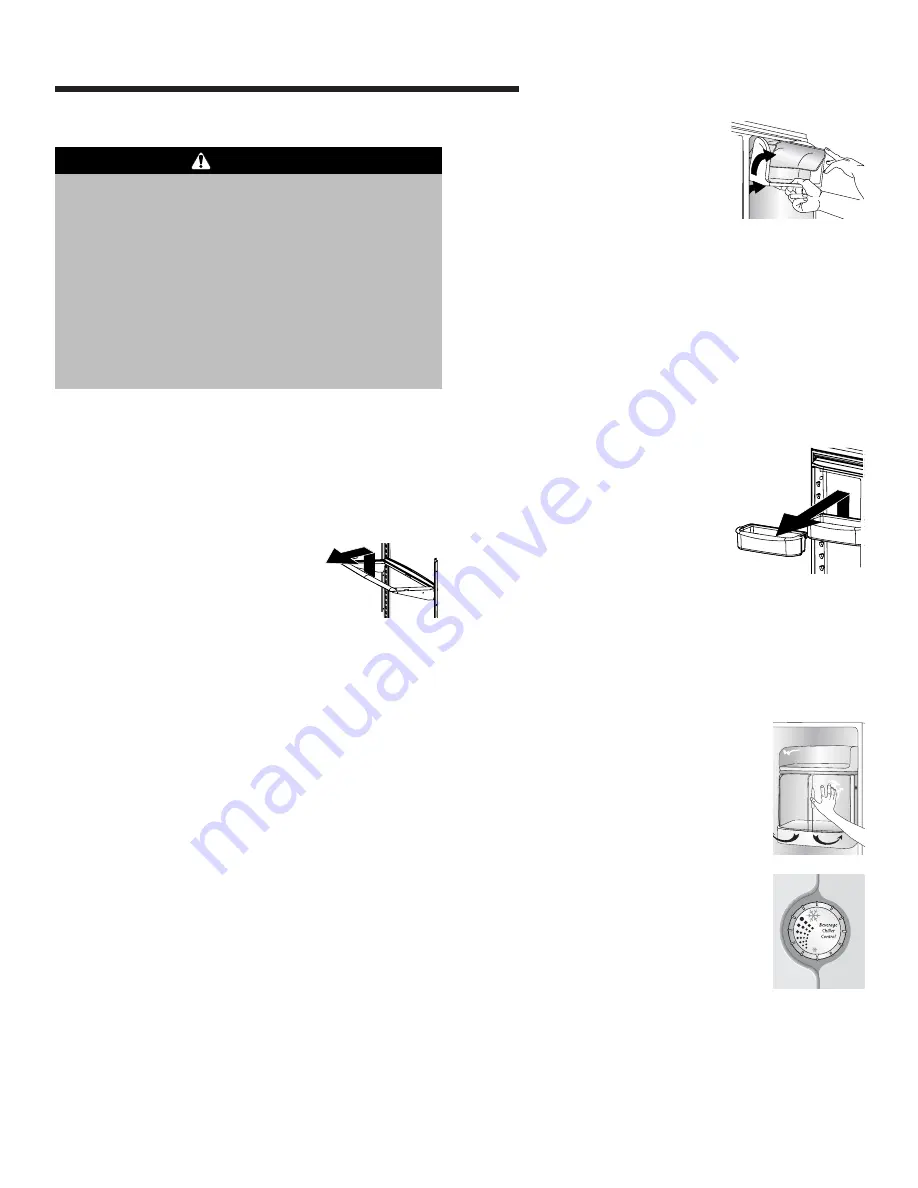
To Remove a Shelf:
• Slightly tilt up the front and lift up
the rear of the shelf, then pull the
shelf straight out.
To Lock the Shelf Into Another Position:
• Tilt up the front edge of the shelf.
• Insert the hooks into the desired frame openings and
let the shelf settle into place.
• Be sure the shelf is securely locked at the rear.
The
Crisper Top
serves as the lower fresh food shelf.
To Remove the Crisper Top:
• Remove crisper drawers as indicated on page 10.
• Place hand under the frame to push up the glass. Lift
glass out.
• Lift frame from refrigerator liner rails.
• To install, repeat above instructions in reverse order.
To avoid personal injury or property damage,
observe the following:
• Never attempt to adjust a shelf that is loaded with
food, except in the case of the Elevator
TM
Shelf.
• Confirm shelf is secure before placing items on
shelf.
• Handle tempered glass shelves carefully. Shelves
may break suddenly if nicked, scratched, or
exposed to sudden temperature change.
CAUTION
Beverage Chiller™
(select models)
The
Beverage Chiller™
keeps
beverages and other items cooler than
the rest of the fresh food section. A cold
air inlet allows air from the freezer
section to pass into the beverage chiller.
The Beverage Chiller™ control is located
on the left wall of the fresh food
compartment. The control adjusts the
amount of cold air allowed in to the
beverage chiller. Turn the control
clockwise for a colder temperature.
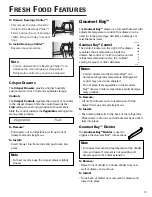
Door Storage
Dairy Center
The
Dairy Center
provides
convenient door storage for
spreadable items such as butter and margarine. This
compartment can be moved to different locations to
accommodate storage needs. To use the dairy
compartment, raise the cover.
To Remove:
• Raise the cover, pull upward and tilt out.
To Install:
• Reverse above procedure.
Door Buckets
Door Buckets
can be moved to meet
storage needs.
To Remove:
• Slide bucket up and pull straight
out.
To Install:
• Slide bucket in and down until firmly seated in the
door liner.
Содержание JBR2086HES
Страница 56: ...55 REMARQUES ...
Страница 57: ...56 REMARQUES ...
Страница 86: ...85 NOTAS ...
Страница 87: ...86 NOTAS ...


