background image

12

Make Gas Connection

WARNING

Explosion Hazard

Use a new CSA International approved gas supply line.
Install a shut-off valve.
Securely tighten all gas connections.
If connected to LP, have a qualified person make sure 

gas pressure does not exceed 14" (36 cm) water 

column. 
Examples of a qualified person include: 
licensed heating personnel, 

authorized gas company personnel, and

authorized service personnel.
Failure to do so can result in death, explosion, or fire.

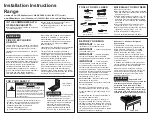
1.  Assemble flexible connector from gas supply pipe to  

pressure regulator located in the middle rear of the range.

2.  Apply pipe-joint compound made for use with LP gas  

to the smaller thread ends of the flexible connector 

adapters. (See B and G in the following illustration.) 

3.  Attach one adapter to the gas pressure regulator and 

the other adapter to the gas shut-off valve. Tighten both 

adapters, being certain not to move or turn the gas 

pressure regulator.

4.  Use a 

15

16

" combination wrench and an adjustable wrench 

to attach the flexible gas supply to the adapters. Check that 

connector is not kinked.

IMPORTANT: All connections must be wrench-tightened. Do 

not make connections to the gas regulator too tight. Making the 

connections too tight may crack the regulator and cause a gas 

leak. Do not allow the regulator to turn or move when tightening 

fittings.

A

B C

D

E

F

G

H

A.  Gas pressure regulator
B.  Use pipe-joint compound.
C.  Adapter (must have ½" male 

pipe thread)

D.  Flexible connector

E.  Manual gas shut-off valve
F.  ½" or ¾" gas pipe
G. Use pipe-joint compound.
H. Adapter

Verify Anti-Tip Bracket Location

1.  Using a 

B\zn

" socket or wrench, turn all 4 leveling rods one 

full turn to raise the range and provide enough clearance for 

the rear leveling leg to slide into the anti-tip bracket.

2.  Move range into its final location, making sure rear leveling 

leg slides into anti-tip bracket.

3.  Use a flashlight to look underneath the bottom of the range 

and visually check that the rear range foot is inserted into 

the slot of the anti-tip bracket.

A

Complete Connection

1.  Open the manual shut-off valve in the gas supply line.  

The valve is open when the handle is parallel to the 

gas pipe.

2.  Test all connections by brushing on an approved  

noncorrosive leak-detection solution. If bubbles 

appear, a leak is indicated. Correct any leak found.

3.  Remove cooktop burner caps, burner bases, and grates 

from parts package. Place burner bases on cooktop and 

burner caps on burner bases. Place grates over burners 

and caps.

4.  Plug into a grounded 3 prong outlet.
5.  Turn on power supply. For further information, please refer  

to the user instructions located in the Use and Care Guide.

A. Closed valve
B. Open valve

Electrical Shock Hazard

Plug into a grounded 3 prong outlet.
Do not remove ground prong.
Do not use an adapter.
Do not use an extension cord.
Failure to follow these instructions can result in death, 
fire, or electrical shock.

WARNING

Содержание 8284756

Страница 1: ...NSTALLATION REQUIREMENTS 4 Tools Parts 4 Location Requirements 6 Electrical Requirements 8 Gas Supply Requirements 8 INSTALLATION INSTRUCTIONS 10 Unpack the Range 10 Install Anti Tip Bracket 11 Make G...

Страница 2: ...property damage personal injury or death Do not store or use gasoline or other flammable vapors and liquids in the vicinity of this or any other appliance WHAT TO DO IF YOU SMELL GAS Do not try to lig...

Страница 3: ...to floor or wall per installation instructions Slide range back so rear range foot is engaged in the slot of the anti tip bracket Re engage the anti tip bracket if the range is moved Do not operate r...

Страница 4: ...any tools listed here Pipe wrench Adjustable wrench or 5 8 wrench Z x 41 4 flat blade screwdriver 2 Phillips screwdriver Drill C drive ratchet ZB zn combination wrench Pliers Level Tubing cutter Z v C...

Страница 5: ...bustible material such as tile or stainless steel See Cabinet Dimensions in the Location Requirements section for installation requirements 30 76 2 cm Adjustable Backguard Order Part Number 8285148 36...

Страница 6: ...r carpet and under range if installing range over carpeting IMPORTANT To avoid damage to your cabinets check with your builder or cabinet supplier to make sure that the materials used will not discolo...

Страница 7: ...cabinet width C 13 33 cm max upper cabinet depth D For minimum clearance to top of range E 30 76 8 cm on 30 76 2 cm models 36 92 1 cm on 36 91 4 cm models 48 122 6 cm on 48 121 9 cm models F 6 15 2 c...

Страница 8: ...Securely tighten all gas connections If connected to LP have a qualified person make sure gas pressure does not exceed 14 36 cm water column Examples of a qualified person include licensed heating per...

Страница 9: ...nd closing Do not block access to shut off valve The valve is for turning on or shutting off gas to the range A Gas supply line B Shut off valve open position C To range A B C TEFLON is a registered t...

Страница 10: ...tion 2 a Remove kick plate from top of range and grate pack Unpack the Range In packaging Packaging removed A A Kick plate A A Kick plate b Lay kick plate to the side to avoid scratching the stainless...

Страница 11: ...Tip Over Hazard A child or adult can tip the range and be killed Install anti tip bracket to floor or wall per installation instructions Slide range back so rear range foot is engaged in the slot of t...

Страница 12: ...as pressure regulator B Use pipe joint compound C Adapter must have male pipe thread D Flexible connector E Manual gas shut off valve F or gas pipe G Use pipe joint compound H Adapter Verify Anti Tip...

Страница 13: ...r to the Use and Care Guide A Griddle drip tray B Griddle A B Electronic Ignition System Install Burner Bases and Burner Caps Install the burner base making sure the igniter electrode is properly alig...

Страница 14: ...1 Unplug range or disconnect power 2 Remove burner grates 3 Remove the control knobs 4 Open the oven door and remove the 2 screws on each side of the range that hold the control console in place NOTE...

Страница 15: ...rough the steps to see which step was skipped 2 Check that you have all of your tools 3 Dispose of recycle all packaging materials 4 For oven use and cleaning read the Use and Care Guide Check Operati...

Страница 16: ...W10821591B 3 16 TM 2016 Jenn Air All rights reserved Used under license in Canada TM 2016 Jenn Air Tous droits r serv s Utilis sous licence au Canada...

Отзывы: