background image

20

Réglages

1

. Réglage de l’heure / date :

Appuyez sur le bouton K. «Time» clignote.

Appuyer sur le bouton I pour paramétrer 
sur 24h (format heure français) ou 12h 
(format heure anglais). Utilisez le bouton 

G


et 

H

 pour changer l’heure et appuyez sur 

la bouton 

K

.

 
Appuyez deux fois sur le bouton 

I

. Utilisez 

les touches 

G

 et 

H

 pour changer l’heure.

 
Appuyez sur le bouton 

I

 pour passer aux 

minutes, puis la date. Utilisez toujours les 
touches 

G

 et 

H

 pour changer les 

paramètres.

2

. Réglage du réveil :

Appuyer sur le bouton 

J

. “Alarm” (

N

clignote.

Appuyez sur le bouton 

I

. Utilisez les touch-

es 

G

 et 

H

 pour changer l’heure.

Vous pouvez enregistrer jusqu’à 5 sonner-
ies différentes. 

Appuyez sur le bouton 

I

 pour passer à la 

sonnerie suivante. 

Le chiffre inscrit en dessous de “MONTH” (

T

indique le nombre de sonneries.

G

H

I

J

N

T

G

H

I

K

12

1.Setting the time / date: 

Press the K button. "Time" flashes.  

Press  the  I  button  to  set  to  24h  (French  time 
format) or 12h (English time format).  

Use  the  G  and  H  buttons  to  change  the  time 
and press the K button. Press the I button twice.  

Use the G and H keys to change the time. Press 
the  I  button  to  move  to  minutes,  then  the  date. 
Always  use  the  G  and  H  keys  to  change  the 
settings. 

2. Setting the alarm clock:

Press the J. "Alarm" button N flashes.

Press  the  I  button.  Use  the  keys  G  and  H  to 
change the time.

You can record up to 5 different ring tones.

Press the I button to move to the next ring. 

The number below "MONTH" (T) indicates the 
number of rings.

Settings

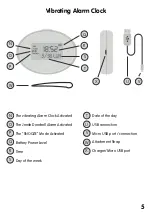
Содержание RL13

Страница 1: ...pour les personnes sourdes et malentendantes INSTRUCTION MANUAL Specially designed for the deaf and hard of hearing impaired people PACK HOTEL MODE D EMPLOI ciallement con u pour les personnes sourde...

Страница 2: ...Tous vos produits sont d j connect s entre eux 2 2 All your products are already connected to each other...

Страница 3: ...Contenu de votre pack Cube flash CBM14 R veil vibrant Sonnette de porte SP14 Coussin vibrant CoV14 Sommaire 6 7 12 13 21 22 24 25 27 4 5 13 Instruction manual The Vibrating Alarm Clock RL13 Summary 3...

Страница 4: ...ussin vibrant E Support en m tal F 2 c bles USB D Sonnette de porte A B D E Contenu de votre pack G Mode d emploi en fran ais et en anglais 6 A Cube lumineux B R veil C Coussin vibrant E Support en m...

Страница 5: ...W X U Connexion port USB V Connexion port Micro USB port R Heure W Cordon d attache X Chargeur port Micro USB Vibrating Alarm Clock The vibrating Alarm Clock Activated The Jenile Doorbell Alarm Activa...

Страница 6: ...Bouton r glage l alarme K Bouton r glage heure F L Plug bouton M Bouton SNOOZE pour repousser l alarme de 10 minutes A B C D E F G H I J K L M Power ON OFF Button of the alarm ON OFF Button of the ala...

Страница 7: ...sions Height x Width X Depth 8 5 x 11 x 2 5 cm Autonomy 2 weeks according to its current use Mounting Kit supplied Quick and easy to set up and reconfigure 2 year warranty 1 year battery warranty Func...

Страница 8: ...n charge Lorsque la LED n est pas allum le chargement est complet LED Vert Flash Une personne sonne la porte Use With the alarm clock you will receive a signal from the Jenile doorbell Jenile s alarm...

Страница 9: ...sonnette de porte L alarme s illumine sans la LED verte C est l heure de se lever L alarme vibre sans la LED verte C est l heure de se lever 9 Green LED vibration A person rings at the door When you s...

Страница 10: ...n alerte de sonnette de porte Lorsque les bouton sont bien positionn s veuillez appuyer sur la sonnette de porte Jenile Tests The Vibrating Alarm Clock is easy to test If despite the instructions give...

Страница 11: ...ssaire Cependant si vous voulez refaire les connections veuillez suivre les instructions suivantes 11 If the alarm does not come on please check that the battery is not exhausted by charging your alar...

Страница 12: ...u 5 sonner ies diff rentes Appuyez sur le bouton I pour passer la sonnerie suivante Le chiffre inscrit en dessous de MONTH T indique le nombre de sonneries G H I J N T G H I K 12 1 Setting the time da...

Страница 13: ...button flashes you have successfully connected your alarm clock to the doorbell Test Your alarm flashes all colors and a small green LED indicates that it was the doorbell that triggered it Press Sno...

Страница 14: ...www jenile com...
Отзывы: