A. With the T-handle off, insert the spool rod into base and
finger tighten the spool rod clockwise to get it started. Slip
flat plastic spacer over spool rod.
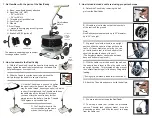
3. How to load/unload a cable reel using proper technique
A. Detach the T-handle by removing the ball
pin from the ReelCaddy
B. Lift cable reel on its side so that the inner hole
of the reel is off the ground
Note:
ReelCaddy accomodates reels up to 23” diameter,
up to 30” in height
C. At ground level with wheels in an upright
position, slide the spool rod through the cable
reel’s I.D. (inner diameter) as far as you can
so that the cable reel is at the bottom of the
spool rod towards the base of the unit.
(The flat plastic washer needs to be between
base and bottom of cable reel)
D. With the cable reel at the base of the unit, use
the spool rod as a lever to lift up the cable reel in
an upright position. This technique helps prevent
the operator fromdoing all of the heavy lifting while
loading.
(*If using optional brake, please refer to section 4)
E. Attach the T-handle and secure it with the ball pin.
F. You are ready to start using the ReelCaddy
G. To unload a cable reel, reverse the procedure:
remove T-handle (and optional brake), drop into
dispensing position, and slide the spool rod away
from the cable reel.
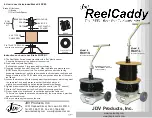
1. Get familiar with the parts of the ReelCaddy
A. Base - has wheels already attached
B. Spool Rod (3/4” NPT)
•
24” for RC01S
•
36” for RC01L
C. T-Handle w/ attached ball-pin
D. Foot Grip Pad
E. Wheels
F. Front Flange
•
prevents from digging into soft ground
G. Built-In Handle
H. Brake Kit RCB1 (optional)
2. How to assemble the ReelCaddy
B. Slide the T-handle over the spool rod and insert the
ball pin through the handle to secure it in place.
D. The T-handle is now in the
correct position; on the same
side as the foot grip pad.
C. Use the T-handle as a “wrench” to tighten
the spool rod to the base of the unit. (There
may be extra “thread” showing on spool rod, which
is okay). Once tightened, the T-handle must be on
the same side as the footpad. If it’s not and
you cannot turn the spool rod any further,
simply remove the ball pin, turn the T-handle
180 degrees, and insert ball pin.
H
Flat
Plastic
Spacer
Flat
Plastic Spacer
Brake
A
B
H
F
E
D
C
G
Quick release
ball pin
Shown with
optional
U1000NH
reusable
cable reel
* The product and packaging are subject
to change without notice.
optional U1000NH
Shown with


