background image


• 

Please note: Possible dirt residues in the dust container are attributable to 

the fact that this device is tested prior to delivery and do not represent any 

defect with the device! 


Attaching and Detaching Accessories 
CAUTION! 

  Before you attach or detach any accessories, ensure that the device is not 

connected to the mains power. 

  The nozzle adapter (1) (see the "Items Supplied" chapter, "Accessories" 

section, "Nozzle adapter and 8-piece accessory set" point) is always plugged 

onto the suction opening first, regardless of whether you are using one of the 

three large nozzles (or the extension suction tubes) or the small accessory 

nozzles! For the small accessory nozzles, the accessory nozzle adapter (4) is 

also plugged onto the nozzle adapter (1)! 


Attaching/Detaching the Floor Nozzle, Brush Nozzle and Crevice Nozzle 

1.  Plug the nozzle adapter onto the suction opening. 

2.  If you wish, plug the extension suction tubes onto the nozzle adapter. 

3.  Plug the floor nozzle or the brush nozzle or the crevice nozzle onto the 

extension suction tube. 

The nozzles can also be plugged directly onto the adapter without placing 

the extension suction tubes in between. 

4.  When you want to detach the nozzles, simply pull them off the adapter or 

the extension suction tubes. 


Attaching/Detaching the 8-Piece Accessory Set 

1.  Plug the nozzle adapter onto the suction opening. 

2.  Plug the accessory nozzle adapter onto the nozzle adapter. 

3.  Select an accessory nozzle and plug it onto the accessory nozzle adapter. 

4.  When you want to detach the accessory nozzles, simply pull them off the 

accessory nozzle adapter. 


Use 
CAUTION! 

  The openings on the device must not be blocked to ensure that the motor 

does not overheat or suffer damage. 

  Never hold the nozzles close to parts of your body or animals during use 

and do not place your hands inside the nozzles. They could become stuck to 

Содержание KR517

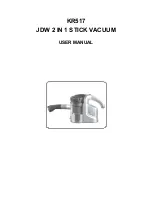
Страница 1: ...KR517 JDW 2 IN 1 STICK VACUUM USER MANUAL...

Страница 2: ...ries 5 6 Before Initial Use 6 Attaching and Detaching Accessories 7 Attaching Detaching the Floor Nozzle Brush Nozzle and Crevice Nozzle7 Attaching Detaching the 8 Piece Accessory Set 7 Use 7 8 Cleani...

Страница 3: ...ision or instruction concerning the use of the appliance in a safe way and understand the hazards involved Cleaning and user maintenance shall not be made by children unless they are older than 8 year...

Страница 4: ...The mains cable must also be kept out of the reach of children and animals Proper Connection Only ever connect the device to a properly installed plug socket The plug socket must also be readily acce...

Страница 5: ...ese do not become clogged Never leave the device unattended when it is switched on or connected to the mains Switch the device off immediately and pull the mains plug from the mains socket if you stop...

Страница 6: ...le 1 brush nozzle 8 piece small accessory set 1 Nozzle adapter Device Overview 10 3 9 2 8 1 7 6 5 4 1 Release button for dust container 2 On Off switch 3 Handle 4 Bottom flap of dust container 5 Catch...

Страница 7: ...profiles and skirting boards window ledges etc Nozzle adapter and 8 piece accessory set 1 2 3 4 5 6 7 8 1 Nozzle adapter is always plugged onto the suction opening first 2 Small round brush 3 Small l...

Страница 8: ...e adapter onto the suction opening 2 If you wish plug the extension suction tubes onto the nozzle adapter 3 Plug the floor nozzle or the brush nozzle or the crevice nozzle onto the extension suction t...

Страница 9: ...to its full length and insert the mains plug into a properly installed mains socket that is easily accessible 3 Move the On Off switch to the 1 position to switch on the vacuum cleaner 4 Guide the noz...

Страница 10: ...ages 1 Press down the release button for the dust container and tip it slightly forwards to release the dust container Then remove it upwards 2 Turn the dust container lid anticlockwise until you can...

Страница 11: ...container engages Cleaning the Housing Nozzles and Extension Suction Tubes Clean the housing the nozzles and the extension suction tubes if necessary using a damp soft cloth Dry them with a soft clot...

Страница 12: ...al times Technical Data Model GW906 S60 Voltage supply 230 V 50 Hz Power max 600 W Protection class II IP20 Plug Wiring UK This appliance is fitted with a BS1363 13 amp plug If you have to replace the...

Страница 13: ...ked with the letter E or marked with symbol If the supply cord is damaged a qualified person must replace it in order to avoid a hazard Environment The crossed out wheeled bin symbol indicates that th...

Отзывы: