© 2017 JCM American Corporation
1 6
September, 2017
BLUEWAVE™DX DOWNLOAD
The JCM
BlueWave™DX Tool (P/N 214780)
offers an alternate method for
updating the Firmware on the GEN5 Printer. To do so, proceed as follows:
S
ETUP
FOR
THE
B
LUE
W
AVE
DX T
OOL
1. Within the BlueWaveDX Tool’s
SD Card
root directory, create a new folder
labeled
"GEN5 System"
.
2. Place the Firmware files for the GEN5 Printer within the new
"GEN5 System"
folder.
U
PDATING
F
IRMWARE
U
SING
THE
B
LUE
W
AVE
DX T
OOL
1. Connect a standard
USB Male "A"
to Male "B"
cable from the BlueWaveDX
Tool’s
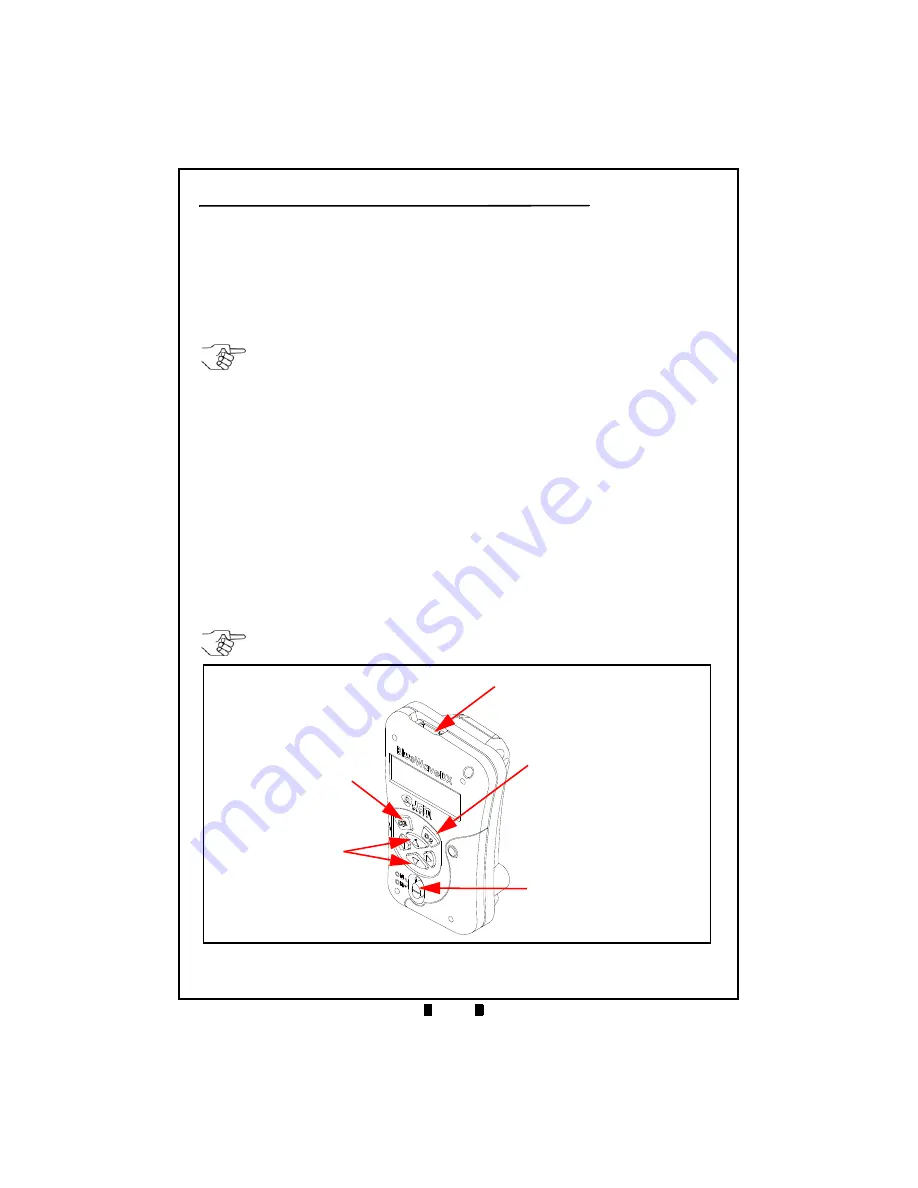
USB Connector Type A
a
) to the GEN5 Printer’s
USB Update
Port
(refer to Figure 2
k
on page 4).
2. Turn the BlueWaveDX Tool’s Power Switch
ON
b
).
3. When the
Firmware Update
screen appears, press the
OK
Button (Figure 15
c
).
4. Press the
UP
and
DOWN
arrow keys (Figure 15
d
) to scroll through the list of
available GEN5 Firmware versions.
5. Press the
OK
Button (Figure 15
c
) to select the desired Firmware version.
6. Press the
OK
Button again to start the download.
7. When the
Download Complete
message is displayed, press the
CLR
Button
e
) to return to the Main Menu
OR
Press the
OK
Button (Figure 15
c
) to download Firmware to another Printer.
NOTE: Sub-folders are not recognized.
NOTE: The BlueWaveDX Tool Operator Guide (P/N 960-100942R) is available in the
Support section of the JCM Global website at
.
a
b
c
d
e
Figure 15
BlueWaveDX Tool (P/N 214780) Primary Controls


