6
SETUP WIZARD
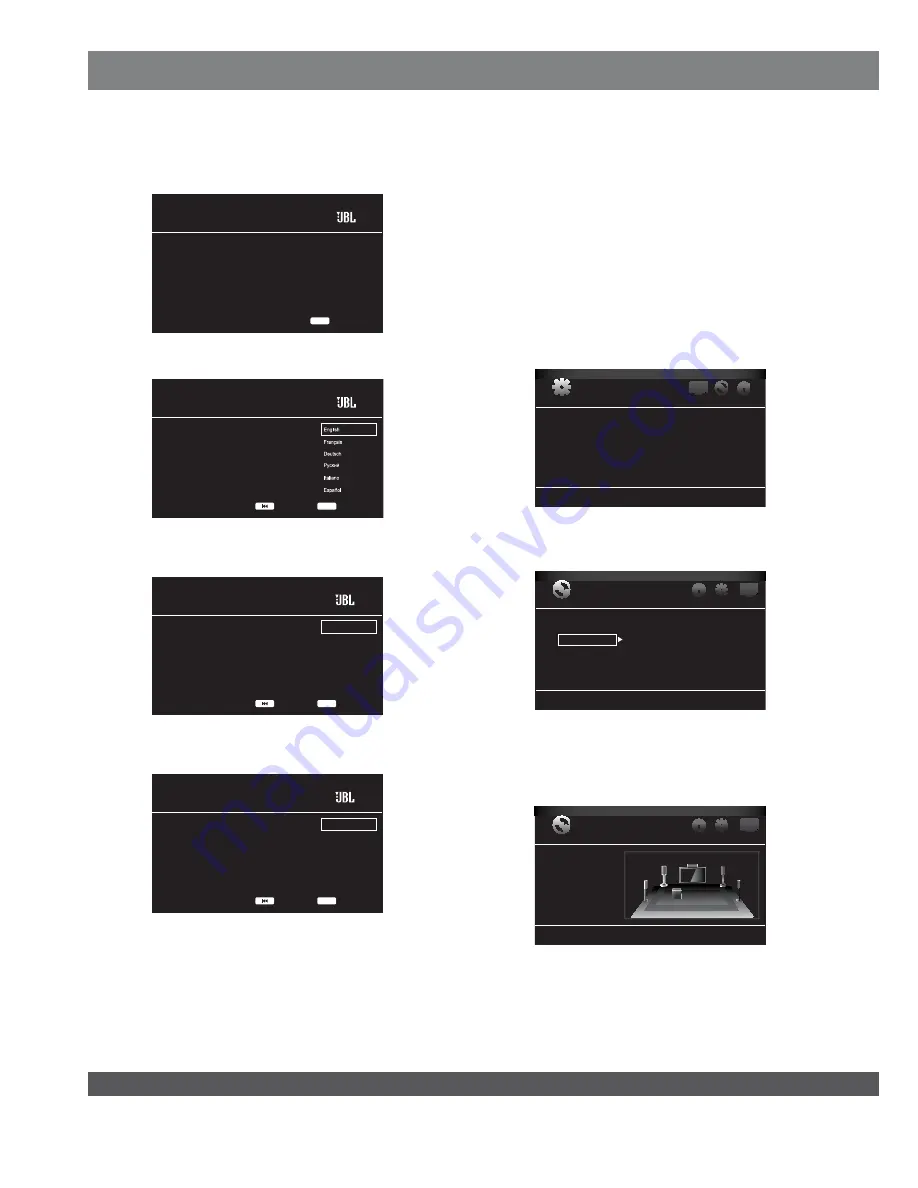
When you turn your BD
300
receiver on for the first time, the on-screen
menu will display the Setup Wizard introduction screen.
Setup Wizard
Welcome! Thanks for choosing JBL Cinema BD.
The following steps will ensure you get the best
performance from your new system.
You can adjust any of these settings later and
review advanced user settings by selecting
“Settings” from the Home Menu.
Next
1/5
ENTER
Press the Enter button, and the language selection screen will appear.
Please the language you would like to use
with JBL Cinema BD.
Setup Wizard
Next
2/5
ENTER
Previous
After selecting the language you want the BD
3
00 receiver to use, press
the Enter button, and the Initial Setup TV resolution screen will appear.
JBL Cinema BD automatically selects the best resolution
for most TVs. If you have an older display or other
requirements, you can manually select your resolution.
Otherwise, of if you’re unsure, select ‘Auto’ to continue.
Upon making a selection the screen will change to the
chosen resolution. You will be presented with the option
to continue with the new resolution or ‘Cancel’ to return
to the previous resolution. If the screen remains blank
please wait 15 seconds without pressing anything and
the system will automatically return to the previous
resolution.
Auto
1080p
1080i
720p
480p/576p
480i/576i
Setup Wizard
Next
3/5
ENTER
Previous
After selecting your TV’s resolution, press the Enter button, and the
Initial Setup aspect-ratio screen will appear.
PleasesSelect the best aspect ratio for JBL Cinema
BD to use with your TV.
The most common option is ‘16:9 Full’.
Consult the owner’s manual for additional details.
16:9 Full
16:9 Normal
4:3 Pan & Scan
4:3 Letterbox
Setup Wizard
Next
4/5
ENTER
Previous
After selecting the aspect ratio that best fits your TV, press the Enter
button to save your settings and then press it again to exit the Setup
Wizard screens.
SET THE SPEAKER DISTANCES
Before you use your Cinema BD
300
system you need to enter the
distance from each speaker to your listening position. When you
installed your Cinema BD
3
00 system, you may have had to place some
speakers a little farther away from the listening position than others.
Sounds that are supposed to arrive simultaneously from different
speakers may blur, due to different arrival times. The BD
300
receiver
provides an adjustment that compensates for these real-world speaker
placement differences, so your Cinema BD
300
system can deliver a
superior surround-sound experience. (Even if all your speakers are the
same distance from the listening position you still need to enter their
distances.)
1. Measure the distance from each speaker (except the subwoofer) to
your main listening position. Write the distances down.
2. Press the remote’s Setup button.The General Settings menu will
appear.
General Settings
System
Language
Playback
Parental Control
Network
3. Use the right Cursor button to select Audio Settings, then use
the down Cursor button to select Speaker Settings. The Speaker
Settings screen will appear.
Audio Settings
Audio Output
Speaker Settings
Test Tone
More...
/QDRRSGDQHFGS"TQRNQATSSNMSNRDKDBS3DRS3NMDSGDMOQDRRHS@F@HM
to select More... The Speaker Settings screen will appear and you
will hear test noise circulate through each speaker in turn. The active
speaker will be highlighted on the screen. (Use the remote’s Volume
– button to lower the volume if the test noise is too loud.)
Audio Settings
Audio Output
Speaker Settings
SUB
L
LS
RS
R
C
Содержание Cinema BD300
Страница 1: ......


