


ENGLISH
USER MANUAL
JB SYSTEMS®
5/12
USB PARTYSET
.3)
FIXED COLOR STANDALONE MODE:
You can set a fixed color for all the units together
•
Press the
[MENU] button until the display shows [COL].
•
Press the [ENTER] button to confirm your choice.
•
[COLO] will appear on the screen
•
Press the [ENTER] button to enter the setup mode.
•
Use the [UP/DOWN] buttons to set the intensity of the red color. [r.000] = off, [r.255] = maximum
intensity
•
Press the [ENTER] button to confirm your choice and to go to the next color setting.
•
Use the [UP/DOWN] buttons to set the intensity of the green color. [G.000] = off, [G.255] = maximum
intensity
•
Press the [ENTER] button to confirm your choice and to go to the next color setting.
•
Use the [UP/DOWN] buttons to set the intensity of the blue color. [b.000] = off, [b.255] = maximum
intensity
•
Press the [ENTER] button to confirm your choice and to go to the next color setting.
•
Use the [UP/DOWN] buttons to set the intensity of the whitee color. [W.000] = off, [W.255] = maximum
intensity
•
Press the [ENTER] button to confirm your choice and to go to the strobe speed setting.
•
Use the [UP/DOWN] buttons to select the desired setting for the strobe effect.
o
[S. 00] = no output
o
[S. 01] to [S. 99] = slow strobe to fast strobe
o
[S. 99] = full on and NO strobe effect
o
[S.100] = Sound controlled strobe
•
Press the [ENTER] button to confirm your choice.
IMPORTANT
: if you have set a correct color and the strobe is set to a value between [S. 01] and [S.100],
but you have
no light output
: go back to the (2) SOUND CONTROLLED STANDALONE MODE settings in
the menu (see above) and check if the sensitivity of the microphone is not set too low or set to zero [u.00]
(microphone OFF).
If the microphone is switched off, the bar can of course not react to the sound
😊
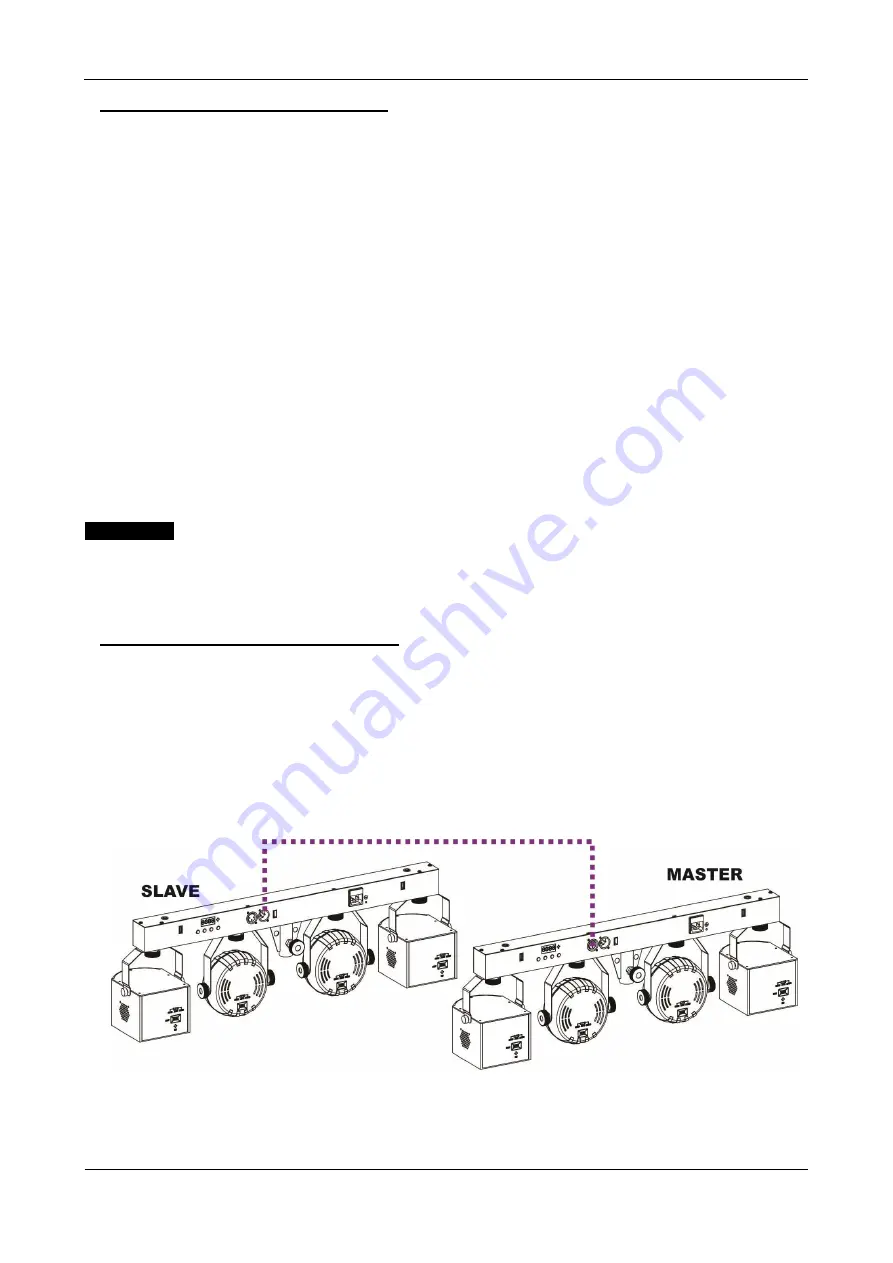
4)
MASTER/SLAVE STANDALONE MODE:
When you have several USB PARTYSET and you want them to all work synchronously, you can work in
the so called master/slave mode. To do this, just daisy-chain all the bars and make the settings of the
desired automatic or sound controlled program in the first bar of the chain (see description above). This
bar is called the Master unit. Now put all the other bars is slave mode
. Once this is done, the “slave” bars
will follow the orders of the Master unit, so they work in perfect synchronicity.
To set a bar in slave mode:
•
Press the
[MENU] button until the display shows [SLA].
•
Press the [ENTER] button to enter this mode.
•
[SLAV] will appear on the display
•
Press the [ENTER] button to confirm the slave mode.


