IP Camera User Guide
Page 38
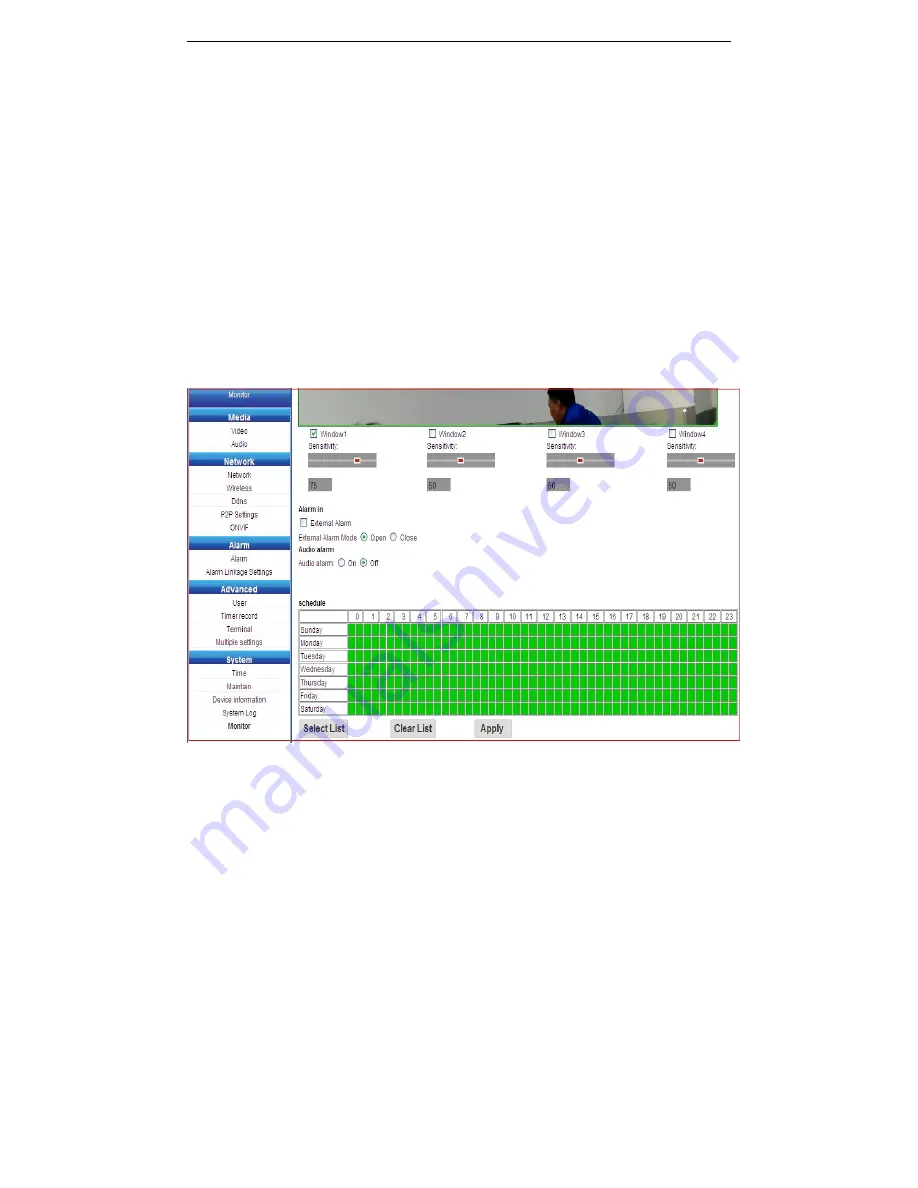
18.8 Alarm settings
The alarm taken effect only when both alarm settings and alarm linkage sucessfully setting.
After
successfully setting, users’ smart phone will receive message when alarm triggered. Click the alarm
notification, users can login the App to view the alarmed pictures.(it will take snapshot 3pcs of 1280 * 720
size images)
External alarm input
:
Refers to I / O interface on the back panel of the camera. Users can enable/disable
this function based on their own request.
Voice alarm
:
after enable,when the camera detects sound around the camera, it will trigger an alarm.
Alarm settings steps are as follows
:
1.Ticked the window and adjust the alarm window size and sensitivity (the greater the value, the more
sensitive)
,
When an object is detected moving window area will occur flashing red light.
2.Select the alarm time. For whole day alarm, select "full list"
3.Click Apply
18.9 Alarm linkage Settings
1.The alarm function will be enable only when the main switch turn on.
2.Ticked the "Save picture on FTP server," when alarm triggered, it will take 3 pictures to save on to the
cloud.Users can check the pictures on smartphone APP.
3.Check the "save picture on the SD card". when alarm triggered, it will take 3 pictures to save on to the SD
card ( the camera must be supported SD card).
4.Check the "save video on the SD card" when alarm triggered, it will take 3 pictures to save one to the
cloud ( the camera must be supported SD card).
5.Check the "linkage preset". When alarm triggered, the camera will automatically rotate to the setted
preset.
6.Check the "E-mail alarm and send a picture". click E-mail settings, fill in the server, user name and
password are same as the sender/recipient’s user name and password. Click on "Apply" after completely


