Row Outside Wipe
: Two horizontal lines wipe in new image from middle to top and bottom
Radar Sweep 1
: Clockwise sweep wipes in new image
Geometric Shrink
: Diamond shape wipes in new image from outside in
Slide Up
: Horizontal bar will push the current image off the screen while pulling a
new image from down to up
Pixel Fill
: Old image dissolves into small dots and new image is replaced
Column Fill
: Random vertical lines will draw new image over previous image
Row Fill
: Random horizontal lines will draw new image over previous image
Blend
: Old image fades out and the new image fades in
Slide Show Setting:
Speed:
Set a Slide Show display time for each image of 3 seconds, 5 seconds, 10 seconds, 30 seconds, or 1
minute.
Shuffle:
On: Images will display in random order.
Off: Images will display in alphanumeric order.
Crop to Fit:
On: Show images with cropping to fit.
Off: Show images without cropping to fit.
Start Slide Show:
Start Full Screen: View photo with full screen.
Start Split Screen: View photo with split screen.
Rotate:
Press the soft button once, the image is rotated 90° counterclockwise.
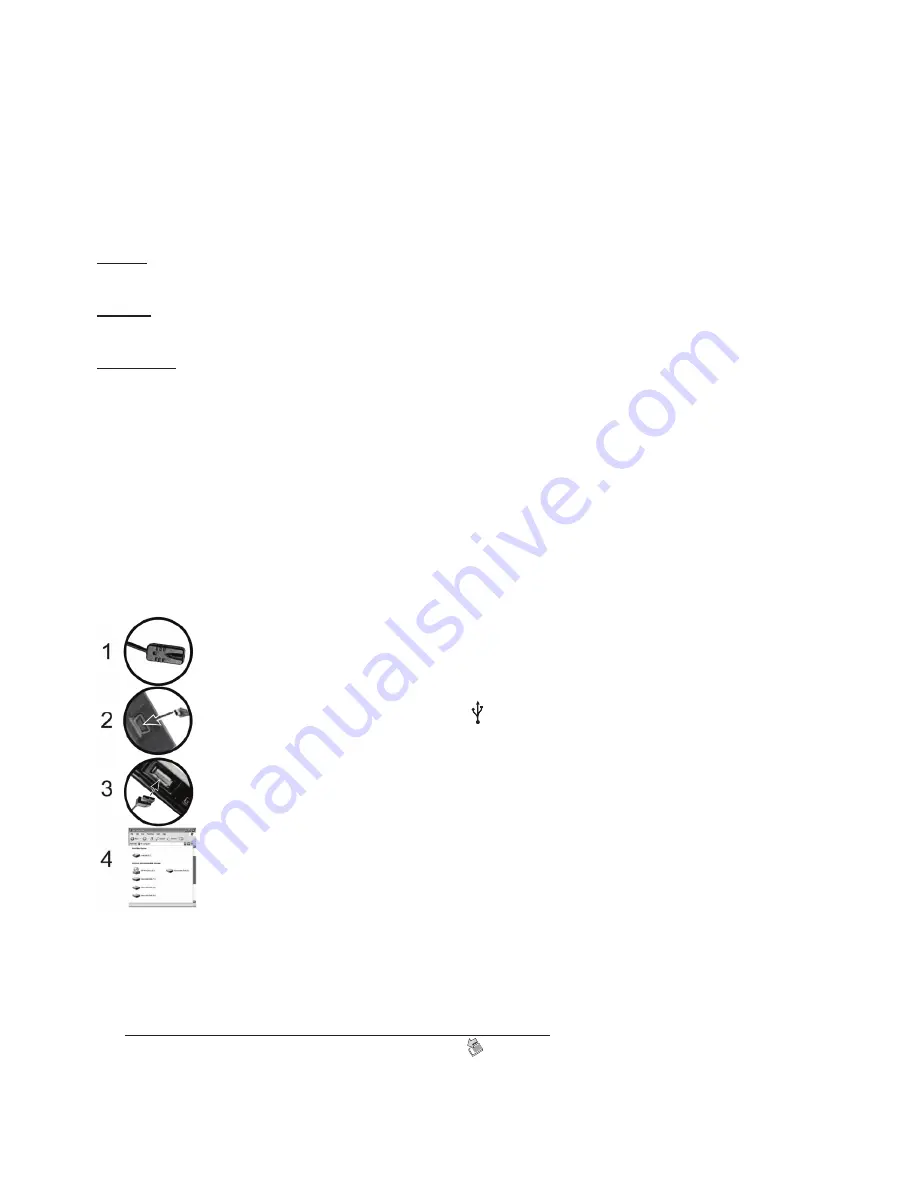
USB Connection to Computer:
To connect the Digital Picture Frame to your computer, you will need a standard USB cable, Type A
Male to Type Mini B 5-pin Male (not included).
1. Connect the AC Adapter to the Digital Picture Frame and slide the Power Switch
to ON.
2. Connect the small end of the USB cable to the USB port on the side panel of the
Digital Picture Frame. The icon “
”will appear in the screen to confirm that the
connection is active.
3. Connect the larger end of the USB cable to a USB port on your computer.
4. Three drive letters entitled ‘Removable Disc’ will appear under the ‘My Computer’
icon in Windows; one for each of the memory card slots on the Digital Picture
Frame. With a card inserted, double-click the appropriate ‘Removable Disc’ icon to
access that card to copy and delete files between your computer and all installed
memory cards.
NOTE:
If your PC is connected to Local Area Network drives, or if you have multiple drive letters
already assigned to peripheral devices, you will need to manage your drive settings in Windows to free
up the four drive letters immediately following your CD-ROM drive so that the Digital Picture Frame
can assign them to the appropriate memory card slots.
To disconnect the Digital Picture Frame from your computer:
1. In the Windows Task Bar, right click the icon and select ‘Safely Remove Hardware’.
2. The ‘Safely Remove Hardware’ dialog box will appear. Select ‘USB Mass Storage Device’ and
click ‘STOP’.
3. On the next dialog box, click ‘OK’ to remove the storage device.
4. On the final dialog box, select ‘CLOSE’ and disconnect the USB cable from your computer.
~ 5 ~


