installation and
operation instructions
Model SEC 180
page 12 of 16
JARVIS
PRODUCTS CORPORATION
33 ANDERSON ROAD, MIDDLETOWN, CONNECTICUT 06457–4926
UNITED STATES OF AMERICA
TEL. 860–347–7271 FAX. 860–347–6978
6204012::.
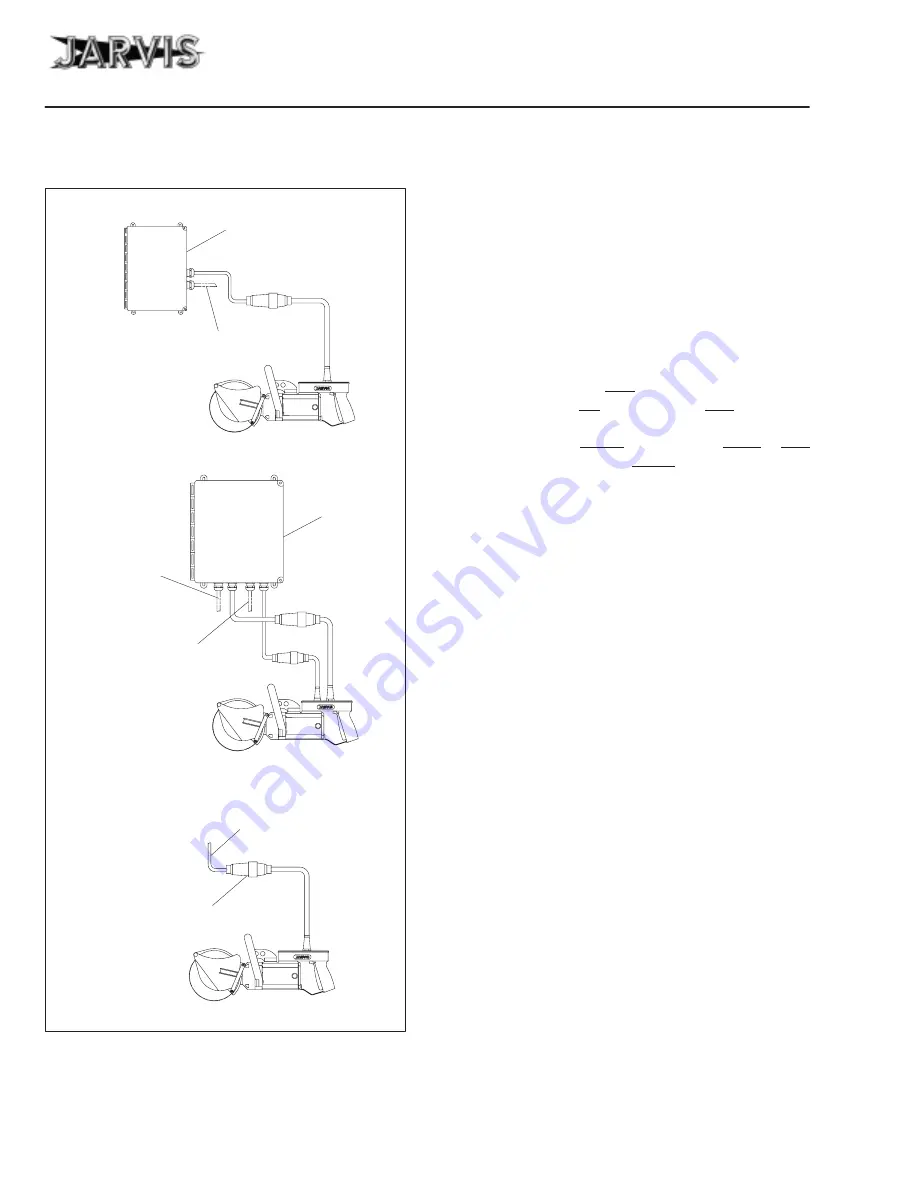
5 Plug the SEC 180 into the appropriate control box or
power supply outlet. See Figure 2 below as a guide.
Figure 2
Power Cord Supplied
by Customer
Control Box
SEC 180 Models with remote brake (single cord)
Power Cord
Supplied by Customer
Plug Connections
Supplied by Customer
Control Box
Power Cord
supplied by
Customer
SEC 180 Models with remote brake (dual cord)
and 42 V models
SEC 180 Models with internal brake (single cord)
Power Cord
for 42 V models
only. Supplied by
Customer
OPERATION INSTRUCTIONS
1 Plug in the SEC 180.
2 Each day, before you begin operation, perform the
following:
2.1 Make sure that the SEC 180 moves freely on the
balancer.
2.2 Make sure that the control handle or handles
work correctly. For single trigger tools: depress
the trigger and the tool should start. Release the
trigger and the tool should stop. For dual trigger
tools: depress each trigger separately and the
tool should not start; depress both triggers si-
multaneously (within one second of each other)
and the tool should start. Release either or both
triggers and the tool should stop. If the tool mal-
functions, remove it from service and report the
problem to your supervisor immediately.
Always operate the tool with both hands on the
handles. Continue to hold the tool with both
hands until the saw blade comes to a complete
stop.
2.3 Make sure that the electronic brake is working
correctly. Depress the trigger / triggers to start
the saw; release a trigger and the saw blade
should stop within 2.5 seconds. If the tool mal-
functions, remove it from service and report the
problem to your supervisor immediately.
3 Make the cut.
3.1 Position the SEC 180 saw.
3.2 Depress the trigger / triggers. Always use both
hands when operating the tool. Continue to
hold the tool with both hands until the saw
blade comes to a complete stop.
3.3 When the desired cut is achieved, release a trig-
ger. This will stop the blade.
3.4 Withdraw the SEC 180 from the carcass.
4 Unplug the SEC 180.


