


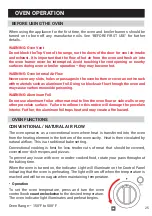


2
5
4
3
1
13
To prevent the range from tipping forward, the anti-tip brackets must be installed.
Failure to install the Anti-Tip Bracket will allow the range to tip over if excessive
weight is placed on an open door or if a child climbs upon it. Serious injury might
result from spilled hot liquids or from the range itself.
ANTI-TIP BRACKET
WARNING: DO NOT OPERATE THE RANGE WITHOUT THE ANTI-TIP
BRACKETS IN PLACE. IF THE APPLIANCE IS ACCIDENTALLY TIPPED,
THE WEIGHT OF THE RANGE MAY CAUSE SERIOUS INJURY.
There are Two Tip-Over Brackets
which are to be installed at the back
of the range, on the left and right
sides.
At the back of the range, insert and tighten a Bracket Bolt into the reinforced hole
at the bottom of the right-side panel.
Affix the Right Bracket into the wall behind the range using 2 Wall Anchors and 2
Screws and positioning the bracket so that it will line up on top of the Bolt to
engage.
Repeat steps 1 and 2 for the Left side of the range.
Safely tilt the front of the range upward slightly and slide the range back towards
the two brackets on the wall, so that the brackets engage.
Try to slide the range forward slightly to verify the Anti-Tip device has been prop-
erly installed. The range should not tip more than 4 inches from the wall if correct-
ly installed.
Ensure the anti-tip device is re-engaged when this appliance is moved.
6
Screws
Wall Anchors
Bracket Bolts
Left
Bracket
Right
Bracket
Bracket
Bolt
Right
Bracket
Gas Pressure
Regulator


